SmartyCam
User Manual
Release 1.04
13
www.smartycam.com
6
Chapter 6 – How to use SmartyCam
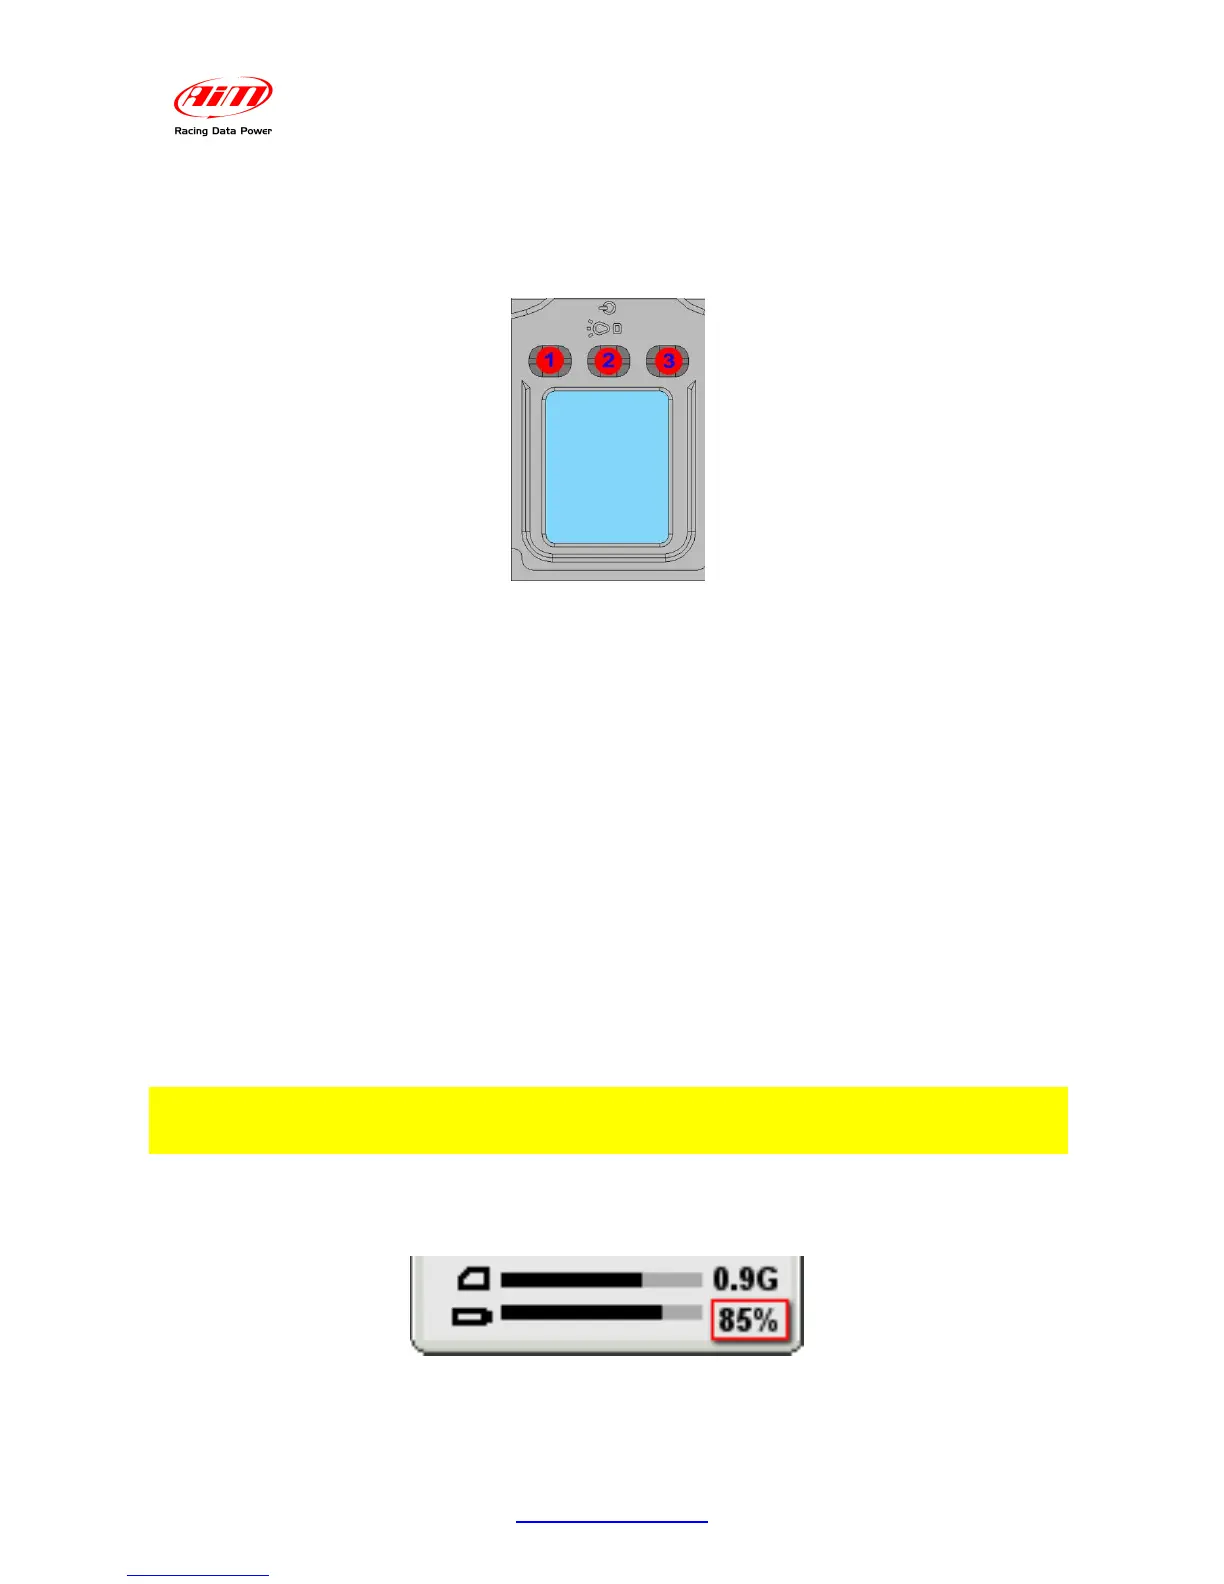
SmartyCam is managed using the three buttons placed above the display: 1,2 and 3 in
the image below.
The menu on the display shows the functions related to each button, close to the button
itself.
All SmartyCam pages are made up of three parts:
• top of page menu functions are shown;
• in the middle of the page specific info are shown;
• in the lower part the “Battery and Memory Status” field is shown.
18
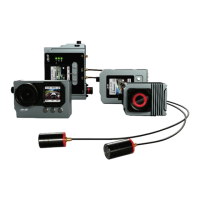
6.1 – “Battery and Memory Status” field
“Battery and memory Status” field constantly shows the level of battery charge and the
remaining memory available for recording. In “Online” and “GPS status” and “Lap Mngmnt”
the GPS signal strength is shown, too.
The above indicator refers to the available memory, showing in black the used part and
in grey the available one. When available memory is lower than 300 kB the black part
becomes red. The number right of the bar is the available space in Giga (in the image
below SmartyCam is working with a 4 Giga Micro SD). Please note that Micro SD icon
becomes red.when SmartyCam is recording or when it is in “Player” section.
Note: MicroSD will be permanently damaged if it is removed from SmartyCam when
its icon in the left bottom of the screen is red.
The below indicator shows the battery charge status while the number on the right shows
the percentage of available battery (image here below)