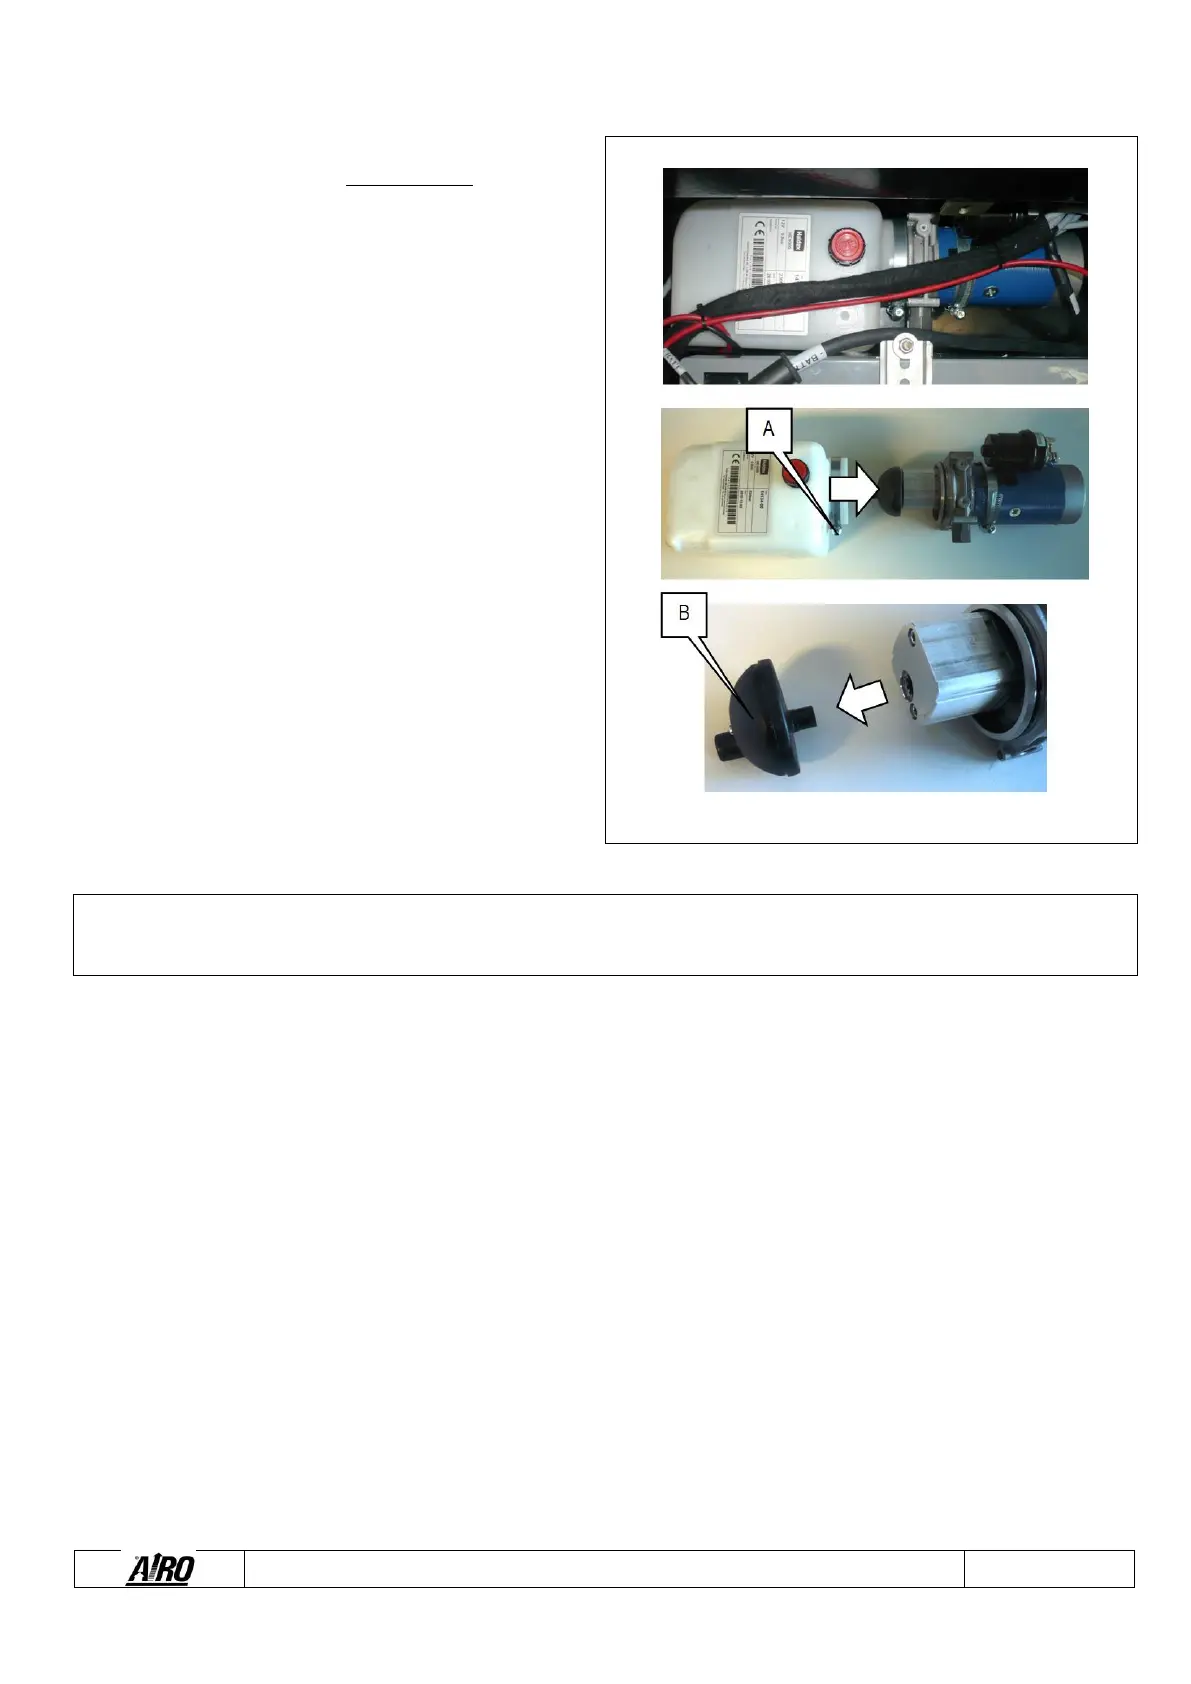
All models are equipped with suction filter flanged to the tank. It
is advisable to replace it at least every two years.
To replace the suction filters installed inside the tank (see
figure):
1) Stop the machine by pressing the emergency stop
button of the ground control panel.
2) Disconnect the power supply cables of the electric
pump and the hydraulic tube.
3) Drain the hydraulic tank by an external pump.
4) Remove the mini-control unit by unscrewing the two
fixing screws from under the box that contains it and
remove it from the box components.
5) Loosen the metal fixing clamp by acting on screw A.
6) Remove the electric pump from the tank by pulling
outwards.
7) Remove filter B from the pump pulling outwards and
clean it with a detergent and a compressed air jet by
blowing from the connection or replace the filtering
element.
8) To restore the initial condition, carry out the above-
mentioned operation in reverse order.