MPC2500 Operator’s Manual rev 1.0
61
Starting the recording
07. Press [MAIN] key.
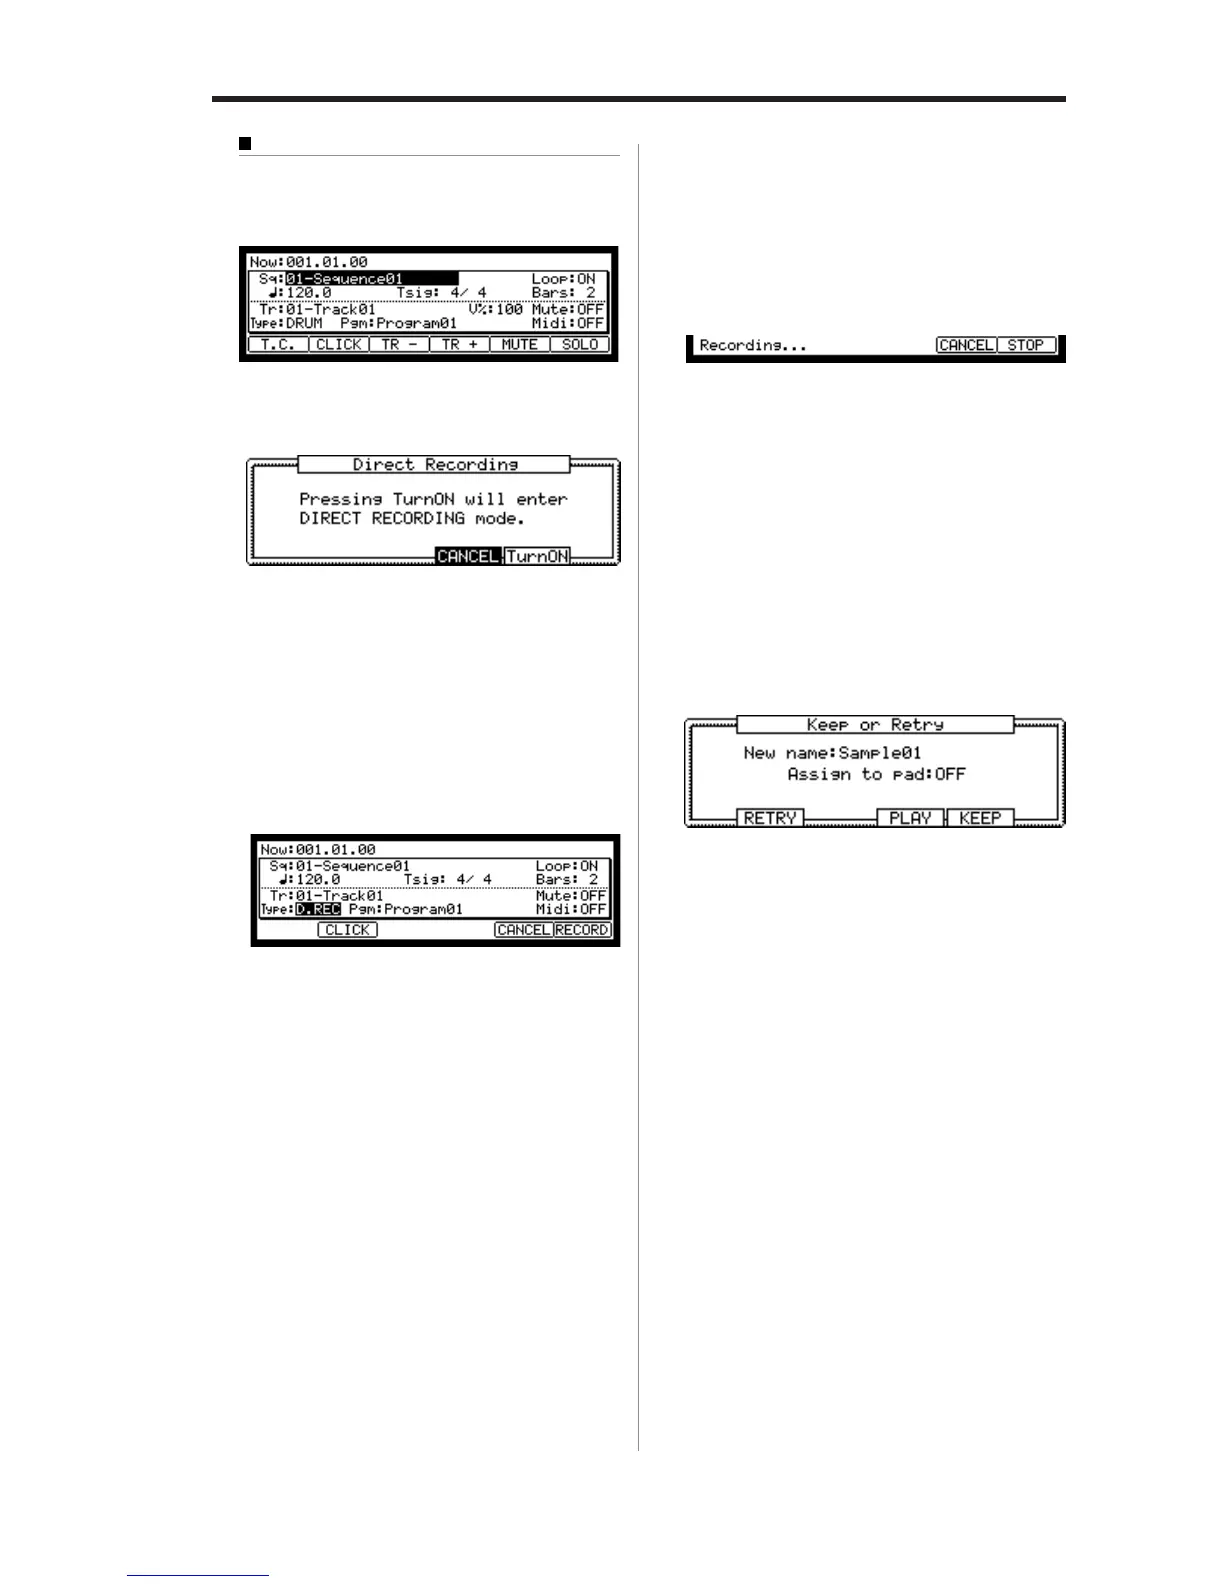
The Main page will be displayed.
08. In the Type: field, press [WINDOW] key.
The Direct Recording window will be displayed.
If you press the [F5] (Turn ON) key, the window will
be closed and the MAIN page will be displayed with
waiting for the Direct Recording.
If you press the [F4] (CANCEL), the window will be
closed and the MAIN page will be displayed.
For this example, please select [F5] (Turn ON).
09. The MAIN page is displayed and the Type : field be-
comes “D.REC”.
The MPC2500 is now in stand-by mode for Direct
Recording. You can start the sequence freely in
stand-by mode for Direct Recording.
[F6] (RECORD) : The MPC2500 will start the re-
cording.
[F5] (CANCEL) : The MPC2500 will go back to
the ordinary MAIN page.
[F2] (CLICK) : The MPC2500 will go to the
“Click/Metronome” page.
You can set the click. For more information, see the
“Click/Metronome feature “ in Chapter 3: Sequence
feature.
Note: In the Direct Recording mode, you cannot change the Se-
quence, Track, or Track type. If you want to change them, press
[F5] (CANSEL) and go back to the MAIN page.
10. Press the [PLAY] or [PLAY START] key for playing
the sequence.
11. Press the [F6] (RECORD) key when you wish to start
the recording and play your performance.
The MPC2500 will start the recording and the bot-
tom of MAIN page will be changed as follows:
Note : In Direct Recording, the MPC2500 will keep the record-
ing by pressing the [F6] (STOP), whether the sequence is set to
LOOP ON or OFF.
You can stop the recording by pressing [F6] (STOP)
key. If you want to cancel the recording, press the
[F5] (CANCEL) key.
Tips : When you use Direct Recording, the foot switch is very
useful for starting/stopping the sequence, leaving your hands free.
For more information on this.
See “Foot switch” in Chapter 18: Other settings.
After finishing the recording, the Keep or Retry win-
dow will be displayed.
12.
Check the recorded sample by pressing [F4] (PLAY) key.
If you press the [F4] (PLAY) key, you can hear the
recorded sample until you release the key. If you
do not like the recording, you can delete the record-
ing and return to the RECORD page by pressing
the [F2] (RETRY) key. If you like the recording and
decide to keep it, proceed to the next step.
13. In the New name field, the recorded sample will have
a new name automatically.
If you wish to enter in a new name, use the [CURSOR]
keys and the DATA wheel to enter in the new name.
For more information about entering in a sample
name, see the “Setting names” section on page 10.
14. Select the Assign to pad field with the cursor and
select the Pad to which you wish to assign the sample
by hitting the Pad.
If you just wish to keep the recorded sample in the
MPC2500’s memory and not assign it to the Pad,
select OFF with the DATA wheel.

 Loading...