Installing the camera
180Alvium G1 User Guide V1.7.0
Front mounting
Especially for dynamic applications with high acceleration, mount the camera using
the bottom mounting threads in addition.
The maximum torque value applies only if the entire thread engagement is
used. For other values, see Adapting maximum torque values on page 181.
1. Mount the camera to the base using suitable M2 screws at 0.17 Nm maximum
torque for a thread engagement (C) of 1.7 mm between screws and mounting
threads, see Figure 56. For technical drawings, see G1 Closed Housing:
Dimensions and mass on page 143.
We recommend you to additionally use bottom and top mounting threads for a
more solid connection.
2. For Alvium G1 BL housed cameras, continue with Mounting the G1 BL interface
unit on page 184
Mounting G1 BL cameras with mount
1. Disconnect the camera from power.
2. With 2 fingers grabbing the cable side FPC connector (b) at the edges,
disconnect the FPC cable from the FPC connector (a) of the sensor unit as
shown in Figure 57.
3. Continue with Mounting G1 housed cameras on page 179.
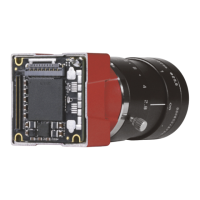
Figure 56: Camera front with mounting threads (c)
NOTICE
Damage to the camera by short circuits
The connection between the FPC cable and the G1 BL interface unit cannot be
disconnected without disassembling the interface unit. Disassembly and improper
reconnection can damage the camera. For the interface unit,...
• ...keep the screws untouched and keep the FPC cable connected.
• Disconnect the FPC cable only on the sensor unit side as shown
in Figure 57.
ĞƚĂŝůĚDϮљϭϳљϯϯ
сDϮсϬϯсϭϳсϯϯ
d
d
d
d
24 mm
24 mm

 Loading...