failed.
Press the Clear information button
11
to reenter patient information manually or with the
use of access to the worklist.
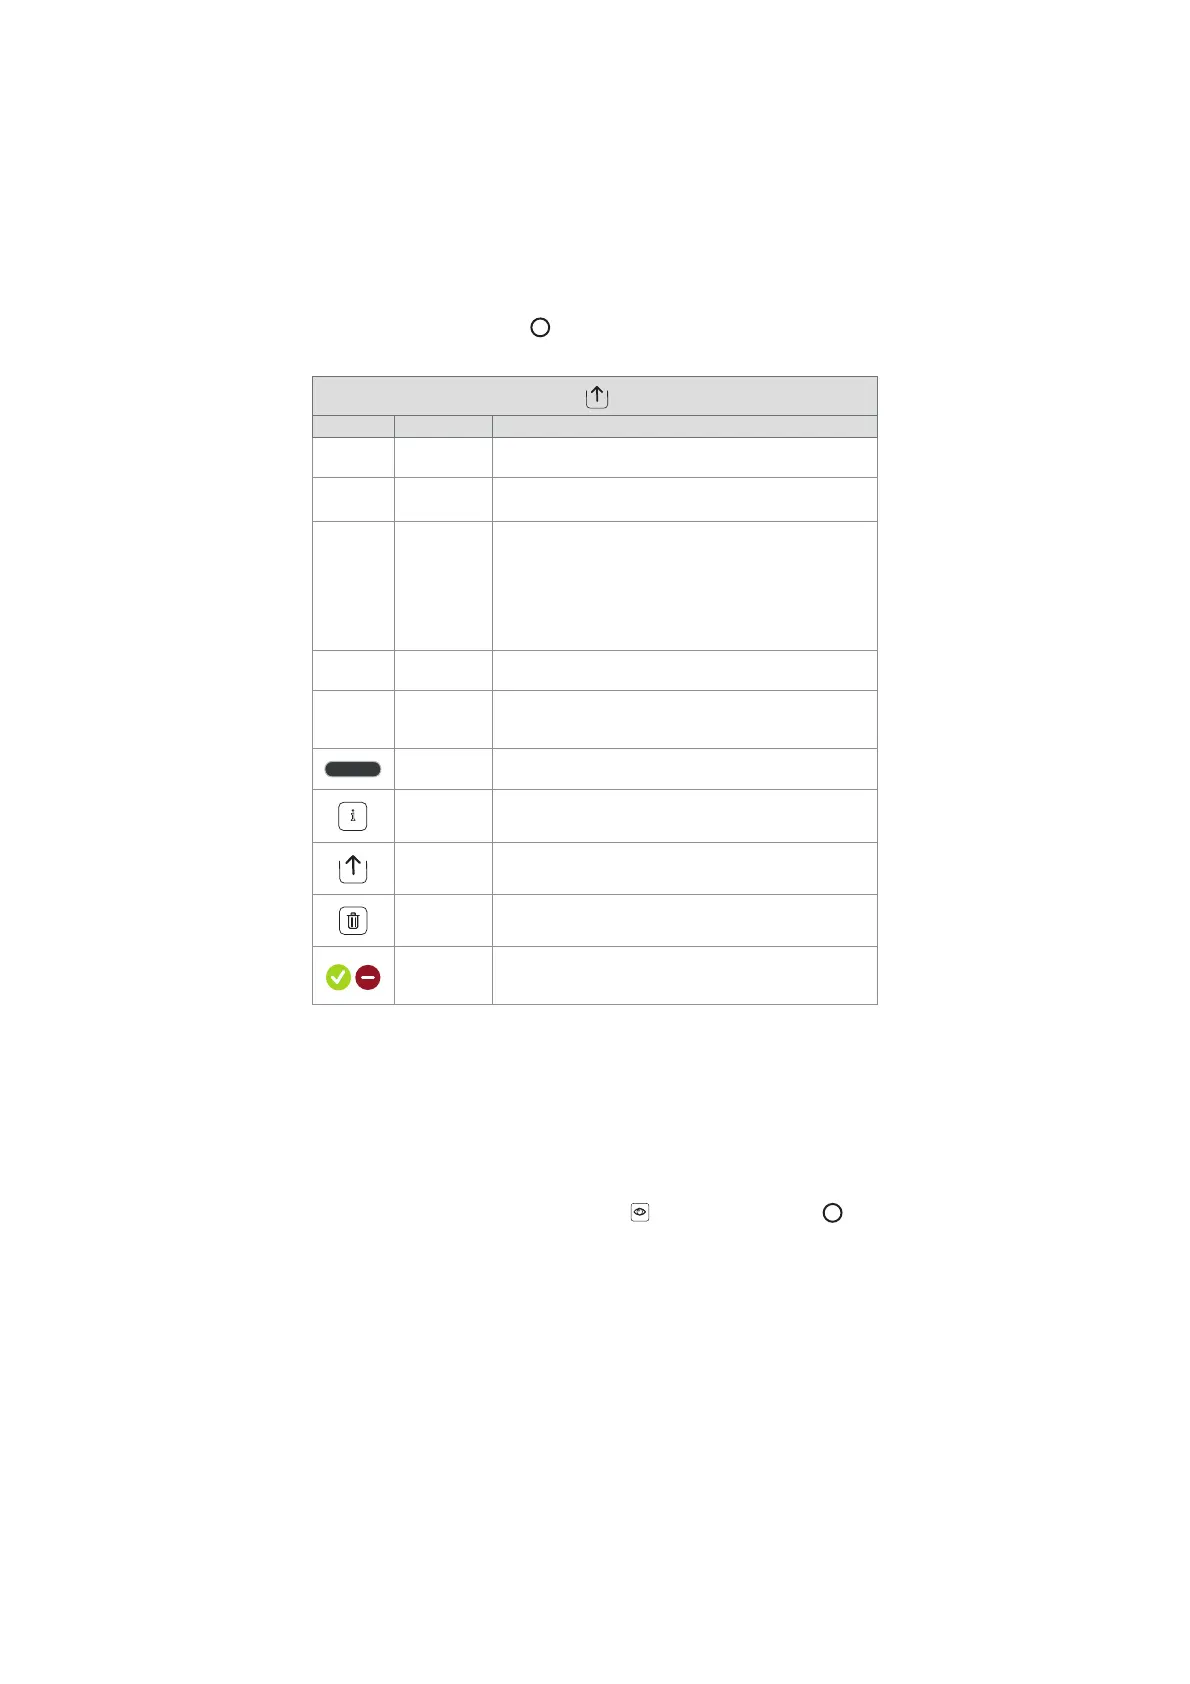
Explanations of functions in export menu
Icon Name Function
- DICOM*
Photos and videos can be exported to a USB flash drive or a
PACS server in DICOM format.
- BASIC
BASIC file format (PNG and MP4). Photos and videos can be
exported via a USB port in BASIC format.
-
Patient
information
Patient data can be retrieved automatically by selecting a
patient in the Worklist (refer to section 7.3.5.) or it can be
entered manually.
Patient data will be saved on the local storage of the
displaying unit until the files are deleted, either manually or
with auto delete function (can be configured by Administrator
in General settings, see section 5.8.).
- USB
Select a connected USB flash drive to export photo(s) or
video(s) to the USB flash drive in BASIC format.
- PACS**
Select a connected PACS server to export photos and videos
to the server in DICOM format. For setting up connection to
the PACS server see section 5.7.
Export
Export button
Press the Export button, to export selected photos and videos
when all necessary settings have been made.
i
Info
Press Info to view the photo, video or procedure information
in the procedure folder.
Export menu Press the Export menu button to open the Export menu.
Bin
Press the Bin button to permanently delete photos and videos
and any patient data from the displaying unit.
Export
indicators
To indicate if an export of a photo or video was successful, a
green export indicator will appear next to the photo or video.
A red indicator means the photo or video was not exported.
*Digital Imaging and Communications in Medicine
**Picture Archiving and Communication System
7.3.5. Worklist
The Worklist contains patient information retrieved from a PACS server (see section 5.7. for
information on setting up a connection to PACS server and enable Worklist). When a patient is
selected in the Worklist drop-down menu, the selected patient information will be attached to
the photos and videos created in the current procedure. Be aware that it is required to log in to
access the Worklist. If no patient is selected before starting the export process, it is possible to
access the Worklist to assign a patient during export in the Export menu or to enter the patient
data manually.
• The Worklist can be found in the Live View tab
by pressing the down arrow
12
.
Select a patient by pressing the name, and confirm in the pop-up window.
• To select a different patient, simply press the new patient's name and press Change in
the pop-up window.
• To deselect a patient, press the selected patient name and press Deselect in the pop-up
window.
28