4 - 1
Lancom 4Portable Flue Gas Analyser
User Guide
4 Operating your Analyser
Each time you use your analyser, check:
The catch-pot is empty and securely fastened. The catch-pot must be air
tight.
The battery is fully charged (or use the power lead).
4.1 Operating Instructions
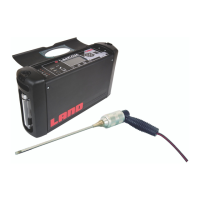
1) Connect the sample line (1) and thermocouple (2).
2) Switch on the analyser
bypressingtheOn/O
button for approximately 3
seconds.
You will hear the internal
pump start. The Lancom
4 startup screen will be
displayed, followed by
the Calibrating Probe
countdown screen. The
countdown lasts 180
seconds. During this time,
air is passed over the
sensors in the Lancom 4
and a ‘baseline’ calibration
value established.
3) Wait for the analyser to complete the zero calibration.
Do not abort the zero calibration.
IftheLancom4isoperatedinaconnedspace,connectanextension
tube to the exhaust port.
4) Insert the probe into the stack. For more information, see Using the
Standard Probe.
5) When zero calibration is complete, the
Main Menu screen is displayed. Select
the Readings option.
6) Press the enter key to begin sampling.
The current gas readings are shown on
the display.
Press the Measurement key to see More
readings.
Wait for the gas readings to settle before you record them. This
usually takes a few minutes
7) When the gas readings have stabilised you can press the enter key to
record a log of the readings.
NOTE
Check for the build-up of liquid in the catch pot when operating the
analyser. Empty any liquid from the catch pot before and after use.
1
2
 Loading...