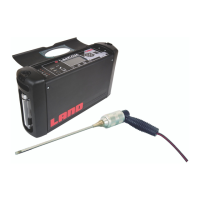
Portable Flue Gas Analyser
User Guide
Lancom 4
Contents
1 About Your Analyser 1-1
1.1 About the Control Panel 1-2
1.2 LED Indicators 1-3
1.3 Probe Connections 1-3
2 Dos and Don’ts 2-1
3 Preparing the Lancom 4 for use 3-1
3.1 Connecting the Battery 3-1
3.2 Setting the Date and Time 3-2
4 Operating your Analyser 4-1
4.1 Operating Instructions 4-1
4.2 StoppingGasSamplingWithoutTurningOtheAnalyser 4-2
4.3 Using the Standard Probe 4-2
4.4 Emptying the Catch-pot 4-3
4.5 Making Draft Readings 4-3
5 Setting up the Analyser 5-1
5.1 Setting the Date and Time 5-1
5.2 Changing the Measurement Units 5-1
5.3 Oxygen Normalization 5-2
5.4 CongurationforEmissionMonitoringtoenableWetAnalysis 5-2
5.5 Calculated NO
2
Factor 5-3
5.6 CongurationforCombustionEciencyMeasurement 5-3
6 Alternative Probe Options 6-1
6.1 Using the Smoke Probe 6-1
6.2 Using the High Temperature Probe 6-3
6.3 Using the DrySampler Probe 6-4
6.4 Using the Flow Probe to Find the Flue Gas Velocity 6-5
6.5 Understanding Mass Flow 6-6
7 Recording Gas Readings 7-1
7.1 Using Data Logging 7-1
7.2 DeningDataLogLocations 7-2
7.3 Managementoflogles 7-3
8 About the Wake and Sleep utility 8-1
8.1 How “Wake and Sleep” Works 8-1
8.2 When should I use the Wake and Sleep option? 8-2
8.3 Setting Up Wake and Sleep 8-2
9 Output Options 9-1
9.1 Serial Communications 9-1
9.2 Printer 9-1
9.3 USB Connection to a PC 9-3
9.4 Analogue Outputs (Optional) 9-4