www.amgmicro.com 16
EVOS
fl
User Guide
REV B Published 20 SEP 2010
ADVANCED OPERATION
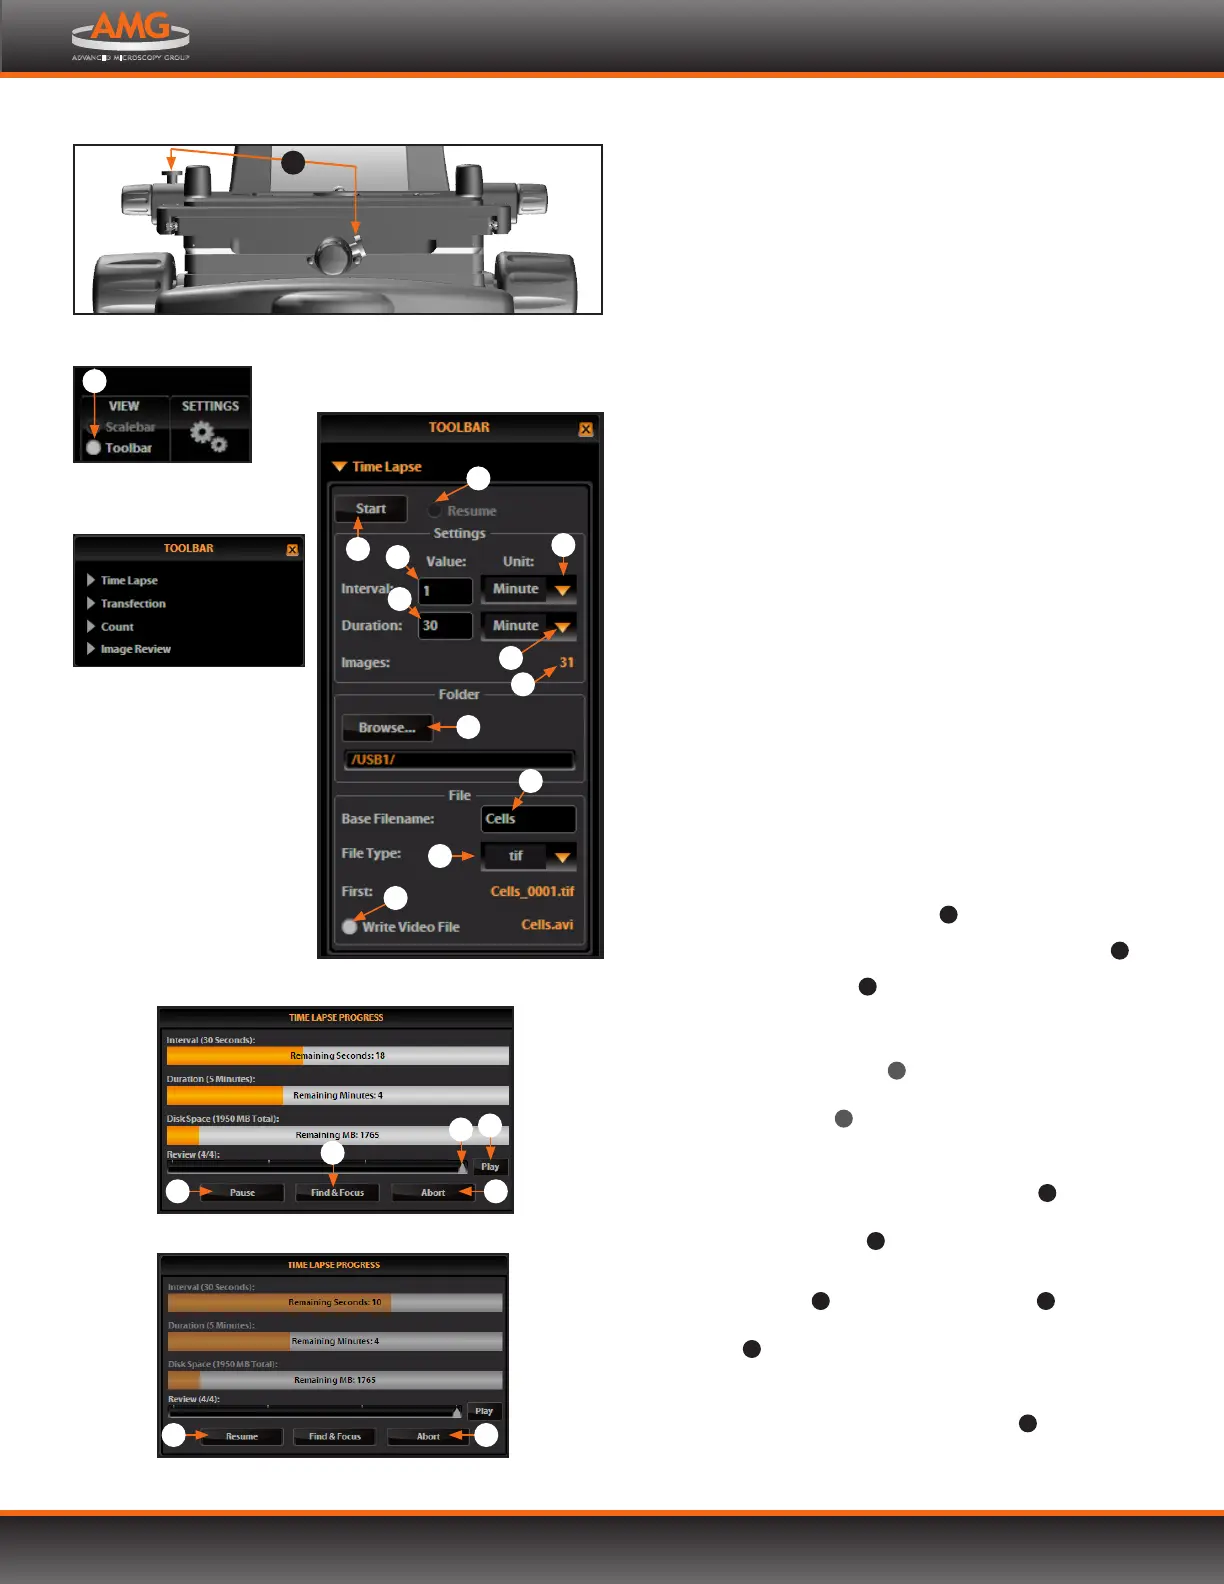
RECORDING TIME LAPSE IMAGES
With EVOS, you can set up your cells and program the
microscope to record time lapse images. To use this feature,
open the Time Lapse tool in the toolbar, specify the settings,
and click Start. You may pause or cancel sessions in progress.
START A TIME LAPSE SESSION
1. Once the specimen is focused and ready, tighten the
stage brakes to prevent the stage from drifting
during the session.
2. Open the Toolbar and expand the Time Lapse tool.
3. Click the Interval text field and enter a value.
4. Choose a unit of measure for the capture interval from
the interval Unit drop-down menu .
5. Click the Duration text field and enter a value.
6. Choose a unit of measure for the duration from the
duration Unit drop-down menu .
Note: The Images field shows the total number of
images for the session.
7. To save the session in a folder other than the default
location, click the Browse button to select the
destination.
8. In the Browse popup (shown on p. 15), highlight the
desired folder and click OK.
9. Under File, click the Base Filename text field to enter
a name, and then choose a file type (.png or .tif) from
the File Type drop-down menu
10
.
10. To create a video (.avi) file, select Write Video File
11
.
11. Click the Start button
12
to begin the time lapse session.
EVOS will display the Time Lapse Progress popup as
long as the session is active.
Note: The Review slider
13
lets you review the images
already captured during the current session. The
Play button
14
shows all the images in sequence.
PAUSE AND RESTART A TIME LAPSE SESSION
In the progress popup, click the Pause button
15
to
suspend the time lapse captures. The progress popup will
dim, and a Resume button
16
will replace the Pause button.
Alternatively, to pause and adjust the settings, click the
Find & Focus button
17
. Click the Start button
12
to resume
the time lapse capture sequence, or uncheck the Resume
radio button
18
and start a new time lapse session.
ABORT A TIME LAPSE SESSION
In the progress popup, click the Abort button
19
. A dialog
box will pop up, giving you the option to delete or keep the
files already saved. Clicking Cancel will resume the session.
Toolbar option in
the control bar
2
Toolbar
Time Lapse Progress paused
16 19
Time Lapse tool
3
5
6
4
7
9
10
12
8
11
Time Lapse Progress popup
15
13
19
14
17
18
X-axis and Y-axis stage brakes
1