www.amgmicro.com 22
EVOS
fl
User Guide
REV B Published 20 SEP 2010
ADVANCED OPERATION
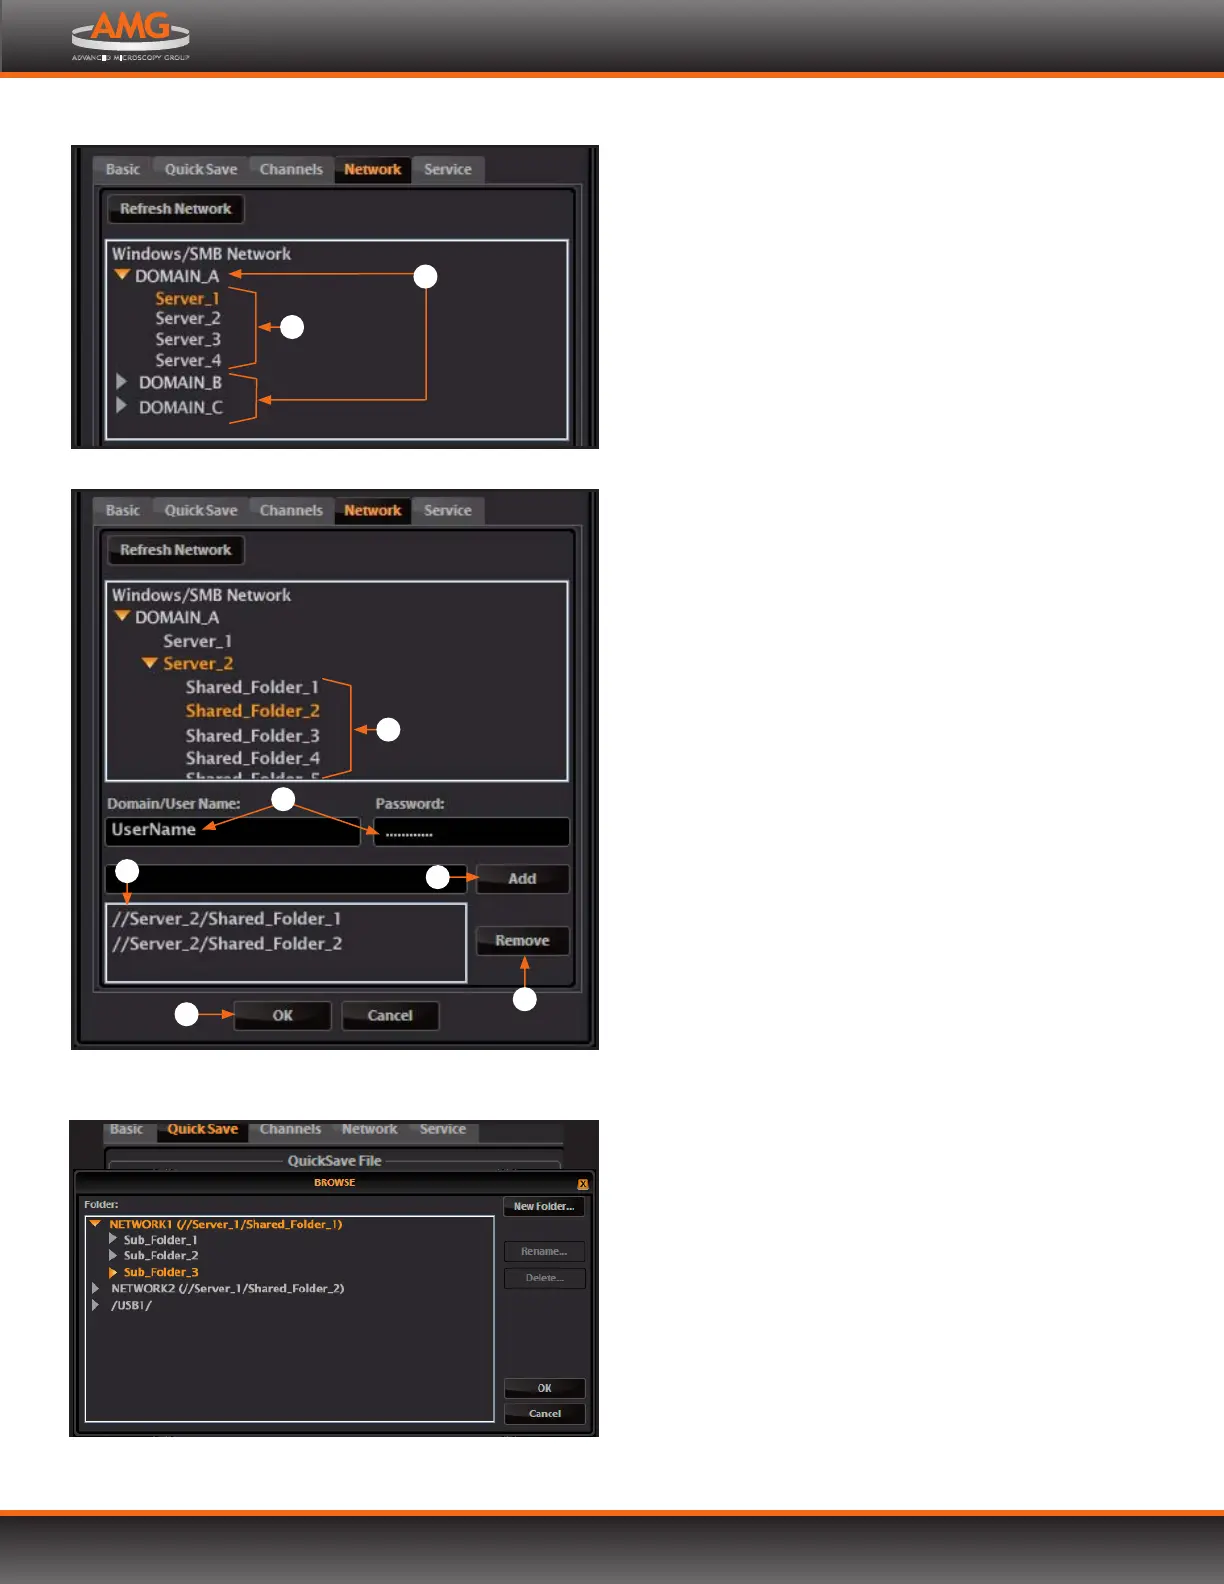
4. The upper list box of the Network page will display
the top level (available domains) of the Windows/SMB
network file tree. Click the triangle icon, or double-click
the domain name, to expand a domain and display
the available servers .
Note: If a domain, server, or shared file appears on the
file tree without a triangle icon, and you are not
able to expand or open it, your permission to
access that item is restricted.
5. Enter your network user name and password in the
login fields and select a server to view the top level of
shared folders on that server. You may not navigate
below the top-level shared folders on the Network page.
Note: If you are using a new user name or password,
verify your login on a PC before using it to log
EVOS onto the network.
6. After the network accepts your login, it will display the
list of available shared folders on the selected server.
Select a shared folder and click the Add button
to include it in the list of possible file destinations.
The folder should appear on the list box below
the Add button. If it does not, contact your network
administrator for help.
Note: You may add multiple shared folders to the list,
but you can only use a single login on any one
server or domain. We recommend that each
EVOS user establish network connections under
his or her own EVOS user ID. See Logging In/
Creating New User Logins (p.13) for more details
on EVOS user IDs.
Your EVOS user ID will remember your network
login. (It is encrypted in the microscope’s non-
volatile memory.) All your connections and login
information will be hidden from other EVOS user
profiles.
7. If you need to remove a shared folder from the
destinations list, select the folder name and click the
Remove button .
8. Click OK to save your network settings.
9. To verify your list of network destination folders, go
to the QuickSave tab and click the Browse button to
display the QuickSave Browse popup.
All your selected network destinations, as well as any
USB flash drives currently plugged in, will appear in the
Browse popup. These locations will also be available in
the Save dialog box and through the Browse button in
the Time Lapse and Image Review tools.
Network destinations in the QuickSave Browse popup
Windows/SMB Network, with available domains and servers
2
1
Adding shared folders; The Network page only displays the top-level
folders. View subfolders in the Browse popup when saving a file.
7
4
5
6
8
3
Connect EVOS to a Network, continued