Device Setup Pages
3. Under Sleep Timeout, use the Up/Down arrows to adjust the timeout period in regular increments, to a maximum of
240 minutes.
4. To disable the default setting and allow separate display and sleep timeouts, press the Sleep on Display Timeout
button. When Sleep on Display Timeout is engaged, the button is green (FIG. 7), and the Sleep Timeout settings will
be disabled. Press the button again to re-enable the Sleep on Display Timeout function.
5. Select the Back button until you are out of the Setup Menu.
Raising and Lowering the LCD Brightness
1.
Select Remote & Display Settings from the Setup Page.
2. Under LCD, use the Up/Down arrows to adjust the LCD brightness in one-point increments, from a minimum of 0
to a maximum of 100.
3. Select the Back button until you are out of the Setup Menu.
The Sleep Timeout period increments are 0 (sleep timeout disabled, remote will stay
active until the battery charge runs low), 3, 5, 10, 15, 30, 60, 120, 180, and 240
minutes.
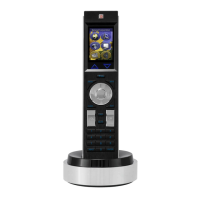
FIG. 7 Sleep on Display Timeout - enabled
Make sure to adjust the Sleep Timeout period after disengaging the Sleep on Display
Timeout function. From the factory, the default sleep timeout will be set for 15
minutes, but engaging and then disengaging the Sleep on Display Timeout function
will reset the period for 0 minutes (will not sleep until the battery charge runs low)
because the previous setting will already have 0 for that setting, even though it was
not actually used.
While deactivating the Sleep on Display Timeout function will prevent the Mio R-4
from going offline when the selected Display Timeout time is reached, doing so will
decrease the effective battery life. Setting the Sleep Timeout period to 0 will keep the
device from disconnecting from the network, but even a fully charged battery will
reach a very low point within 10 to 14 hours. If the device’s battery is too depleted, it
may need to be returned to the charging cradle and recharged before it can be used
again.
Take care not to set the LCD brightness too low, as the screen may become too dark
to read. If you accidentally set the LCD brightness too low and the screen becomes
too dark, touch the center right of the touchscreen until the screen brightens again.
 Loading...


