Programming the Mio R-4
5. Select Transfer to device in TPDesign4.
Updating Firmware
Main Mio R-4 firmware updates are only available at this time via USB connection to the Virtual NetLinx Master.
Updating Mio R-4 Firmware Through USB
To update the main firmware for the Mio R-4:
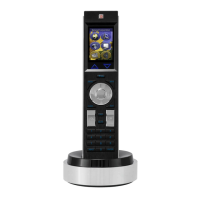
1. Connect the Mio R-4 to your computer via the USB programming jack (FIG. 22).
2. Open NetLinx Studio.
3. Connect to the Virtual NetLinx Master.
4. Select Tools > Firmware Transfer.
5. Choose the firmware file to be transferred.
6. Enter the Mio R-4’s Device ID.
7. Select Send.
8. The unit reboots after the upgrade and enters un-archiving mode, during which the AMX logo is displayed and the
POWER LED continuously flashes. The unit reboots again after un-archiving with the new firmware running.
USB
NetLinx Studio can be set up to run a Virtual Master where the PC acts as the Master by supplying its own IP Address for
communication to the Mio R-4. For a PC to establish a USB connection with a Mio R-4, it must have the AMX
USBLAN driver installed.
The AMX USBLAN driver for Windows XP can be downloaded as a stand-alone application from www.amx.com.
Prepare Your PC for USB Communication With the Mio R-4
If you haven’t already done so, download and install the latest versions of NetLinx Studio and TPDesign4 (from
www.amx.com), and restart your PC.
Configure a Virtual NetLinx Master Using NetLinx Studio
A Virtual NetLinx Master (VNM) is used when the target Mio R-4 is not connected to a physical NetLinx Master. In this
situation, the PC takes on the functions of a Master via a Virtual NetLinx Master. This connection is made by either using
the PC’s Ethernet Address (via TCP/IP using a known PC’s IP Address as the Master) or using a direct mini-USB
connection to communicate directly to the Mio R-4.
Before beginning:
1. Download the latest AMX USB LAN driver from www.amx.com.
2. In NetLinx Studio, select Settings > Master Communication Settings, from the Main menu to open the Master
Communication Settings dialog (FIG. 23).
If the Mio R-4's connection icon does not turn green within 10-15 seconds of enabling
the virtual NetLinx master (“Refresh System” in NetLinx Studio, “Connect...” in
TPDesign4), unplug the device for at least 5 seconds and then reconnect it.
If you are using the Mio R-4 in conjunction with other ZigBee-enabled devices, such
as the Mio R-3 and the NXR-ZGW wireless gateway, you should update the ZigBee
firmware to all of the ZigBee devices at the same time.
It may be necessary to temporarily disable any software firewalls on the
computer before attempting to transfer via USB. A common source of firmware
transfer failures over USB to an Mio R-4 is that Windows Firewall is blocking the Mio
R-4 from connecting to the virtual netlinx master.
 Loading...


