Copyright © 2019 ANK Audio Kits
www.AudioNoteKits.com
audionotekits@rogers.com
Page 85
Now we'll make the connections to the left side filament solder tabs.
Twist the other (not tinned) ends of these jumper wires around the stripped and tinned end of the
Mains Secondary Grey wires.
From the underside of the board, connect the combination Mains Secondary/jumper wires to the
left side filament solder tabs, as shown in the picture below:
Make sure there are no loose strands, then trim off the excess wires on the top of the board.
10.2.2 The 6SH7 and GND Connections
Earlier we connected 2 Black wires to the 6SH7 and GND connections on the Power Supply board and
we routed those wires along the base of the front of the chassis and between the output
transformers.
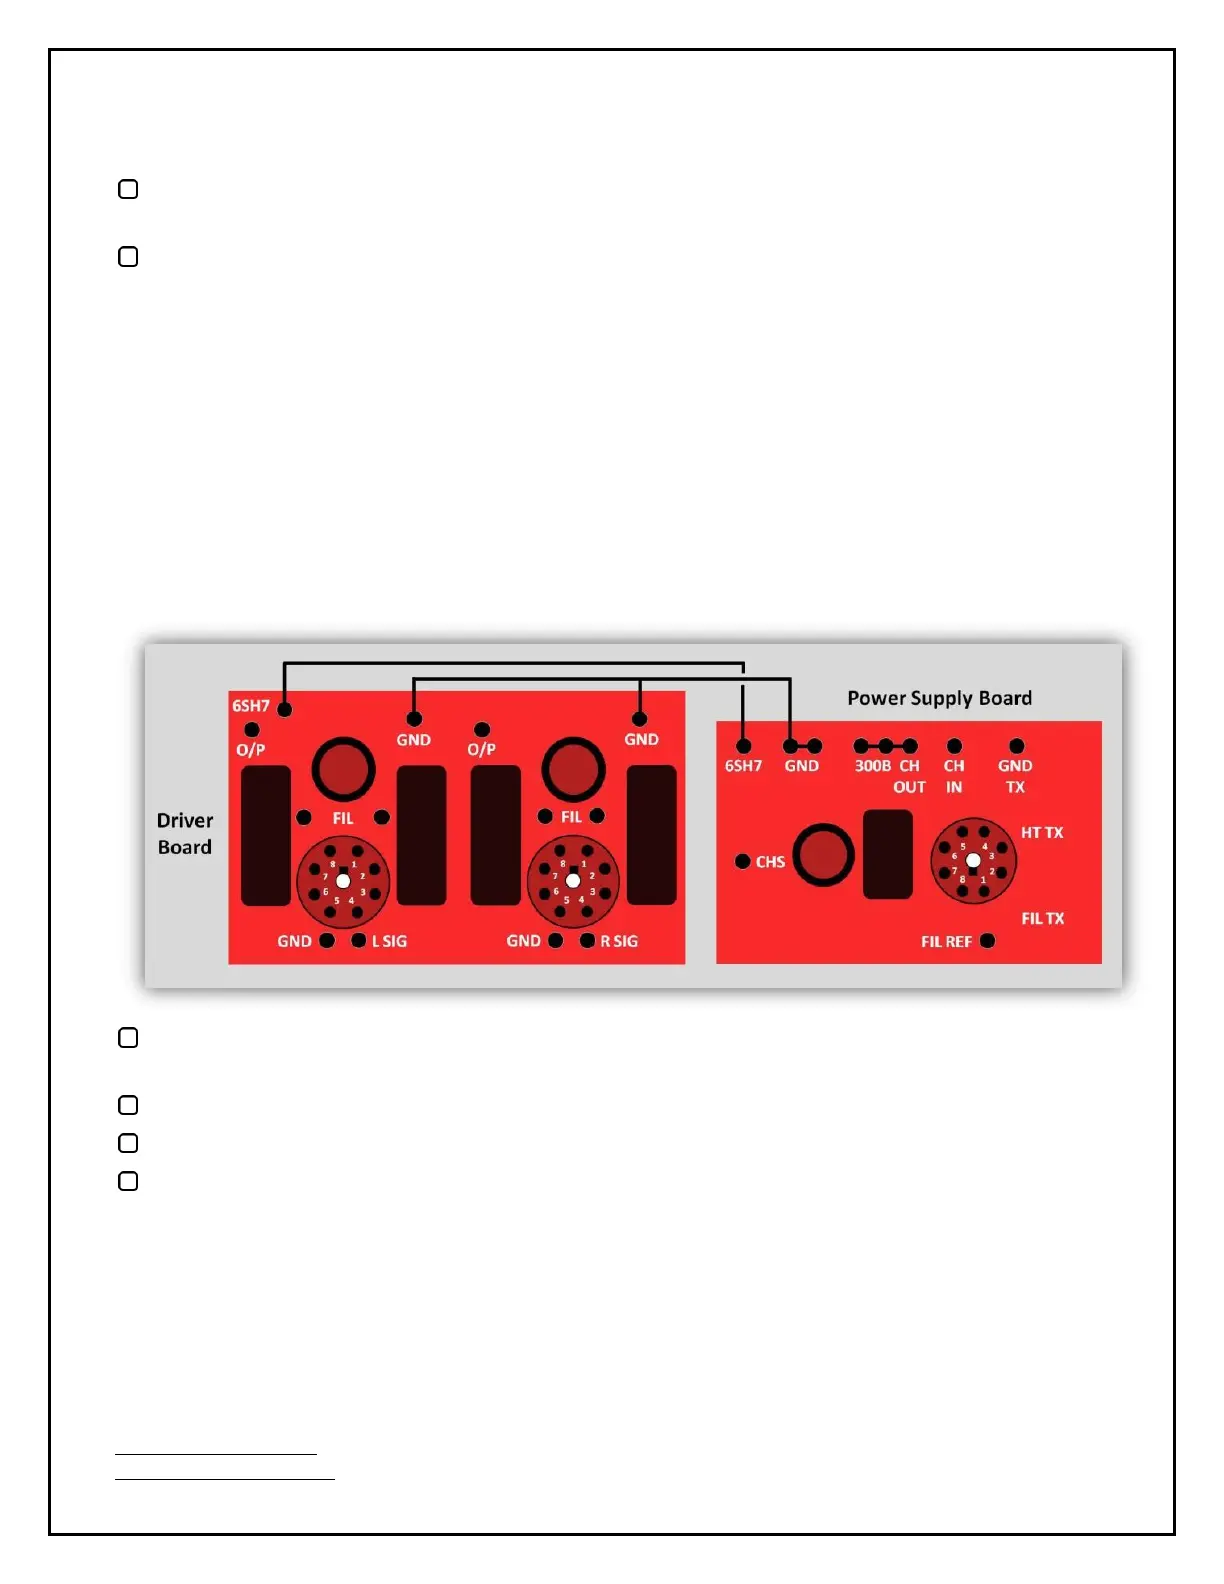
Referencing the following graphic:
Use the Connectivity mode of your multimeter to determine which of these 2 Black wires comes
from the 6SH7 solder tab on the Power Supply board.
Connect this Black wire to the 6SH7 solder tab on the Driver board, from the underside.
Connect the other Black wire to one of the 2 GND tabs on the Driver board, from the underside.
Similar to the way in which you added jumpers for the filament wires earlier, add a black jumper
on the underside of the board to connect the 2 GND tabs, as shown on the next page:


 To Next Page