Copyright © 2019 ANK Audio Kits
www.AudioNoteKits.com
audionotekits@rogers.com
Page 72
9.2 Installing the Tag Strips
9.2.1 Wiring the Tag Strips
There are two identical tag strips, one for each 300B. It's not obvious from the picture above exactly
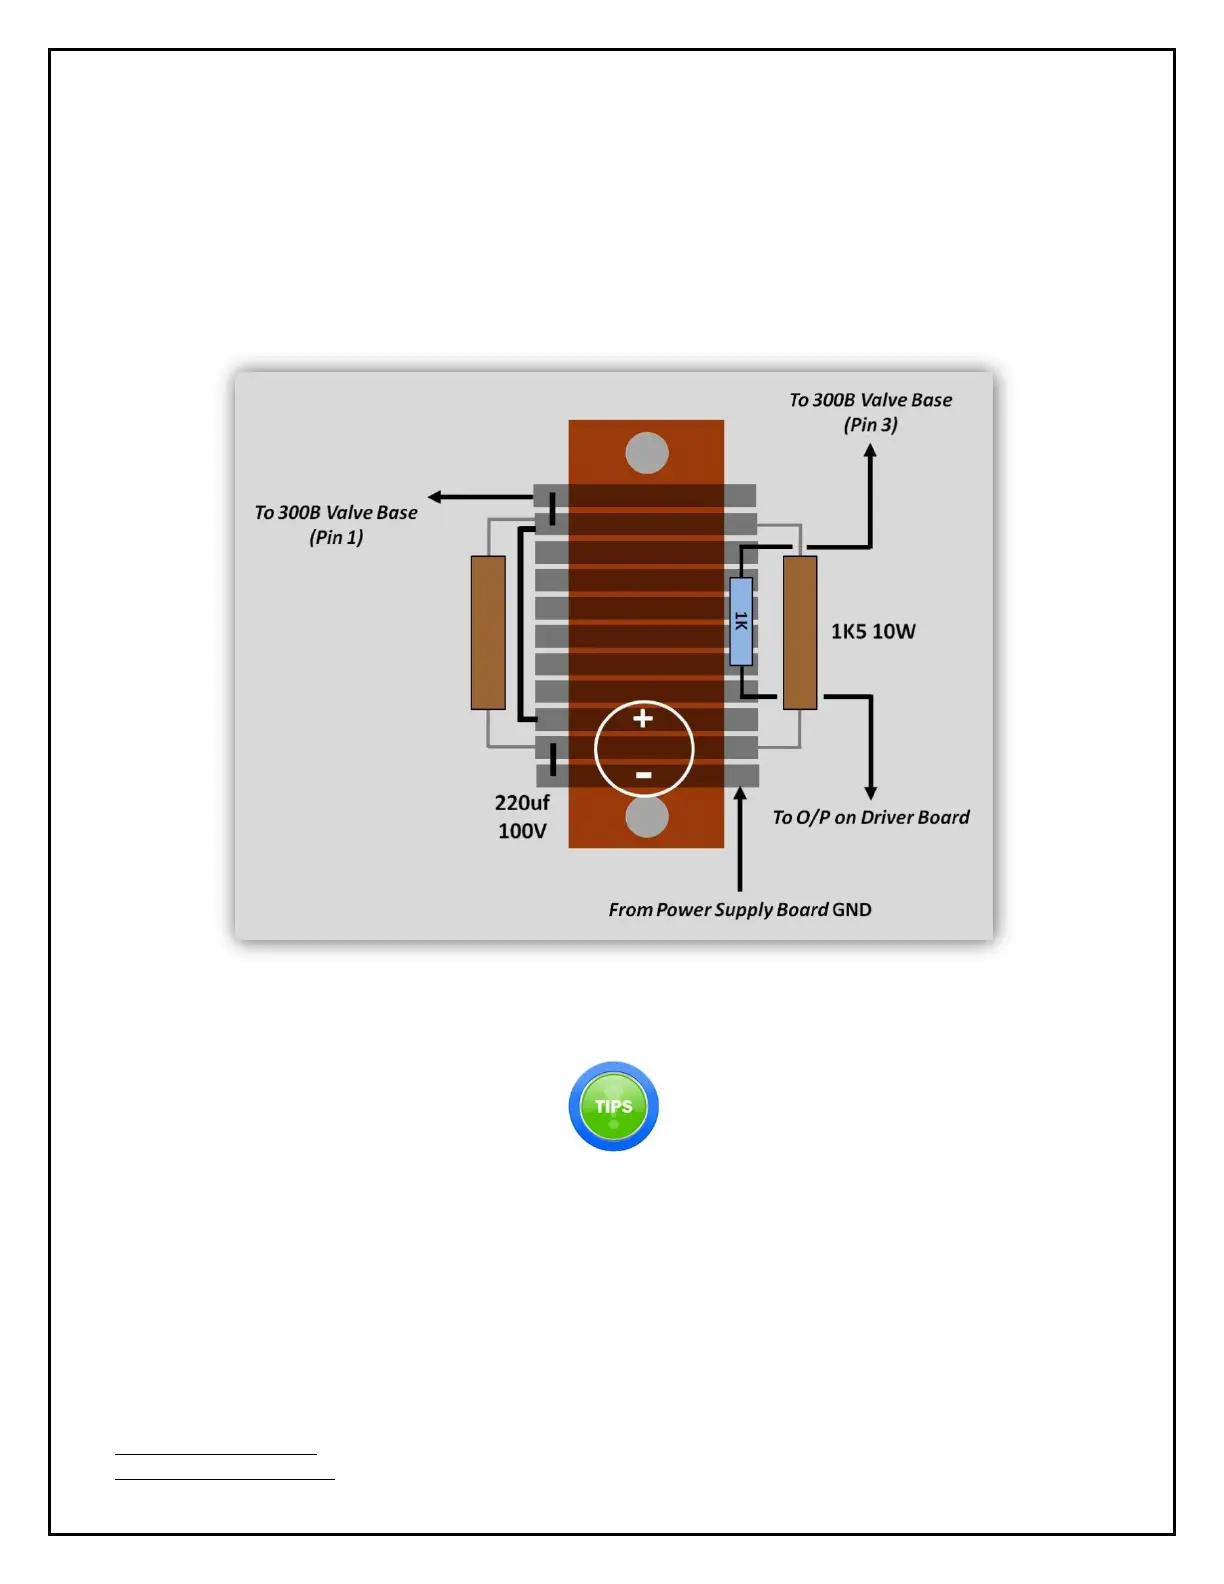
how the wiring is to be done; in fact, it's a bit tricky, so we'll go step by step. Here's a graphic of a
completed tag strip:
The following instructions are for one tag strip; you can either do the two step-by-step/side-by-side
or you can just do one tag strip and then repeat the instruction sequence for the second tag strip.
Bend the resistor leads to create a little tension so that when you insert them in a tag or against a
jumper the tension will hold them in place as you solder.
The 3 connections are a bit of a problem because you can't fit all 3 wires in a tag hole. A resistor
lead can be placed (under tension) against a jumper and a small weight will keep the jumper in
place as you solder.
Use 2 short (about 3/8") dressings on the capacitor leads to avoid the possibility of a short. You
can use some left over wire insulation.


 To Next Page