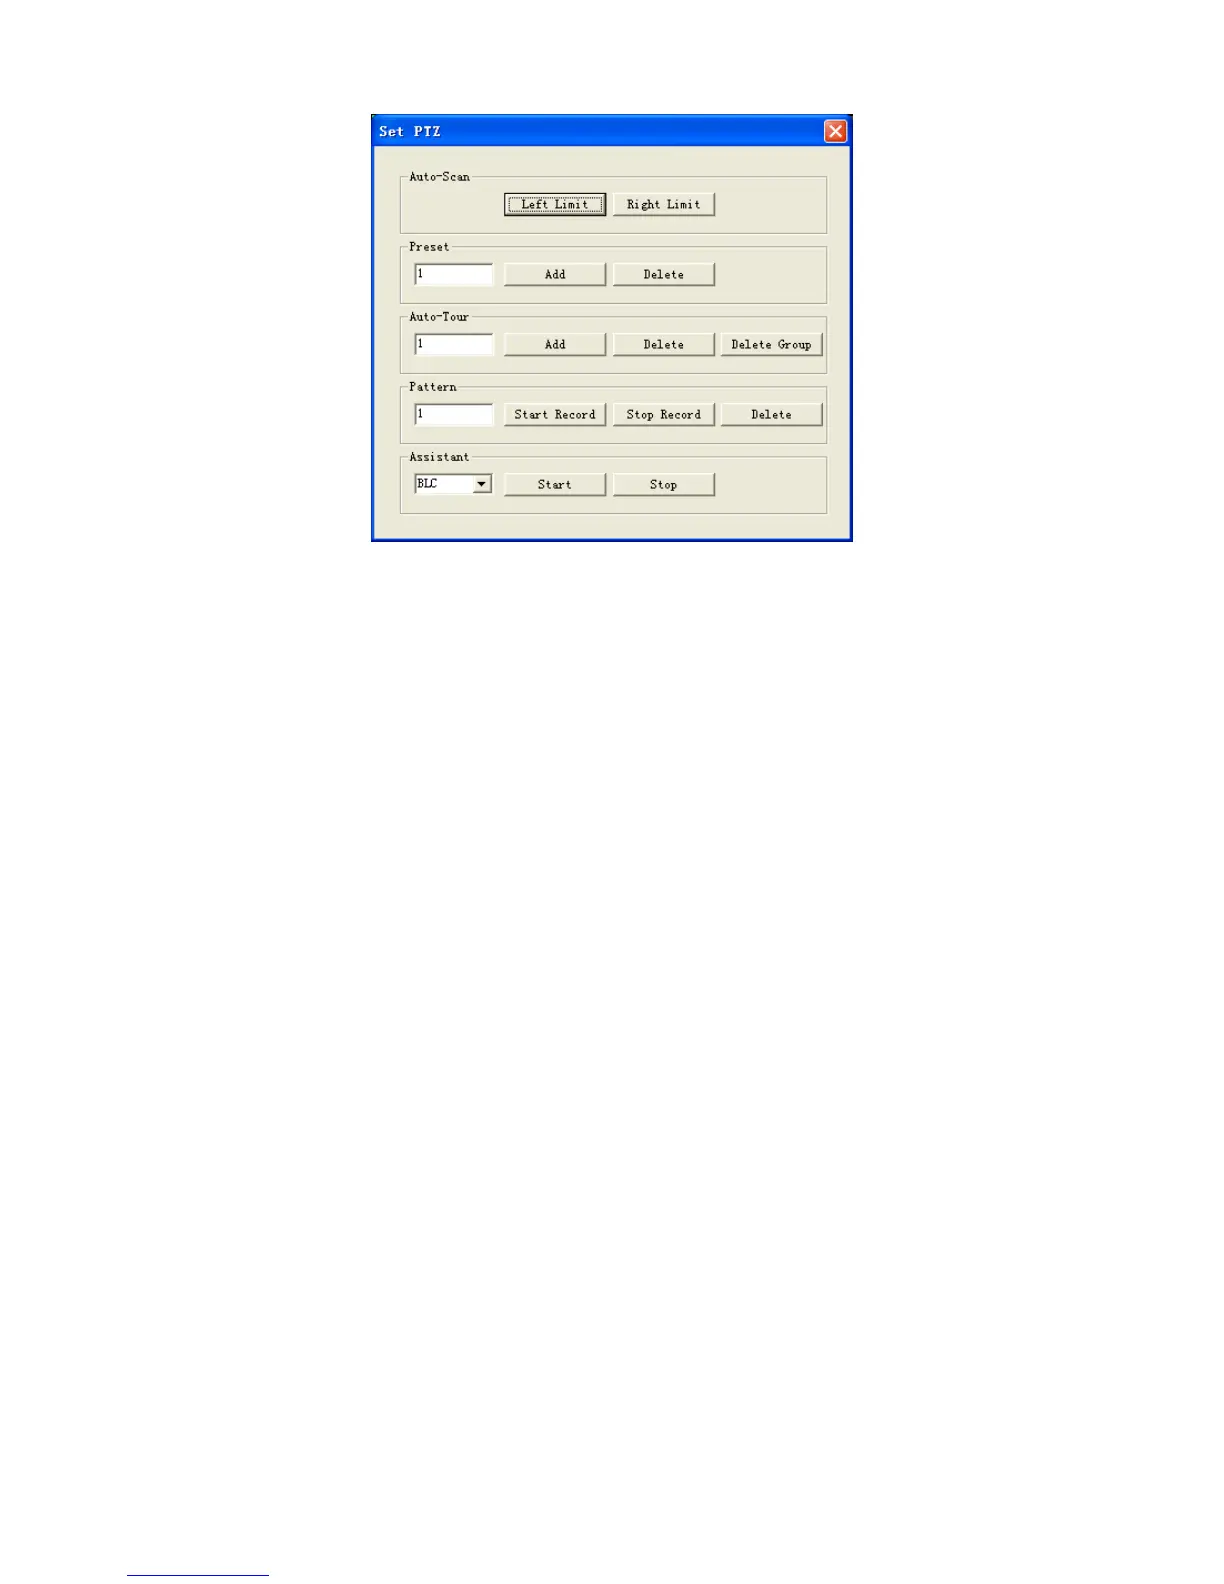
Figure 7-12
7.2.2.4 Auto Scan
In Figure 7-12, move the camera to you desired location and then click left limit button.
Then move the camera again and then click right limit button to set a right limit.
7.2.2.5 Pattern
In Figure 7-12, you can input pattern value and then click start record button to begin PTZ
movement. Please go back to Figure 7-11 to implement camera operation. Then you can click
stop record button. Now you have set one pattern.
7.2.2.6 Preset
In Figure 7-12, move the camera to your desired location and then input preset value. Click add
button, you have set one preset.
7.2.2.7 Auto tour
In Figure 7-12, input auto tour value and preset value. Click add button, you have added one
preset in the tour.
Repeat the above procedures you can add more presets in one tour.
7.2.2.8 Assistant
You can select the assistant item from the dropdown list. See Figure 7-13.