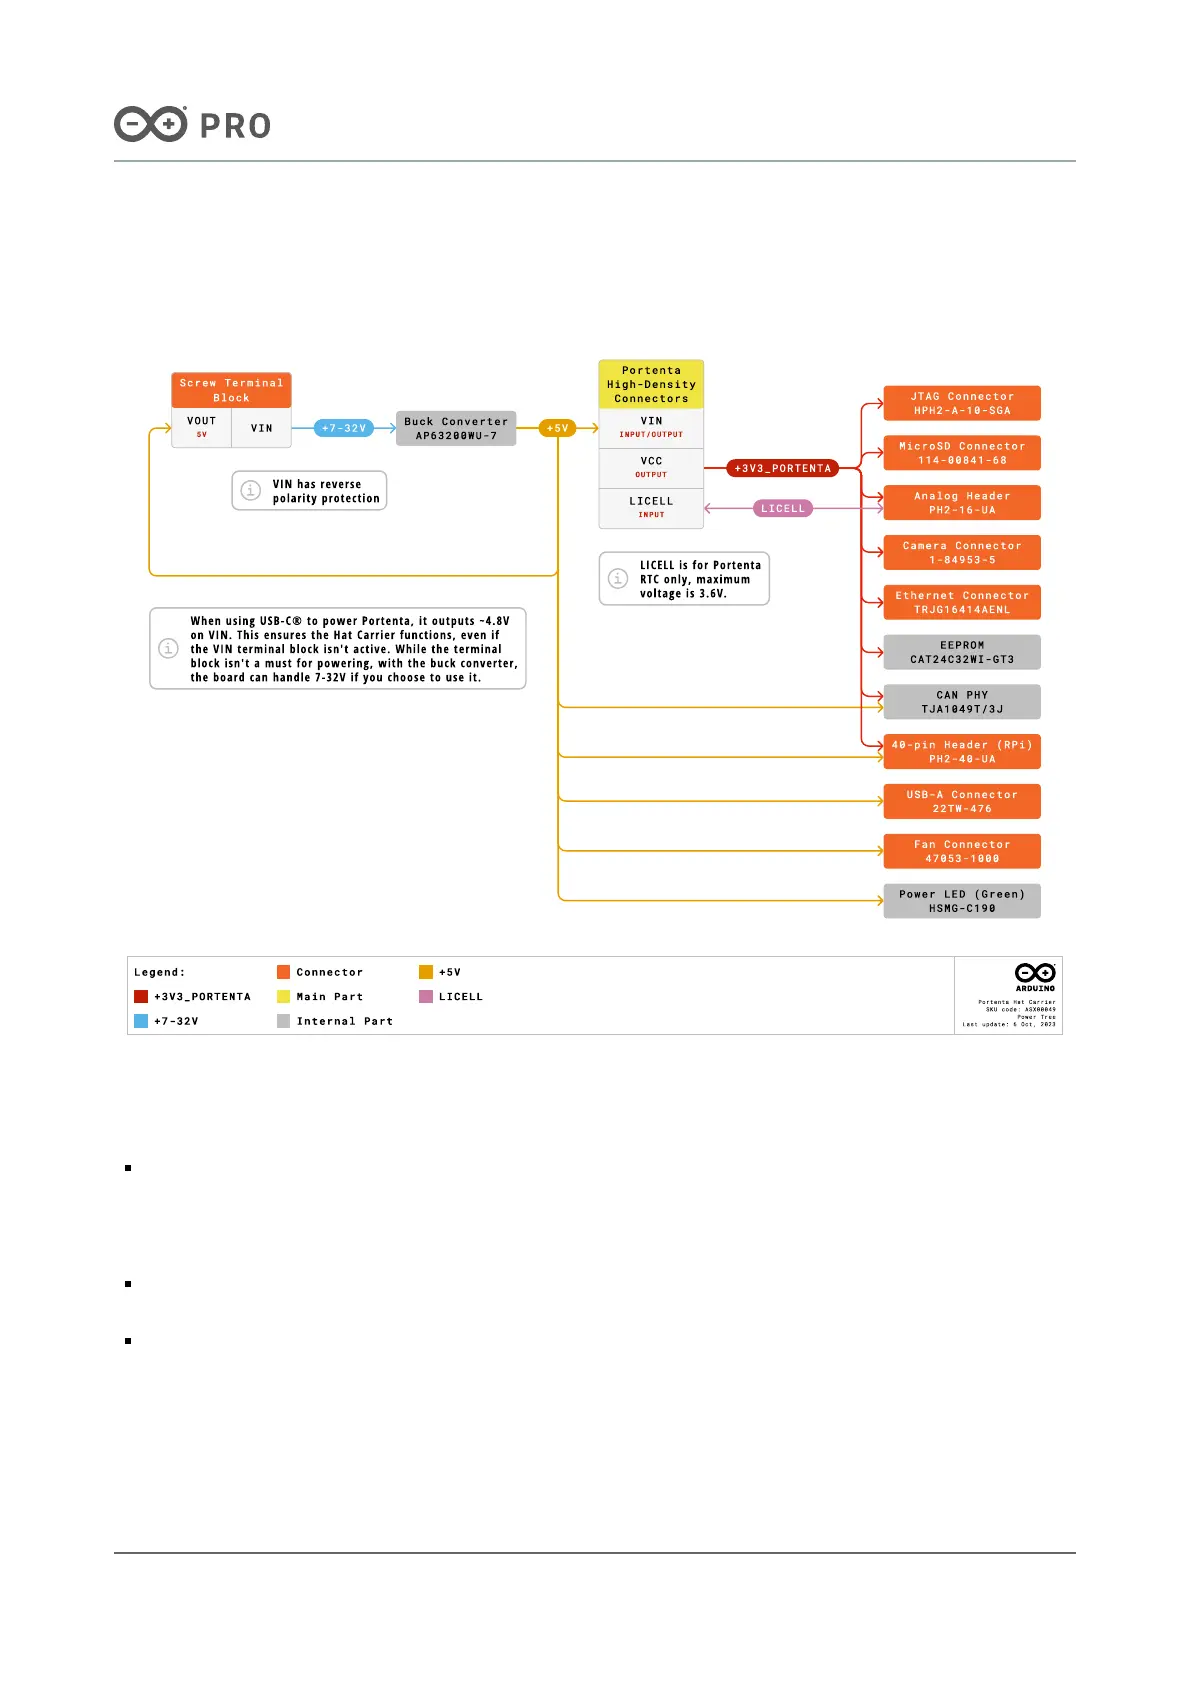
7.4 Power Tree
Figure 4 shows the power options available on the Portenta Hat Carrier and illustrates the main system power
architecture.
Figure 4. Portenta Hat Carrier power tree
As shown in Figure 4, the Portenta Hat Carrier can be powered in multiple ways:
Through the screw terminal block connector (J9): Accepting a voltage range between +7 to +32 VDC. An
AP63200WU-7 buck converter (U7) then steps down the +7 to +32 VDC VDC input to +5 VDC for the carrier and
any connected Portenta family board. It is also possible to power the system with a fixed +5 VDC using the "5V"
pin present in this block connector.
Via the connected Portenta family board's USB-C® connector: It provides a stable +5 VDC to the carrier and
the connected Portenta Family board.
From a Raspberry like Hat using the 40-pin header connector: It provides a stable +5 VDC to the carrier and
the connected Portenta Family board.

 Loading...


