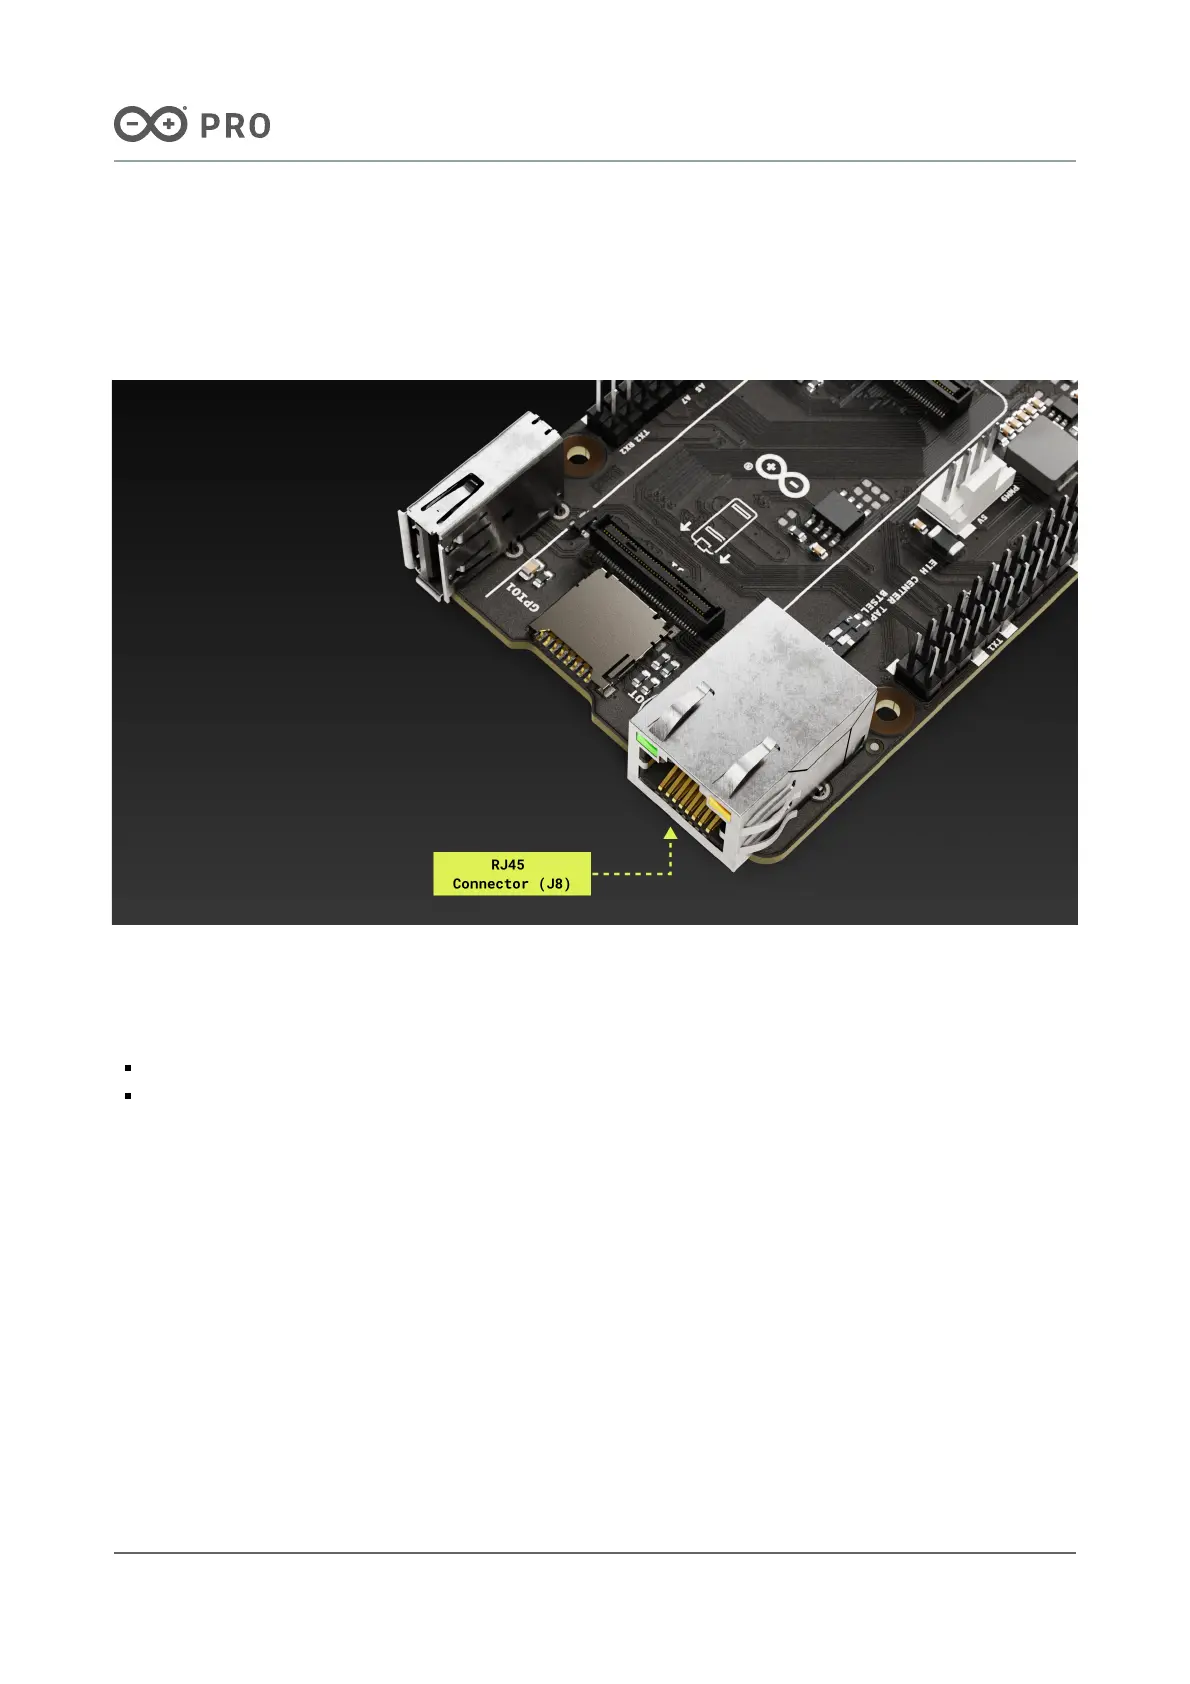
7.5.7 RJ45 Connector For Ethernet (J8)
The RJ45 connector, directly linked to the high-density connector on the Portenta board, facilitates an Ethernet
cable connection to your network. It integrates magnetics for electrical isolation, and features LED indications for
activity (orange) and speed (green).
Figure 11. RJ45 connector of the Portenta Hat Carrier
Depending of the Portenta family board attached to the Portenta Hat Carrier, the DIP switch (SW2) must be in a
specific position to ensure the correct functioning of the ethernet interface:
For the Portenta X8, be sure that the ETH CENTER TAP on the DIP switch (SW2) is on the default position OFF.
For the Portenta X7 or Portenta C33, set the ETH CENTER TAP on the DIP switch (SW2) to ON.

 Loading...


