TD 92674EN
29 April 2015 / Ver. I
Configuration Manual
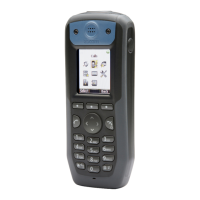
Ascom d81 DECT Handset
16
4. Maintenance
3 Insert the handset into a desktop charger or charging rack connected to Device
Manager (not needed if an over the air connection is used). Navigate to the Numbers
tab in the Device Manager.
The new handset now has the same User ID as the old handset. It is automatically
synchronized and data
and parameter settings from the old handset are transferred
to the new handset.
The synchronization takes a while if the Contac
ts in the original handset contains a
large number of entries.
4.8 Replacement of the Handset with PDM
To see which data that is replaced during this process, see 4.7.1 Data Included in a
Replacement Transfer on page 15.
Both the old handset and the new handset must be of the same device type. The same
extension number is assigned to the new handset.
The new handset should not yet be subscribed to the PBX.
1 If the new handset has been previously used, perform a factory reset, see 4.5 Perform
a Factory Reset on
page 14.
2 Make sure that the handset is saved in the PDM. In the Num
bers tab, a saved handset
has the symbol
in the Saved column. If not, right-click the handset and select
"Save" to transfer the settings to the ne
w handset later on.
Note: If
the old handset settings cannot be saved, stop the replacement procedure. Instead
register the new handset and follow the instructions for installing a handset, see 3.2
Installing a New Handset on page 8.
The following steps are described in two different scenarios. Check the most suitable one
before proceeding.
4.8.1 Handset Replacement with PDM in DECT System
NOTE: The handset to be installed must not have any p
revious valid registrations. If it has a
valid registration, unsubscribe the handset.
1 Unsubscribe the old handset. If the unsubsc
ribtion cannot be performed in the
handset, unsubscribe the handset via the DECT interface. See the corresponding
documentation for your system.
2 Subscribe the new handset with the same extension number as the old handset. The
subscription procedure is described in
the handset’s User Manual.
During the subscription procedure, th
e handset’s User ID is automatically set to the
same as the extension number. The User ID is used to identify the handset when it is
connected to PDM and is visible in the Number column.
TIP: The User ID can be viewed by navigating to
the menu:
Admin menu > Device info > User ID.
3 Insert the new handset into a desktop charger or charging rack connecte
d to the
PDM.
4 A dialog window appears, asking the user to decide wheth
er to use the Number
settings in PDM or the Number settings in the device. Select "PDM".
The handset is automatically synchronized an
d all data and parameter settings are
transferred to the new handset. The synchronization takes a while if the Contacts in
the original handset contain a large number of entries.