30 Rev. 00
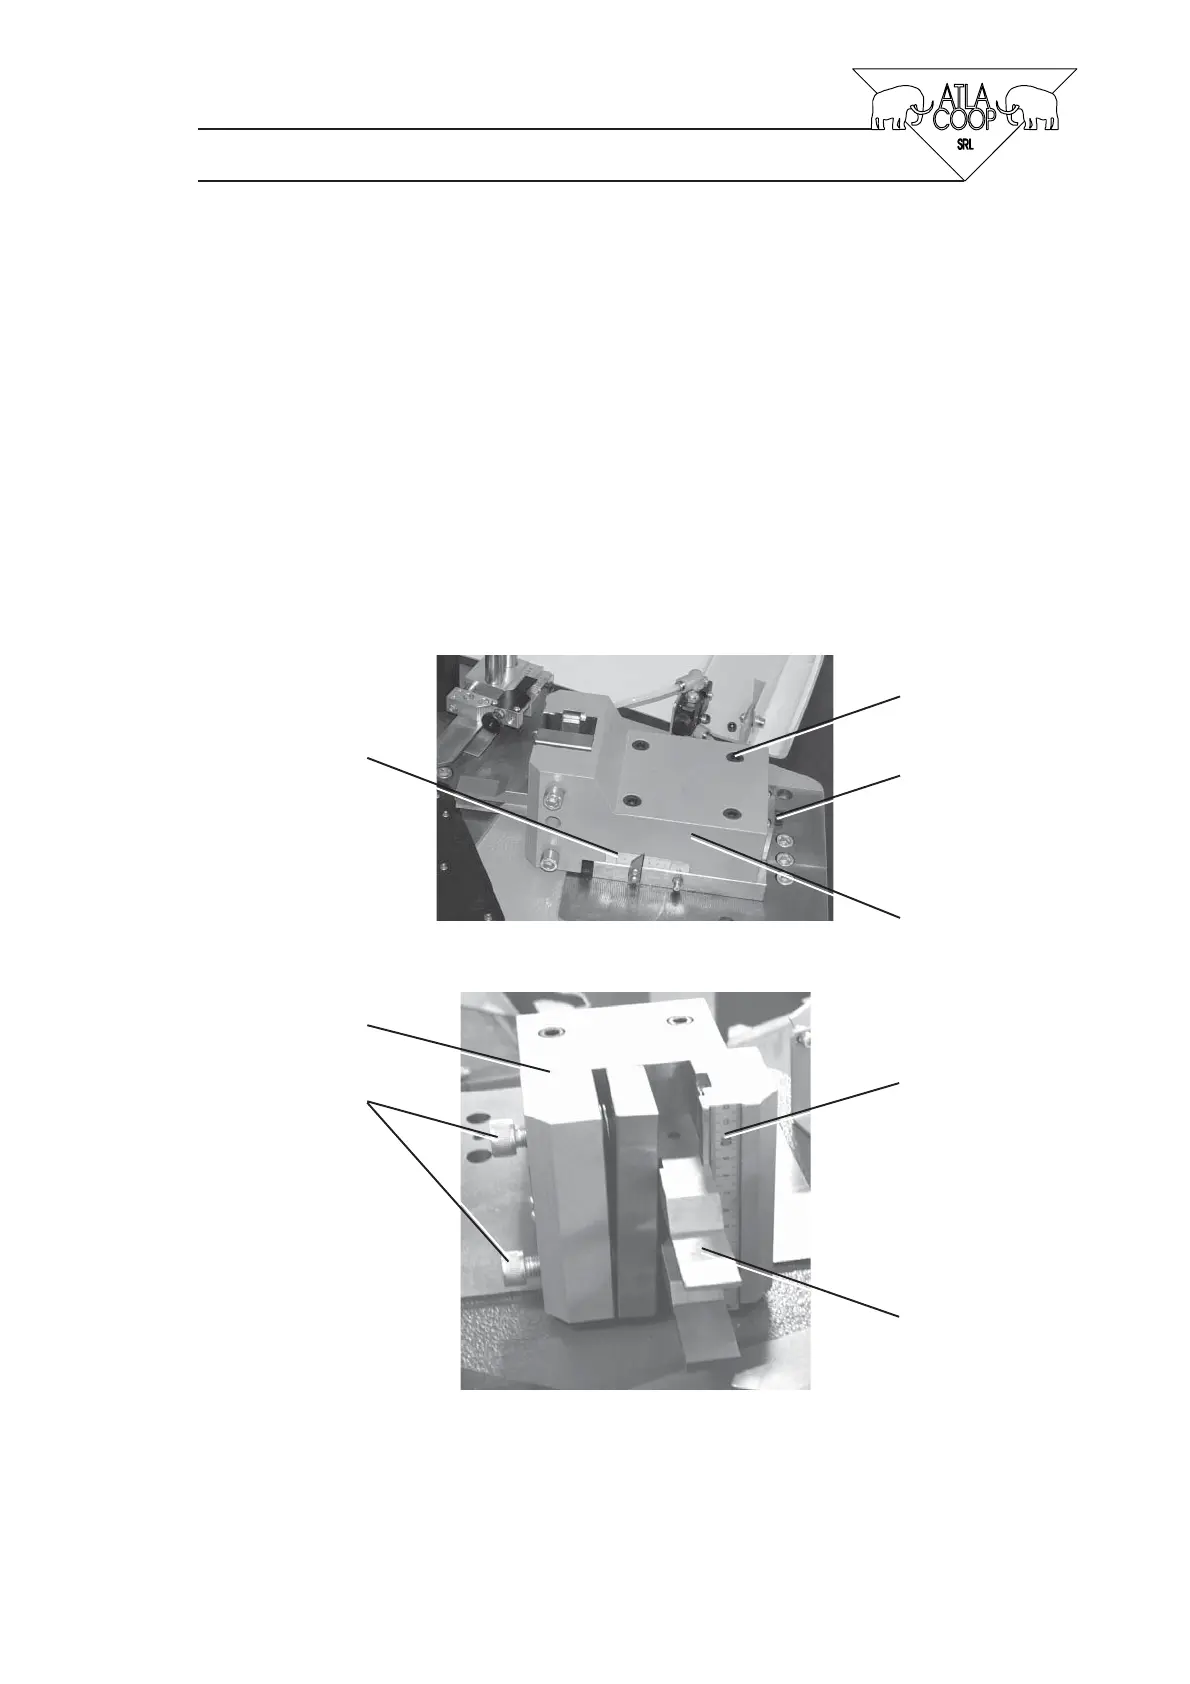
5.5.4 HOW TO MOUNT AND ADJUST THE CRIMPING KNIVES
— Open the safety guard.
— Loose four screws (1, fig. 5.6) on the crimping head (2) and adjust the position of head by
swinging the screw (3) according to the crimping point of corner's chamber (dimension «d», fig.
5.7) where the reference forks will press.
— In particular the operator must move the head till he reads on the graduated scale (4, fig. 5.6)
the measure that represents the value «d» ( in mm).
— Once the position reached, tighten the screws (1).
— Loose two screws (5) and insert the knives (6) (one or two) into their holder.
— Measure the crimping height on the profile to be worked, then position them at the required
height by means of the graduated scale (7); then tighten the screws (5).
— Perform the same operations for both heads.
Fig. 5.6
1
3
2
4
2
5
7
6