Copyright © 2006-2009 AudioNote Kits
www.AudioNoteKits.com
audionotekits@rogers.com
Page 14
Section 4: Choke Installation and HT Wiring
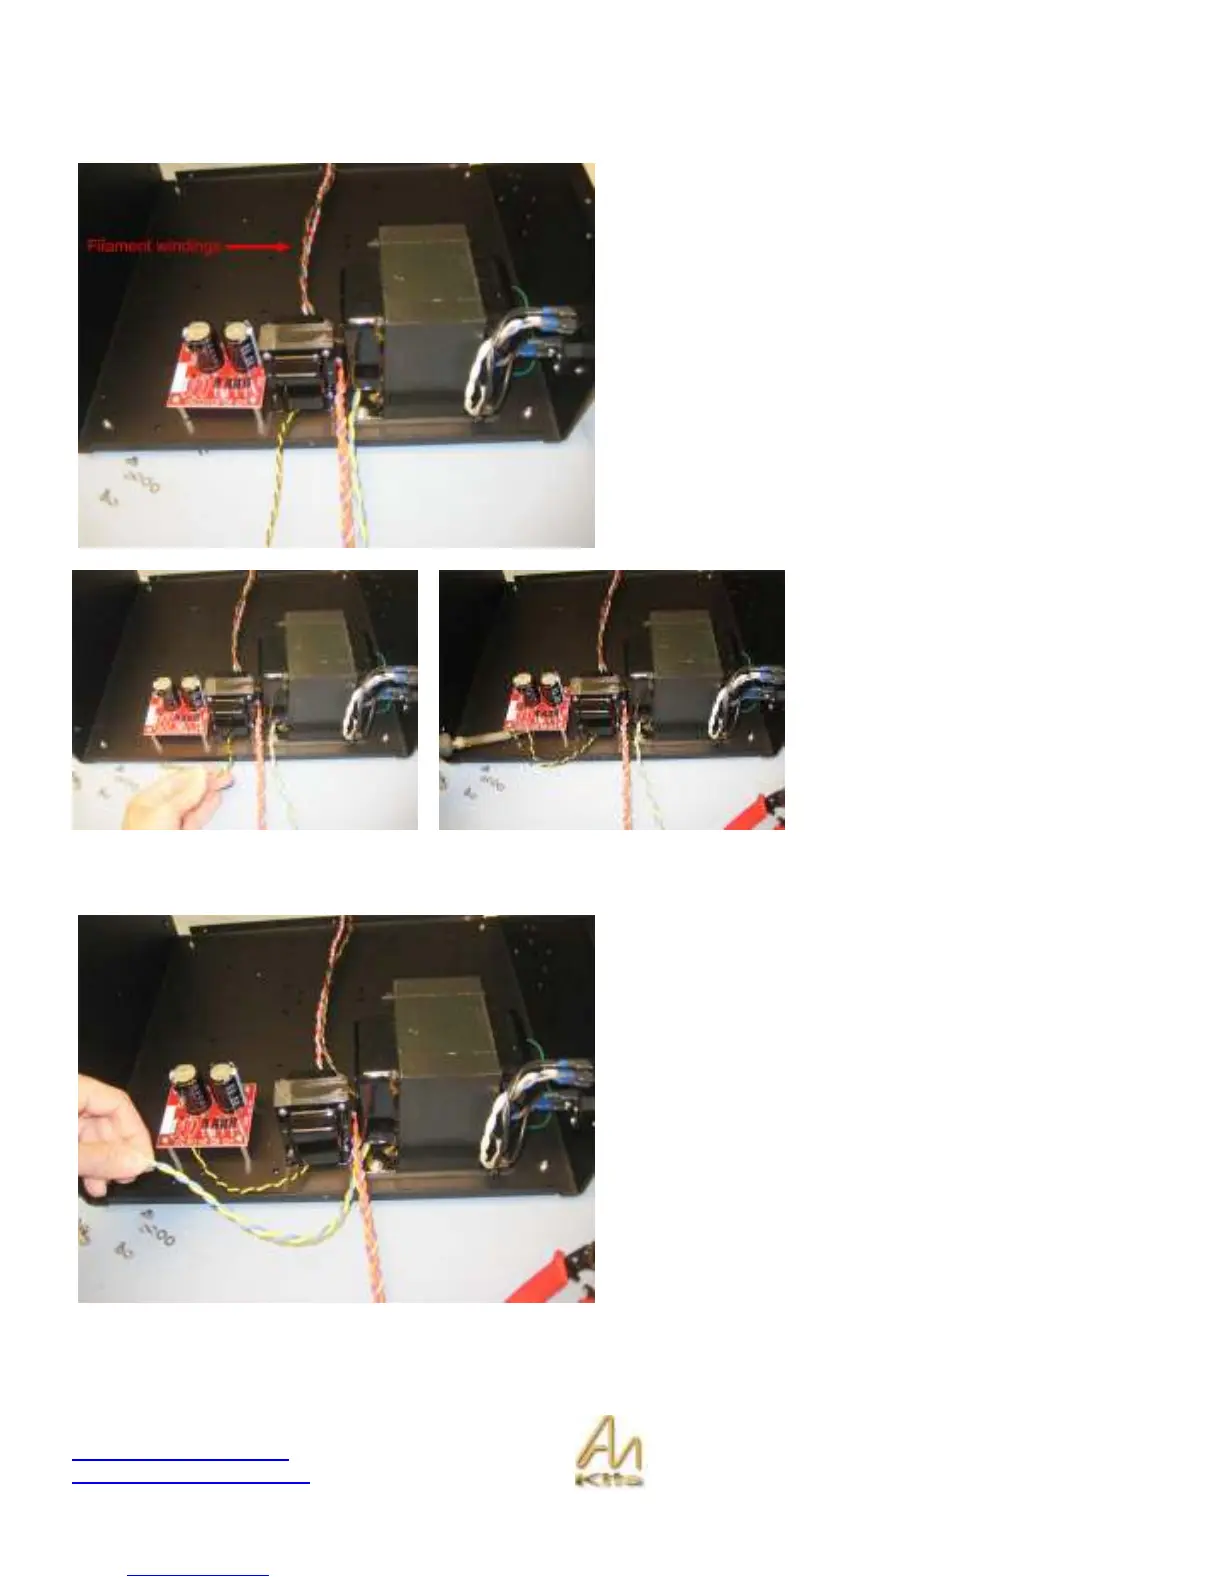
Here is how the choke and the Power supply board will be
positioned in the chassis.
You will want to bring the Mains transformer secondary
leads through on this side of the chassis and position the
twisted filament wires from the secondary windings going
the other way into the amplifier.
Use the supplied hardware (M3 screws and nuts) to secure
the choke into position.
Trim and tin the Choke wires (yellow
and black) so that you can connect
them to the power supply board.
Insert them underneath the board if
you like and apply solder from the top
of the board – plenty of solder will be
used and then you can trim the extra
tinned wire poking through the board.
Connect the yellow and black wires
from the Choke into holes CH-1 and
CH-2 – it does not matter which wire
goes to which hole.
Now lets take the High Voltage wires (Yellow and Blue) and
trim to length.
Strip the end of the wires and tin.
Connect to HAC1 (High Voltage AC 1) and HAC2 (High
Voltage AC 2).