Copyright © 2006-2009 AudioNote Kits
www.AudioNoteKits.com
audionotekits@rogers.com
Page 9
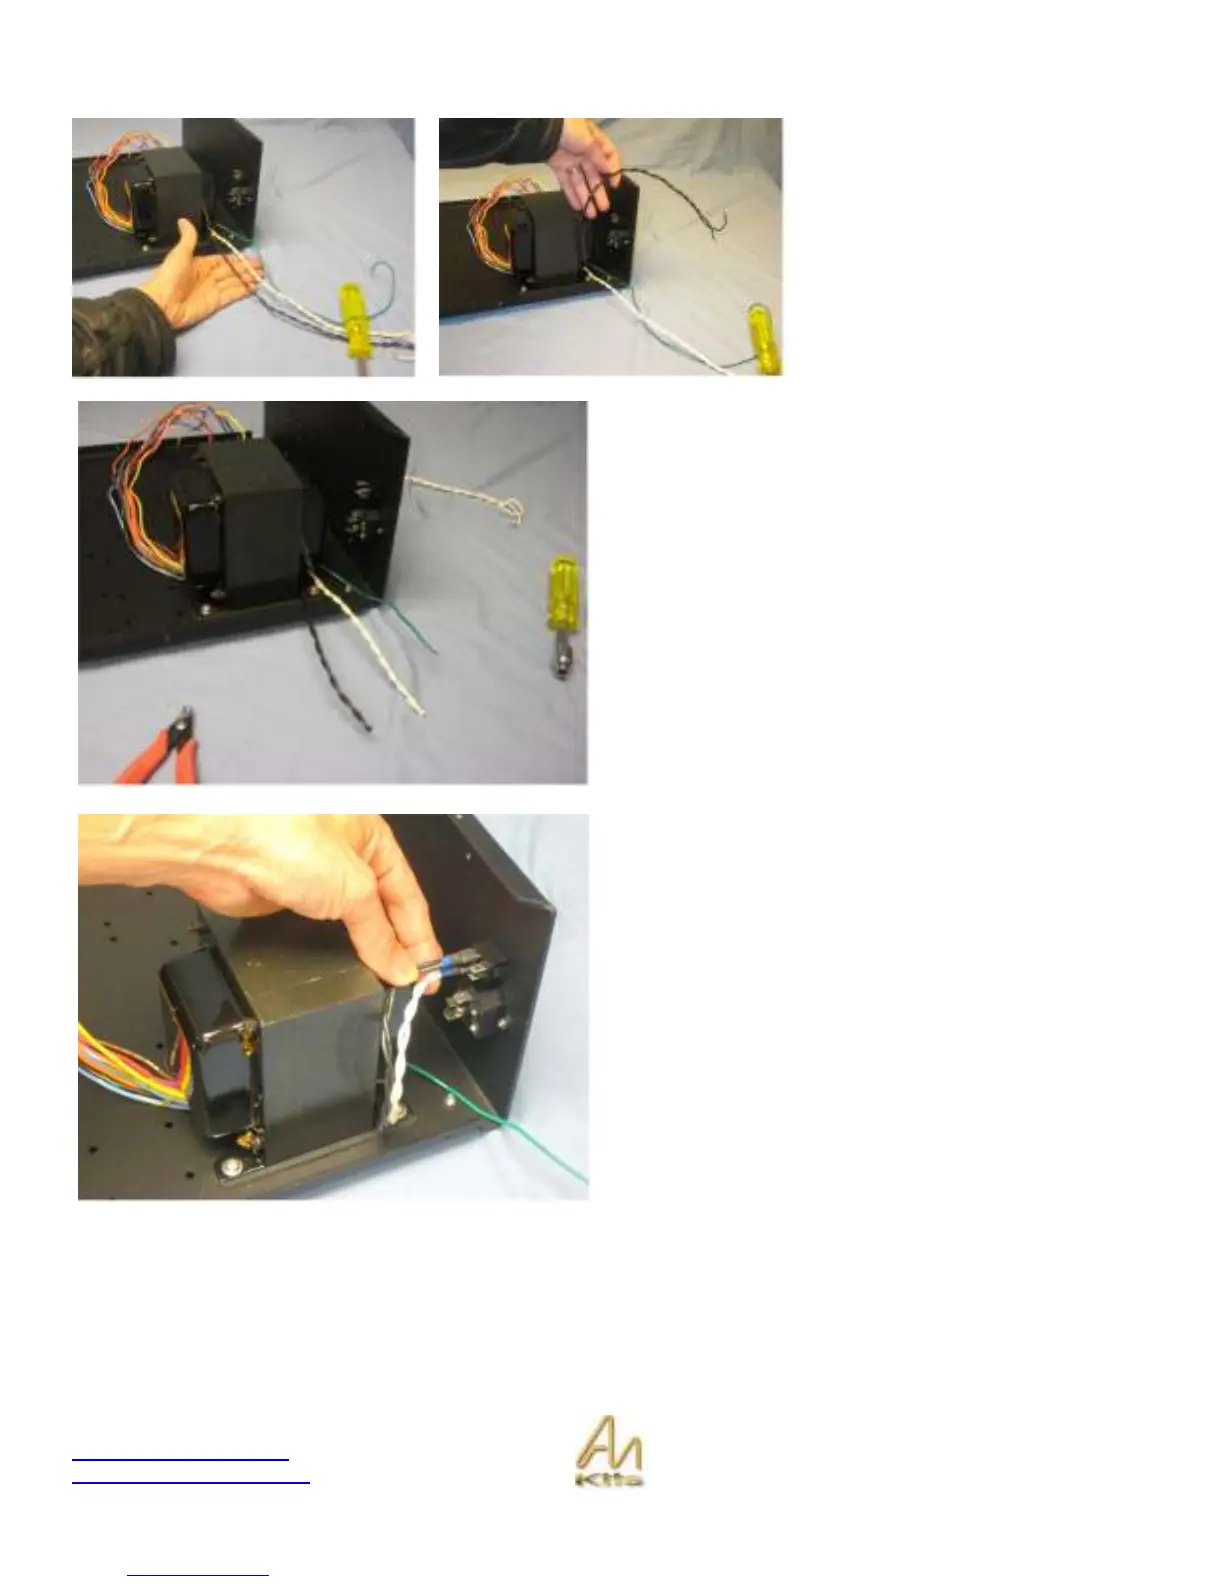
Remember, the following example shows how to wire for 120v operation only.
If you live in a 120V AC world voltage
then we will twist the black wires
together as shown as well as twisting
the white wires.
We will also be working with the green
screen wire.
* Applies to 120v operation only.
The next step is trim the wires lengths once they have been
twisted such that the length would reach to the top of the
chassis (approx 7 or 8 inches).
* Applies to 120v operation only.
Take both black twisted wires and strip about ½ inch of
insulation – then twist the ends together – then TIN this end
by applying solder to it to make sure that it is nicely formed.
Then place a blue CRIMP on the end of the wire. Here’s the
tricky part – add solder so that the TINNed end of wire
adheres to the crimp – you will probably need to add a
surprising amount of solder to make sure there is a very
good connection along with quite a bit of heat.
Once the crimp has been added then you can place the
heat shrink over the exposed metal end of the crimp and
apply your heat gun.
REPEAT for the White twisted wires.
* Applies to 120v operation only.