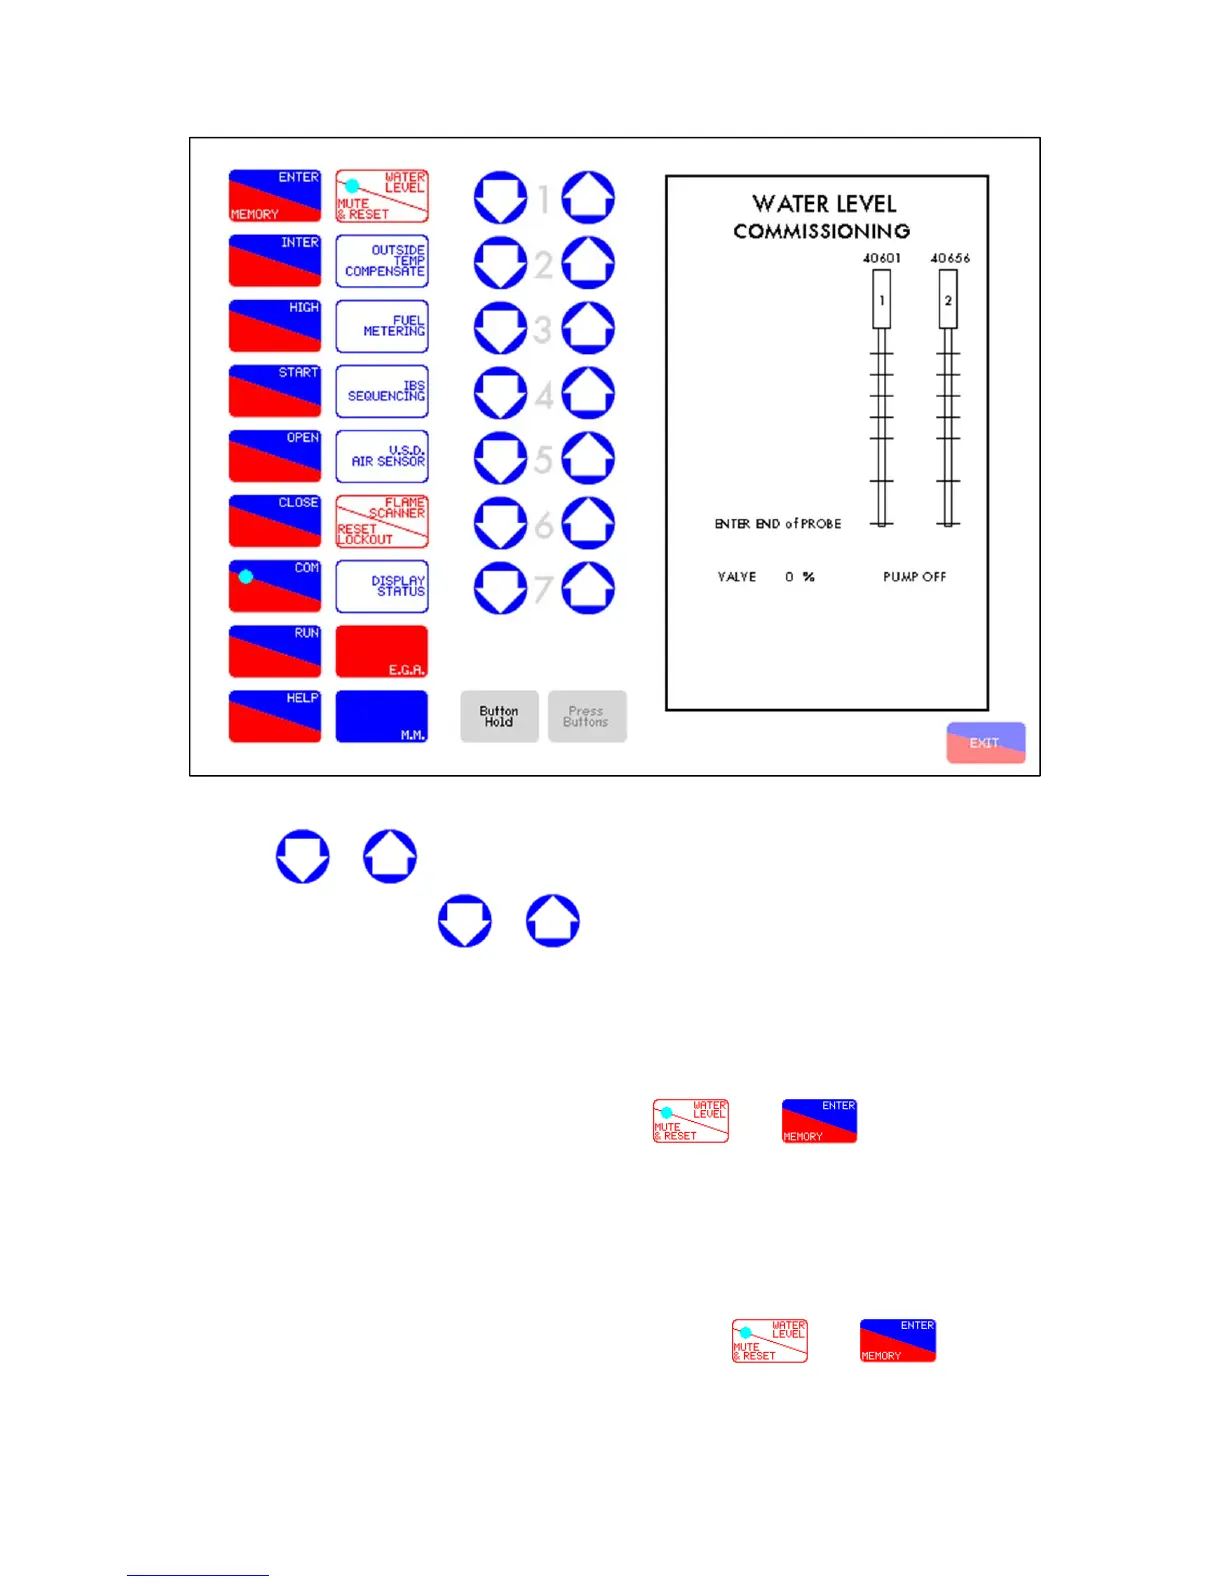
Figure 2.3.1.iii Commissioning Water Level Probes
Use CH2 to control the position of the feed water valve (if optioned) and CH1 to
control pump operation (OFF ON).
The current position to be commissioned is indicated by a flashing message showing End of Probe.
Increase the water level until it approaches the bottom of the probe. The End of Probe position should
be entered as a minimum level of water in the boiler, indicated by the lowest water level visible in the
site-glass. As the water level exceeds the end of the probe, the displayed probe values will begin to
change. Once the desired point has been found, close the feed water valve and turn off the pump.
After allowing some time for the values to settle, press then to save that position
for End of Probe.
Note: Each position must be greater than approximately 25mm (1”) above the last stored value which
equates to a minimum of 500Hz. We would recommend 800Hz between positions.
The display will then show ‘2
nd
Low’ flashing. Increase the water level using CH1 and CH2. Once the
desired point has been found, close the feed water valve and turn off the pump using CH1 and CH2.
Again, after allowing some time for the values to stabilise, press then to save the
current water level.
 Loading...