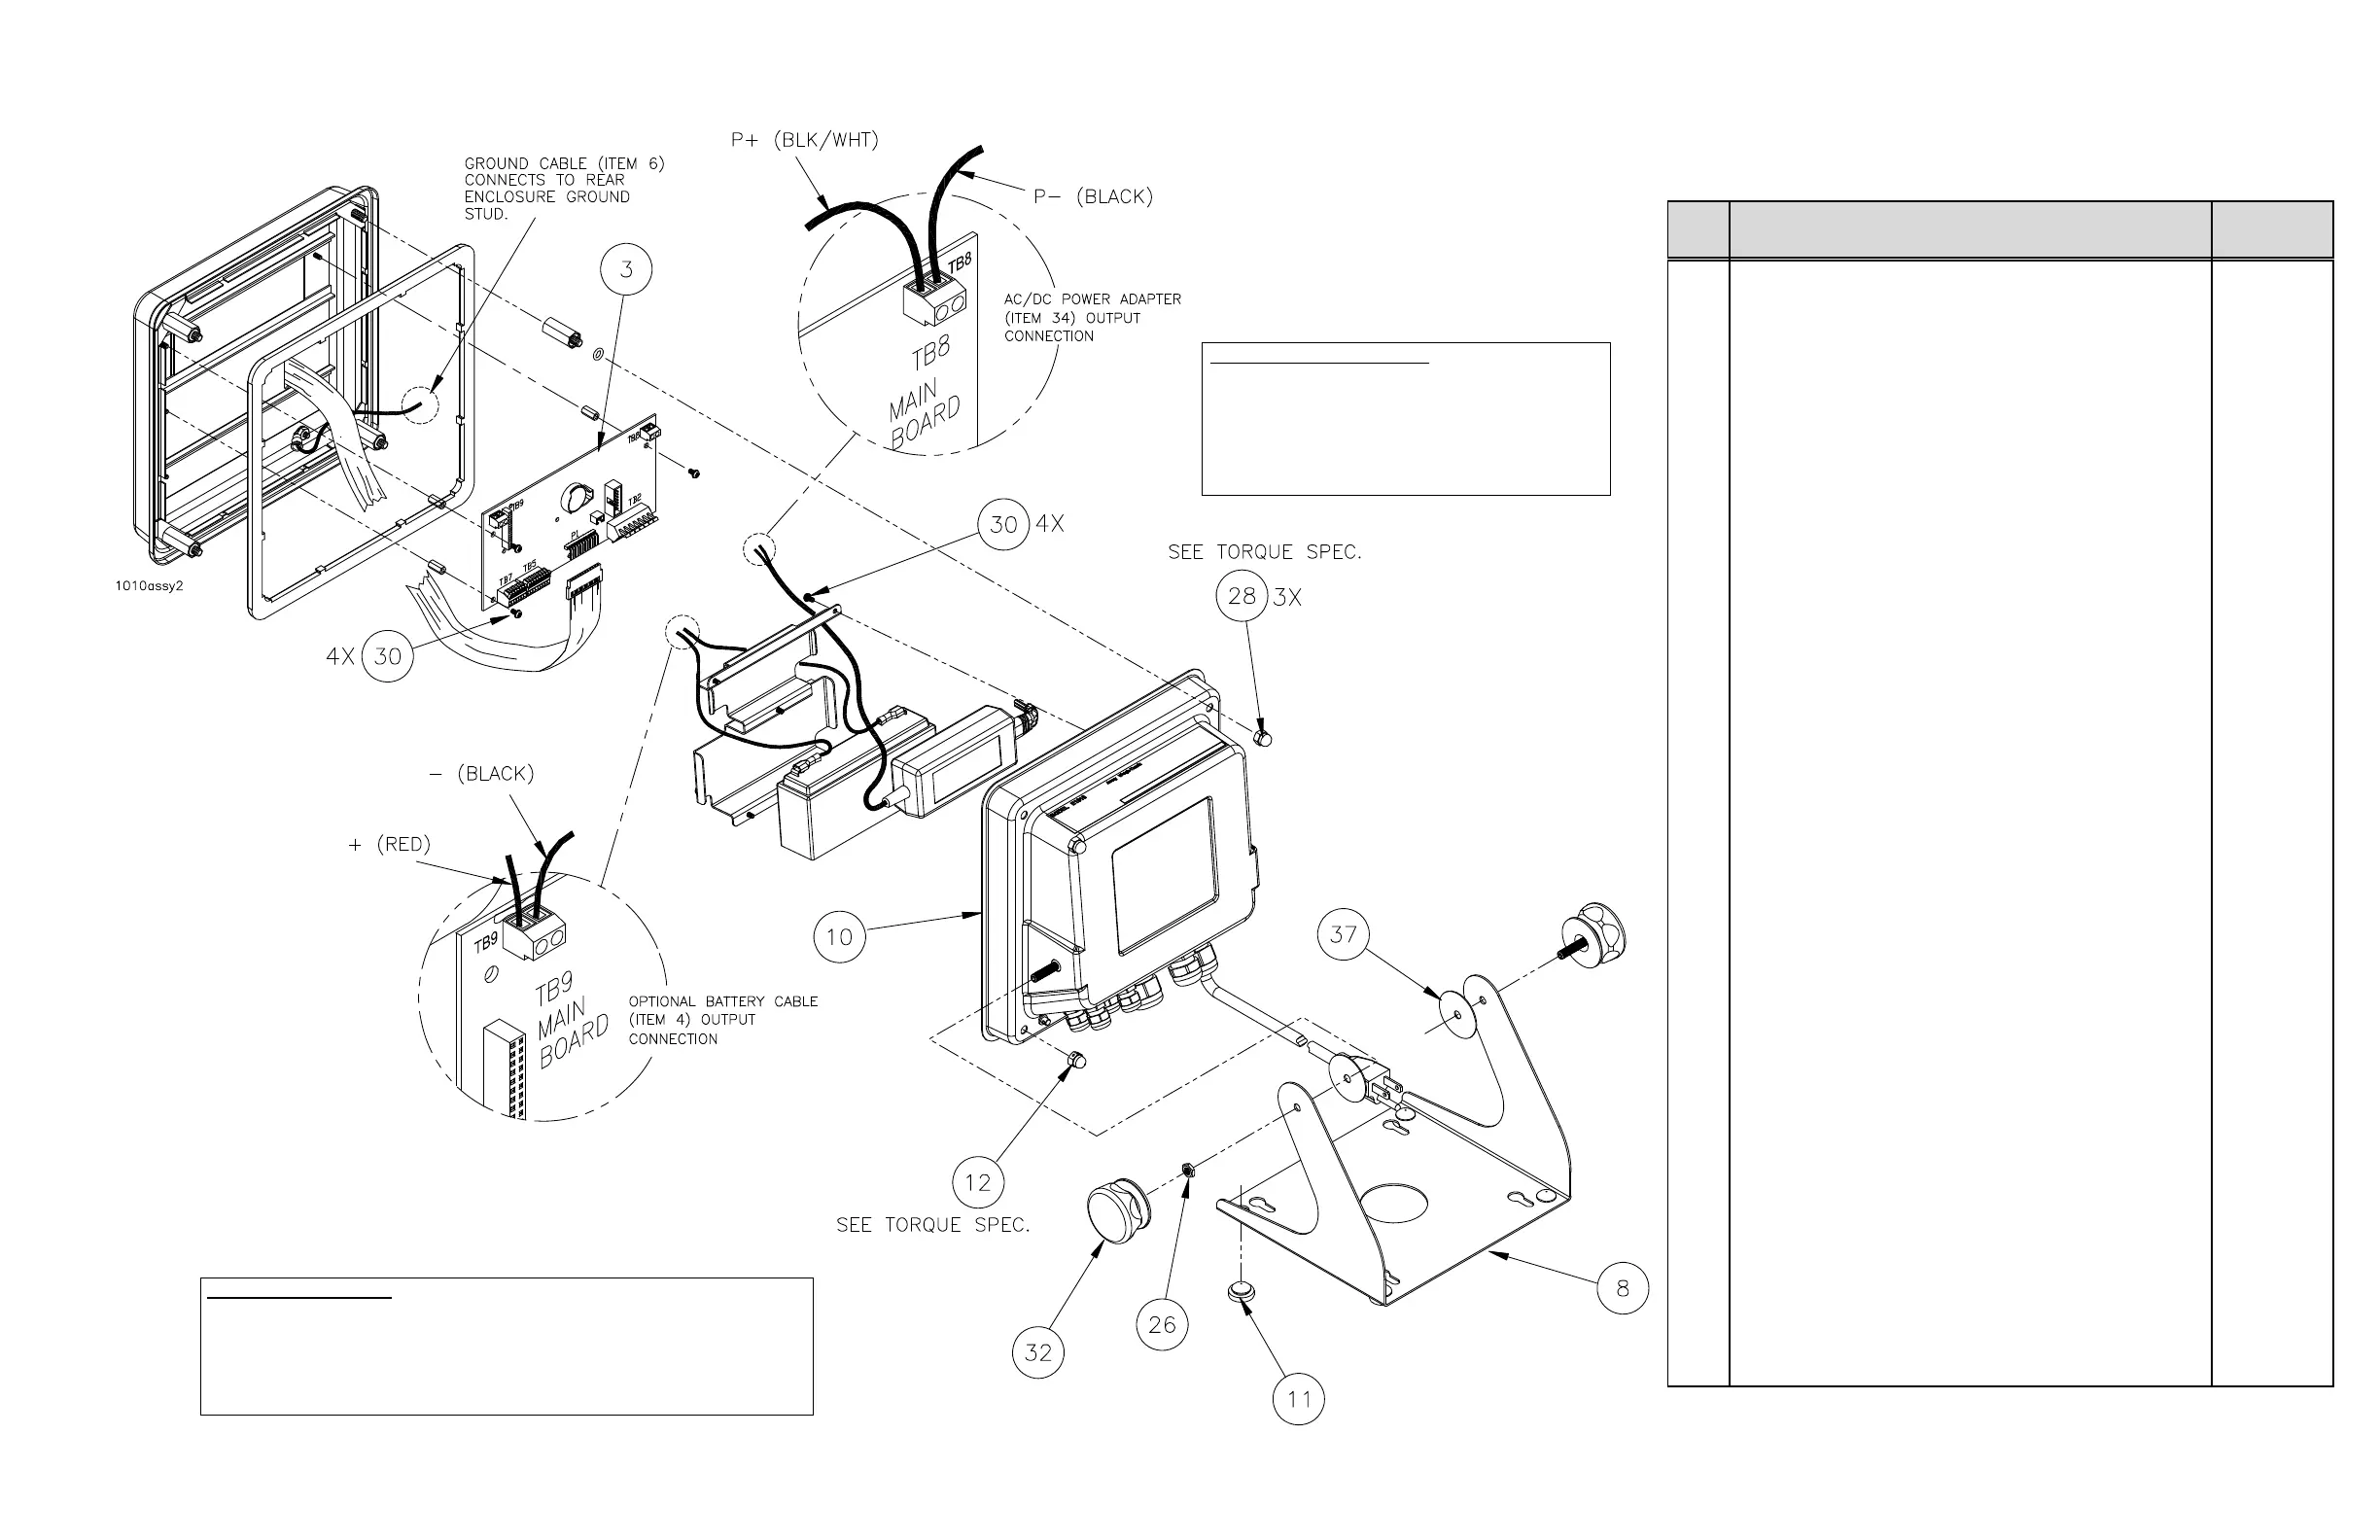
59
ITEM
NO. DESCRIPTION AWT P/N
1 AC Power Cord Assembly (110-240VAC, USA)
AC Power Cord Assembly (110-240VAC, UK)
3 Display/Main Board assembly 57312-0029
4 Battery Cable Assy (optional; used with item 35)
5 Front Enclosure Ass’y, E1010, (incl: keypad overlay,
front encl., display window, adhesive backing) 57720-0025
6 Ground Wire Assembly (front panel-to-rear panel)
7 Standoff, Hex, M6 x 1.06” [27.00mm] long, M/F
8 Indicator Stand 56132-0011
9 Enclosure Gasket 57042-0018
10 Rear Enclosure
11 Rubber Foot 56138-0015
12 Acorn Sealing Nut, M6 56844-0010
13 Battery/Power Adapter Bracket
14 Neoprene Washer
15 Neoprene Washer
16 Neoprene Washer
17 Neoprene Plug, .250” [6.35mm] dia. (cut as needed)
18 Nut, M3
19 Strain Relief, M16, (Hummel)
20 Strain Relief, (Hummel)
21 Strain Relief, (Hummel)
22 Neoprene Plug, .354” [9mm] dia
23 Locking Nut
24 Locking Nut
25 Locking Nut
26 Nyloc Nut, M6
27 Standoff, M3 x .472” [12mm] long, M/F
28 Acorn Nut, M6 54008-0058
29 Nut w/ External Lock Washer, M4
30 Screw, M3 x 6mm
31 O-Ring
32 Plastic Knob, M6 68718-147
33 Terminal Block, 4-POS
34 Power Adapter, 100-240VAC/12VDC, 2.2Amp 53984-0058
36 Standoff, M3 x .492” [12.5 mm] long, F/F
37 Friction Washer
38 PVC heat Shrink Tube (VW-1)
39 Set Screw, M6 x 30mm L
40 Lock-Tite, red (not shown)
MODEL E1010 SST INDICATOR
ENCLOSURE PARTS AND ASSEMBLY
(CONTINUED FROM PREVIOUS PAGE)
NOTE TORQUE SPEC:
M6 Acorn Nuts (items 12 and 28) torque in a corner-to-corner
pattern, first to 26 in. lbs. [2.9 N·m], and then to 44 in. lbs. [5.0 N·m].
All other M6 fasteners- 20.0 in. lbs., [2.3 N·m]
All M3 fasteners- 3.5 in. lbs., [0.4 N·m]
SET SCREW REPLACEMENT
Apply “Lock-Tite (red)”
(item 46)
to thread end opposite
of the hex socket end. Using a 3mm hex wrench,
thread set screw into the knob on “ side shown” (Ref.
illustration below) until snug. Repeat this procedure to
replace
set screw
into indicator housing(not the
knob)
for opposite side as shown.

 Loading...


