13
Model E1010 Indicator Service Manual
Service Menu
The first level of the Service menu is shown in Figure 3. Under these nine
items you can do most of the configuration and calibration procedures to
ready the indicator for use. Other items are covered in the Supervisor menu
covered later in this manual
Figure 3
Service menu top level flowchart
Since the whole Service menu is quite large, it has been broken up into its
individual submenus. Each submenu is illustrated below followed by specific
instructions. See Appendix 1: Complete Service Menu to see the whole
menu at once.
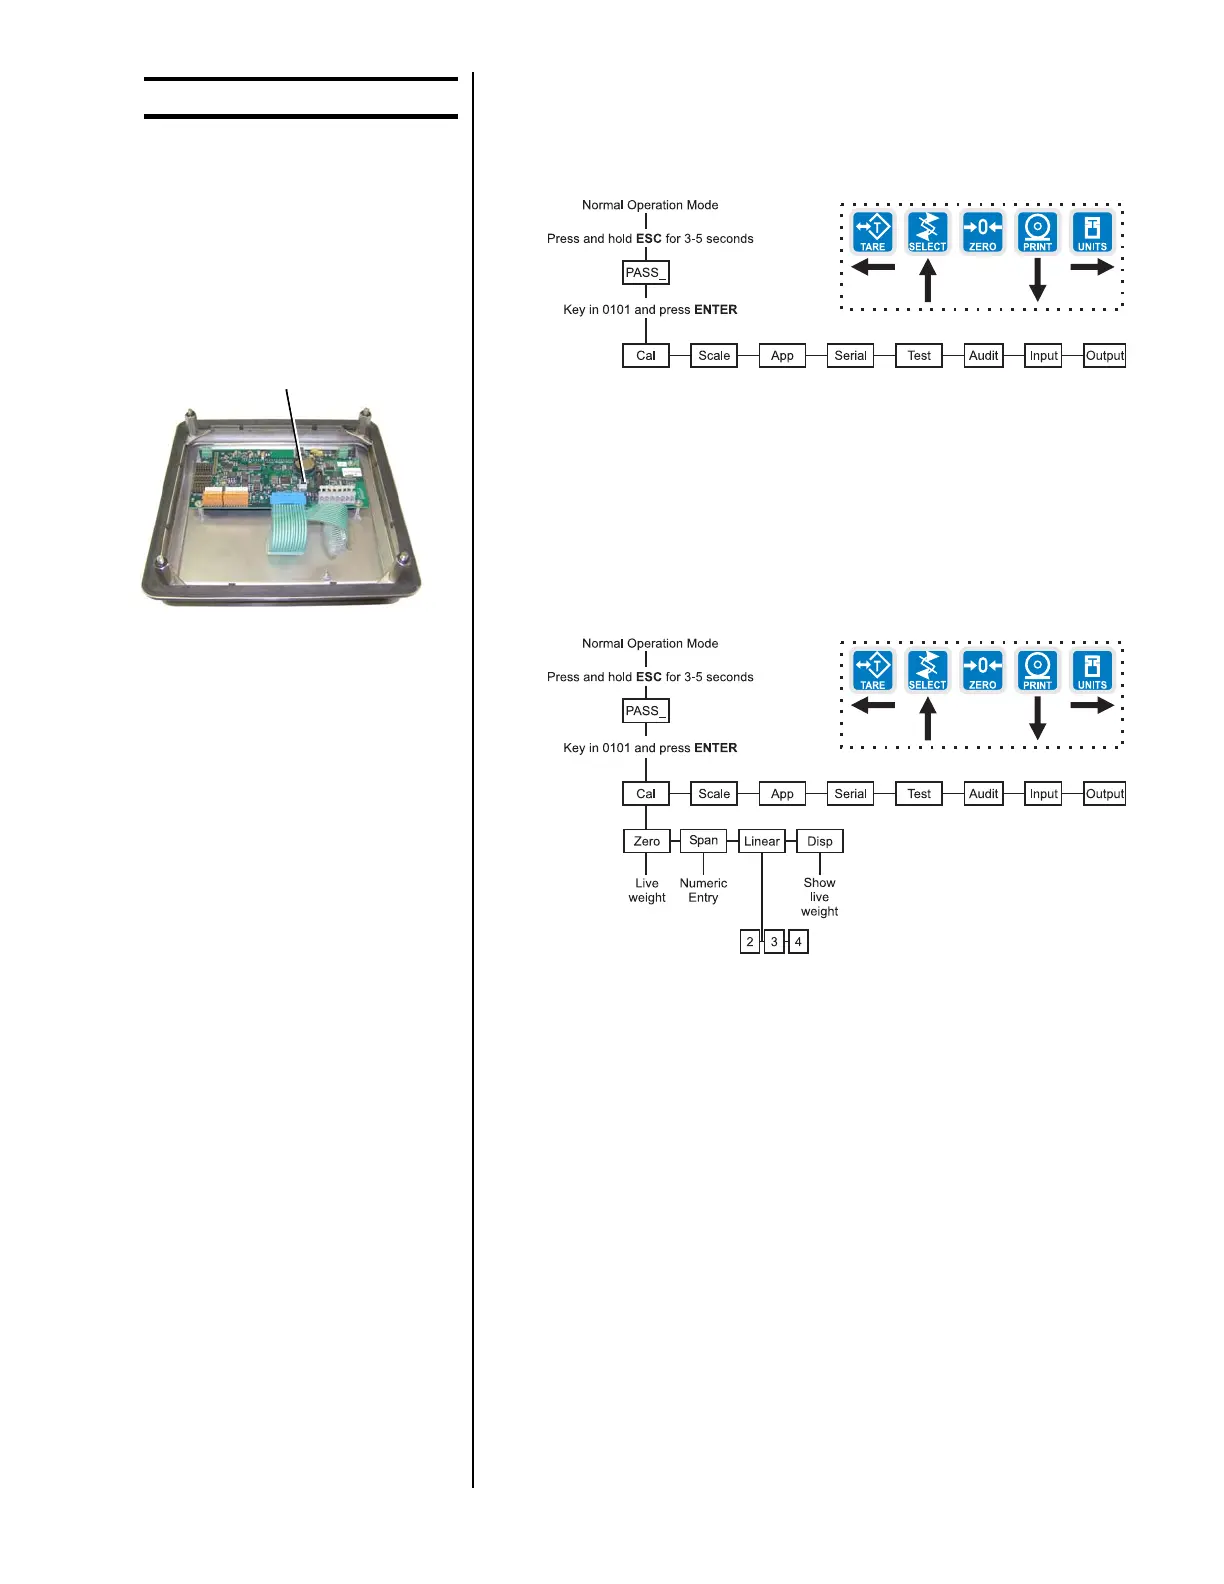
Figure 4
CAL submenu
1. Access the Service menu. . .
CAL is displayed.
2. Press the PRINT key. . .
ZERO is displayed. Use this item to set the zero reference for the
indicator/scale.
3. Remove all weight from the scale and press the PRINT key. . .
Live weight is shown.
4. Press the ENTER key to perform the zero procedure. . .
BUSY is briefly displayed then the live weight which should be 0.
5. Press the ENTER key to save and return to the ZERO menu item. . .
ZERO is displayed.
Password for the Service menu
is 0101.
CAL submenu
ZERO
(Setting Zero Reference Point)
See Appendix 1 to see the
complete Service menu.
Press the ESC key to abort
calibration.
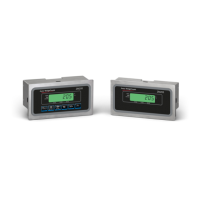
The indicator must be unsealed
to perform calibration. The
indicator is unsealed when
Jumper JP1 is on. It is sealed
with Jumper JP1 removed.
Jumper JP1 must be in place
to unseal the indicator.
 Loading...