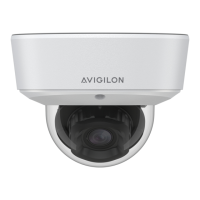
General
When you select Setup, the first page you see is the General page. The General page allows you to set the
camera's identity.
Tip: Features and options are disabled if they are not supported by the camera.
Note: If a camera with video analytics or unusual motion detection is physically moved or adjusted,
or if the focus or zoom level is changed, reset the learning progress to provide accurate results. If the
camera's image rate and compression or display settings are updated, the learning progress may
reset automatically.
1. In the Name field, give the camera a meaningful name.
2. In the Location field, describe the camera's location.
3. Select the Disable device status LEDs check box to disable the LED indicators located on the camera.
4. Select the Lens Distortion Correction check box to enable an algorithm-based automatic correction
of lens distortion. The camera will reboot when applying this setting.
5. From the Mode drop-down list, select the mode that the camera will operate in.
This option is only displayed for higher bandwidth usage cameras.
l
Full Feature — This is the standard operating mode. Offers the full functionality of the camera.
l
High Framerate — This mode will use the maximum image rate possible but will disable self-
learning video analytics, Unusual Motion Detection (UMD), and tamper detection and WDR on
EScameras.
Models Features Impacted by High Framerate
4K (8 MP) H4 HD Analytic
Cameras:
8.0-H4A-x
o
Increased maximum frame rate
o
Self-learning video analytics and tamper disabled
o
Unusual Motion Detection (UMD) disabled
o
Lower resolution tertiary video stream
o
Secondary video stream disabled
H4 HD ES Analytic Cameras:
xx-H4A-xG-x
o
Increased maximum frame rate
o
WDR disabled
General 6
 Loading...