FREQUENTLY-USED FUNCTIONS
23
237
Preset Point
01 ~ 10 Preset point 01 ~ 10
These ten buttons are used for preset point 1 ~ 10.
To set or go to other preset point (such as 15), please enter the numbering manually
in the input box next to , and choose to set the preset point, or to go
to the preset point.
Set preset point
Move the camera view to the point you want to set, and click the numbering you
want from 01 ~ 10, or enter the numbering manually in the input box next to .
Then, click to confirm.
Go to preset point
To go to the preset point from 1 ~ 10, simply click the button.
To go to the other preset point out of 10, enter the numbering manually in the input
box next to , and choose to confirm.
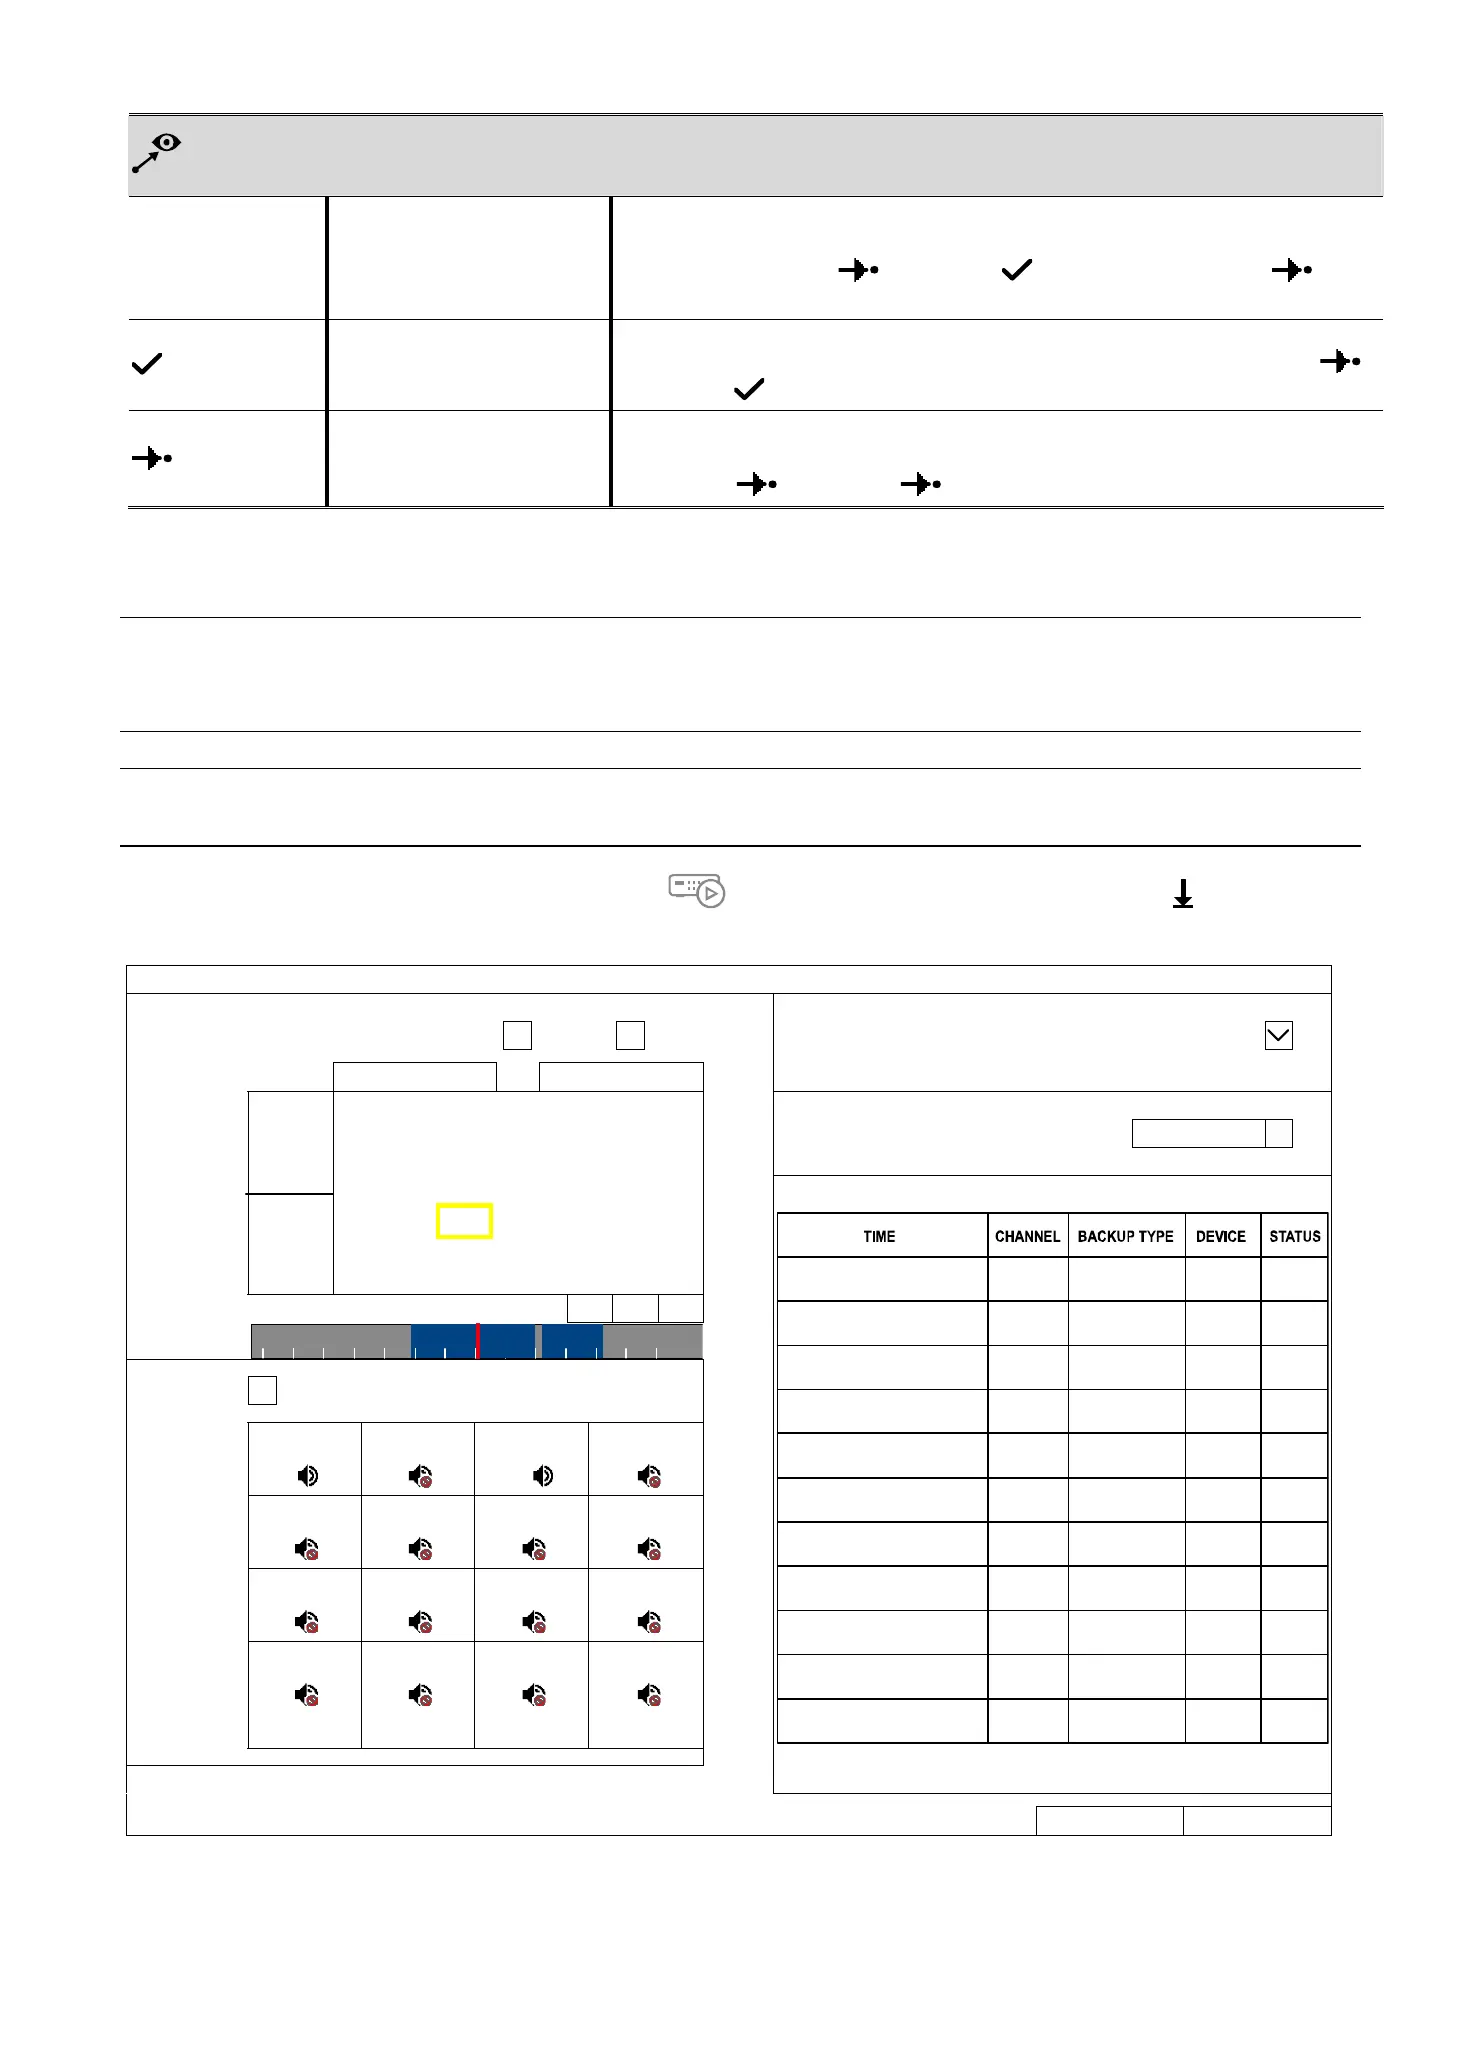
5.4 Video Backup
Note: Before using the USB flash drive, please use your PC to format the USB flash drive to FAT32
format first. For the list of compatible USB flash drives, please refer to “APPENDIX 3 COMPATIBLE
USB FLASH DRIVE LIS at page 75.
Note: For video backup, please use USB flash drive or back your data up over the Internet. It’s NOT
allowed to connect the hard disk to your PC and get the video data directly.
To copy recorded data for video backup, click to go to the playback panel, and choose at the bottom
tool bar to open the backup menu:
BACKUP
SOURCE DESTINATION
DATA TYPE √ VIDEO LOG TARGET USB DEVICE
RANGE
2017/07/18 23:03:52
~ 2017/07/18 23:03:52
AVAILABLE SIZE 3 GB
SUN MON
TUE WED THU FRI SAT STORAGE
1 USB PATH /VIDEO …
2 3 4 5 6 7 8
9 10 11 12 13 14 15
16 17 18 19 20 21 22
23 24 25 26 27 28 29
< 2017 >
< JUL >
30 31
< 23:03:52 > HR MIN SEC
HOURS
CHANNEL ALL
CH1
CH2
CH3
CH4
CH5
CH6
CH7
CH8
CH9
CH10
CH11
CH12
CH13
CH14
CH15
CH16
CANCEL BACKUP
Step1: In SOURCE, choose the data type (VIDEO or LOG) and the time range you want to copy from the
calendar. The date with video recording will be shown in blue.
Step2: In CHANNEL, choose the channel(s) you want.
 Loading...