MAIN MENU
30
307
6.1.5 ALARM OUT
Note: An alarm-out device (such as a buzzer) should be connected to an IP camera first for this
function to take effects. To configure the alarm-out device connected to the recorder itself,
please refer to “6.11.3 ALARM OUT” at page 54.
This function is used when the external alarm-out device is connected to an IP camera. You can configure an
alarm-out device to activate continuously or activate only for a period of time when it’s triggered.
In RESTORE AUTOMATICALLY,
Choose DISABLE to allow the device to activate continuously when it’s triggered unless you switch it off manually
from the alarm-out switch control panel ( ) on the live view.
Choose ENABLE to allow the device to activate only for a period of time (1 / 3 / 5 / 10 / 20 / 30 / 60 / 120 / 180
seconds) when it’s triggered.
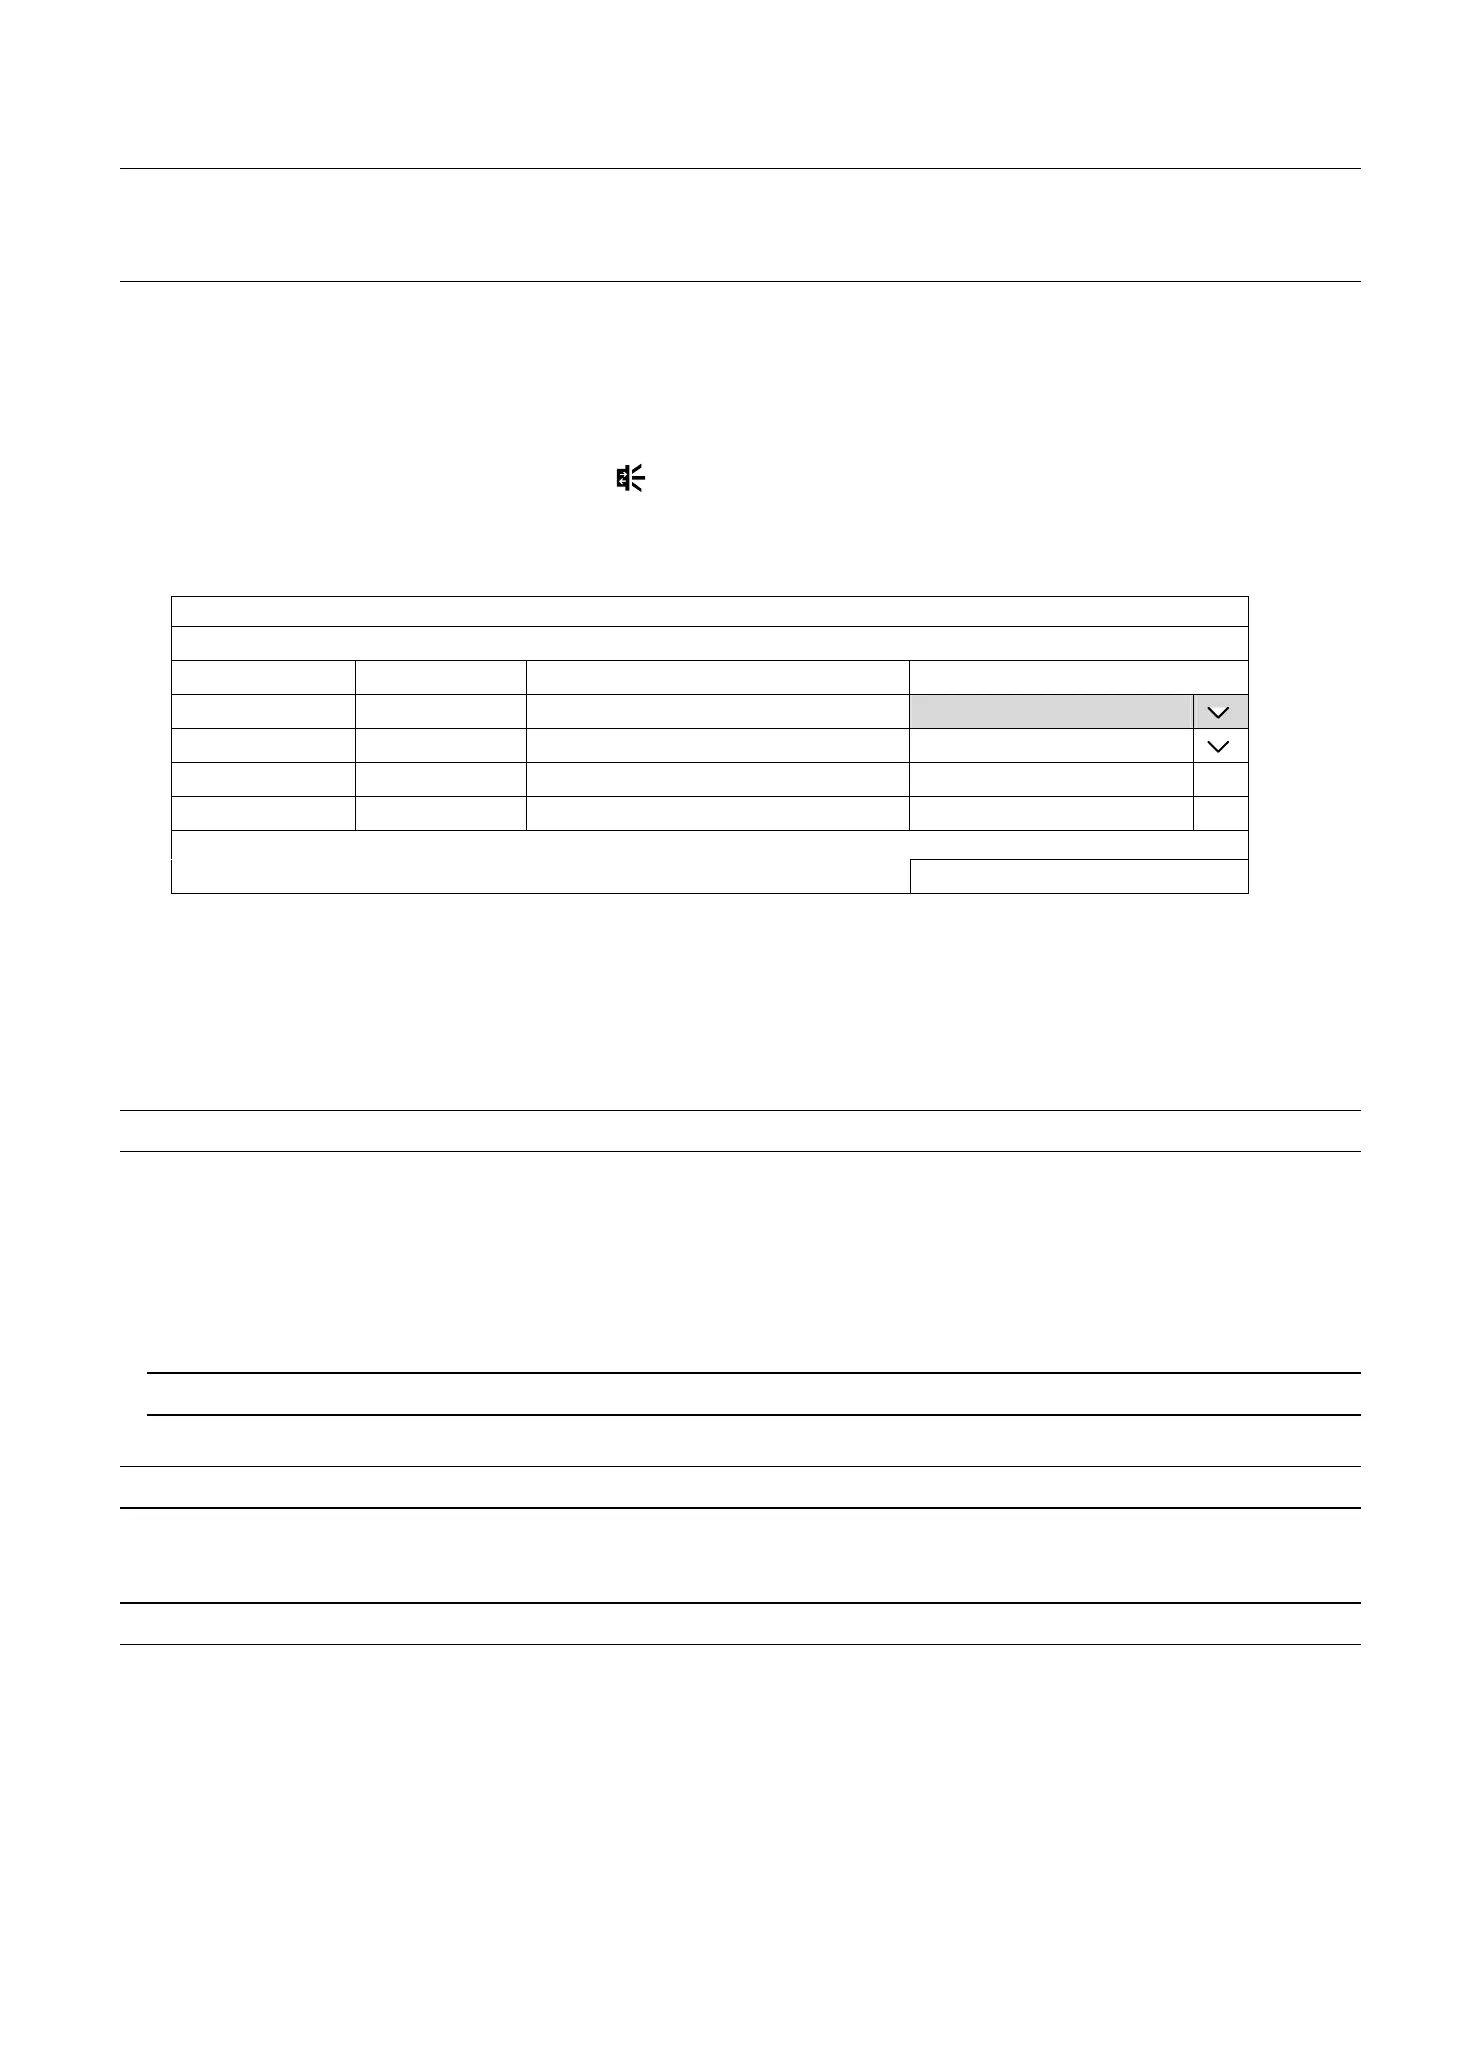
ALARM OUT
CHANNEL TITLE NAME RESTORE AUTOMATICALLY ALARM OUT DURATION (SECS)
CH1 alarmout-ch1 DISABLE 1
CH2 alarmout-ch2 ENABLE 5
CH3
CH4
APPLY
6.2 RECORD
Set the image size, video quality and other related parameters individually for live display, record streaming and
sub streaming.
Note: The settings shown below depend on the setting tab you selected in this setting page.
a) D.O.R (Depend on record): When this option is checked, the video size, quality and other related
parameters will follow the configurations in RECORD STREAM.
b) PROFILE: Select the video profile pre-defined in your IP cameras. You can directly use the profile setting,
or modify the setting on this page.
c) TYPE: Select the compression format for each channel.
Note: The options selectable for TYPE depend on the camera you’re intended to connect.
d) IMAGE SIZE: Select the image size for each channel.
Note: The options selectable for IMAGE SIZE depend on the camera you’re intended to connect.
e) QUALITY: Select the video quality for each channel. The higher the value, the better the image quality.
f) I.P.S.: Image per Second, the higher the value, the more fluent the video.
Note: The options selectable for “I.P.S.” depends on the camera you’re intended to connect.
g) BITRATE (kbps): Select how much data to process per unit of time for each channel. The higher the
value, the better the video quality.
h) BITRATE CONTROL: Configure the upper bit rate limit for the selected channel if necessary.
VBR - When the bit rate of the camera exceeds the value you set, the video fluency may be affected;
CBR - When the bit rate of the camera exceeds the value you set, the image quality may be affected.
i) G.O.V.: “Group of VOPs” is used to configure the length of G.O.V. The greater of the value, the less the
bandwidth for transmission, and the poorer the image quality.
 Loading...