12
AXIS 231D - Installing the AXIS 231D
Manual Installation using ARP and Ping in Windows
Assign your product with a unique IP address from a computer on your network, as
follows:
1. Acquire an unused IP address for the AXIS 231D from your network administrator.
2. Connect a standard network cable to your AXIS 231D and connect it to the network.
3. Locate the serial number/MAC Address (S/N) found on the label on the AXIS 231D.
4. From a computer on your network, open a Command Prompt, i.e. from the Windows
Start menu, select Run... and type cmd in the field. Click OK.
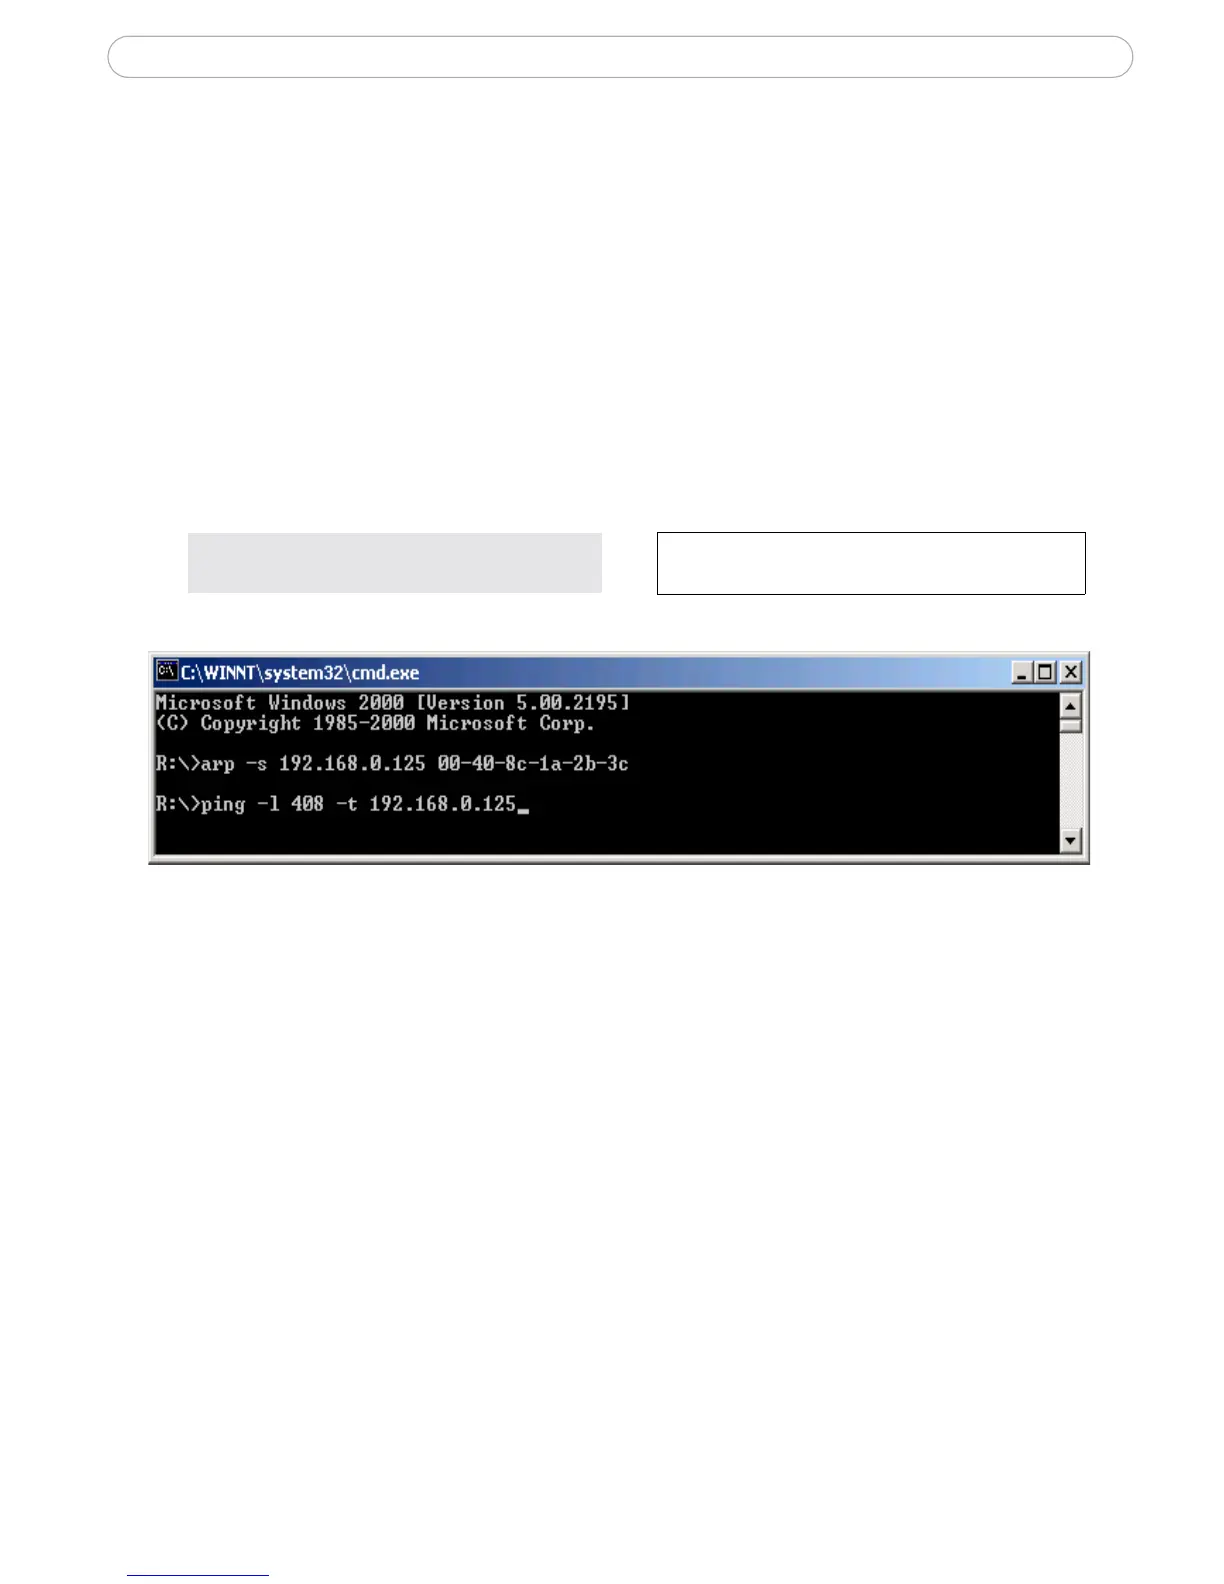
5. Enter the commands:
Syntax:
Example
6. Connect the power to the AXIS 231D.
7. When ‘Reply from 192.168.0.125: ...’ is displayed (approximately 10-15 seconds),
type Ctrl+C to close the ARP Ping session.
8. Start a Web browser and enter the IP address in the Address/Location field.
9. Press Enter.
10.Enter a new password for the root user (administrator).
11.If required, accept the installation of AMC onto your workstation. See AXIS Media
Control (AMC), on page 10 for more information.
12.The installation is now complete, proceed to Using the Network Dome Camera, on
page 15.
arp -s <IP address> <MAC address>
ping -l 408 -t <IP address>
Note: The ping command is
followed by -l (lower case L)