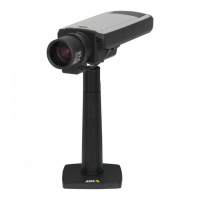
AXIS Q1602 Network Camera
Video and Audio
An overlay text can display the current date and time, or a text string. When using a text string, modifi ers can be us ed to display
information s uch as the current bit ra te or the cur re nt frame rate. For inform ation about available modifiers, see
File Naming &
Date/Time Formats
in the online help .
To enable overlays:
1. Go to Video & Audio > Video Stream and select the Image tab.
2. To include an overlay image, select Include overlay image at the coordinates. The overlay image m ust first be uplo aded to
the Axis product, see
Overlay Image
.
3. To include date and time, select Include da te and Include time.
4. To include a text string, select Include text and e nter the text in the field. Mo difiers can be used, s ee
File Naming &
Date/Time Formats
in the o nline he lp .
5. Select the text color, the text backg round color and the position of the overlay.
6. Click Save .
Tomodifythedateandtimeformat,gotoSystem Options > Date & Time.See
Date & Time, on page 36
.
Overlay Image
An overlay image is a static image superimposed over the video stream. The im age, for example company logo, is used to provide
extra information or to mask a part of the image.
To use an overlay image, the image must first be uploaded to the Axis product:
1. Go to Video & Audio > Overlay Image.
2. Click Browse andbrowsetothefi le.
3. Click Upload.
4. Select the image to use from the Use overlay image list.
5. Click Save .
To display the overlay image:
1. Go to Video & Audio > Video Stream and select the Image tab.
2. Under Overlay Settings,selectInclude overlay image at the coordinates and enter the X and Y coordinates.
3. Click Save .
For information about supported image formats, see the online help
.
Privacy Ma sk
A privacy mask is an area of solid colo r that prohibits users f ro m viewing parts of the monitored area. Privacy masks cannot be
bypassed via the VAPIX® Application Programming Interface (API).
The Privacy Mask List (Video & Audio > Privacy Mask) s hows all the masks that are currently configured in the Axis pro duct and
indicates if they are e nabled.
You can add a new mask, re-size the mask with the mouse, choose a color for the mask, and give the mask a name.
For more i nformation, see the online help
19