Axon Fleet 3 Installation Guide
Axon Enterprise, Inc. Page 16 of 47
o High to Low Transition: 2.5 s
• Do not wire the Fleet 3 Hub to any pulsing/bouncing/intermittent 12V signal
inputs (ex. Lightbar). Ensure that the Fleet 3 Hub receives steady and constant
12V+ when the input is active/high.
Determining a Mount and Wiring Plan
Use the following guidelines to locate the Dual-View Camera, Interior Camera, Hub, Axon
Signal Vehicle unit, router, MDC, and Interior Antenna mounting locations.
• The Dual-View Camera is commonly mounted facing out the front windshield.
• The Interior Camera is commonly mounted on the prisoner partition, facing the
prisoner compartment.
• The Hub and Axon Signal Vehicle (ASV) unit are best mounted near each other. The
ideal location is near the siren/light controller unit since this is typically where most
activation sources originate. There should also be a good source of battery power
near this location.
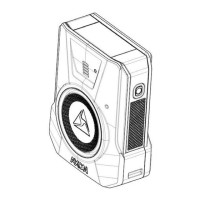
Hub Mounting: The Hub is equipped with narrow air vents on the top and bottom of
the front cover. Do not block the air vents.
• Locate electrical inputs
o Axon recommends you use the included Power and Signal Harness.
o Locate 12V power source for the Hub, router, and ASV.
o Locate an electrical ground.
o Locate ignition sensing source for the Hub and router.
o Locate any Signal 12V input wires used for triggering camera activation or
Video Overlays (lightbar, door trigger, etc.)
o (Optional) If installing brake sensing, also locate a 12V brake power source.
• Determine the mounting location of the Interior Antenna. It must be mounted with
an unobstructed view of the sky. Common locations include:
o Rear deck, behind the rear seat headrests in a sedan.
o On the third row (fixed) window in an SUV.
 Loading...

