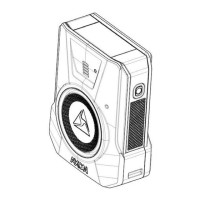
Axon Fleet 3 Installation Guide
Axon Enterprise, Inc. Page 47 of 47
You will need an Axon BWC registered to the same agency as the Fleet 3 system.
• On the Settings page, tap Add Body Camera and follow the prompts to pair the
BWC.
• Navigate to the Devices page by tapping the camera icon.
• Locate the BWC panel and tap the full screen icon in the right-hand corner of the
panel. This initiates a live view of the BWC camera. Confirm the camera is streaming
on the Dashboard. End the camera view.
• Tap Record in the BWC panel to initiate a recording. Tap Stop a few seconds later to
end the recording.
• Navigate to the Videos page by tapping the video media icon. Confirm the BWC
recording is present in one of the incidents.
Test the Priority Upload functionality for at least one vehicle in the installation group.
Add metadata to the BWC recording and tap the Prioritize Upload toggle. The BWC
must stay near the vehicle and the Fleet 3 system must not power down during the
test. Confirm the evidence completes uploading to Axon Evidence.
6. Check Signal Configuration.
• Activate trigger inputs and check status. Trigger each configured input (lightbar,
door, etc.). Check the camera LEDs or Dashboard to confirm the correct cameras
activate. End the recording before moving to the next trigger. Note that you must
wait 30 seconds between each trigger.
If an Axon Signal Vehicle (ASV) device is installed in the vehicle, verify nearby BWCs
begin recording when the appropriate trigger is activated.
• If any inputs are configured to log status and not activate cameras, continue with a
Log Status input check: start a recording, trip each status trigger and end the
recording. Upload the recording to Axon Evidence. Sign into Axon Evidence and go
the Hub device page for the current vehicle. Open the device audit trail. Confirm
each configured trigger input has an entry with the structure: {input label}, 12V input
{input pin}, active.
7. If enabled at the agency, check the Automated License Plate Reader (ALPR) functionality.
• On the Dashboard, go to the ALPR page by tapping the ALPR icon. Navigate to the All
Reads section.
• Aim the Dual-View camera at a vehicle’s license plate and observe that the license
plate read displays in Fleet Dashboard.

 Loading...