8-2
Chapter 8. PID CONTROL TUNING
The AT (auto tuning) function is used in the following cases:
• The PID constants are set automatically with the control method set at “Fixed PID” ([CtrL = 1]).
• The PV rise is slow or overshoot is large in the control with the PID constants, which have been set automatically
using the ST function.
• The PV rise becomes slow or overshoot becomes large with the control method set at ST ([CtrL] = 2).
The AT function can be used when the control method is set at either “Fixed PID” ([CtrL] = 1) or ST ([CtrL = 2]).
Starting procedures
(1) Make sure that the PV input or operation end (heater power, etc.) is
controllable.
(2) Make sure that the mode indicator [rdy] is off and the operation is in the RUN
mode. If the indicator [rdy] is lit and the operation is in the READY mode,
change the mode to the RUN mode.
With the default settings before shipment, when the [mode] key is kept
pressed for 1 sec. or longer, the RUN/READY mode selection can be made.
(3) Make sure that the mode indicator [man] is off and the operation is in the
AUTO mode. If the indicator [man] is lit and the operation is in the MANUAL
mode, change the mode to the AUTO mode.
With the default settings before shipment, the AUTO/MANUAL mode
selection can be performed using the parameter setting, AUTO/MANUAL [A
-- M].
(4) Set the parameter setting [AT Stop/Start] to “AT start ([At] = [At.On]) ”.
Stopping procedures
The AT function is completed automatically. To stop the AT function, which is
running, change the parameter setting [AT Stop/Start] to AT stop ([At] = [At.OF]).
Additionally, the AT function is stopped when changing the READY mode to the
MANUAL mode.
z
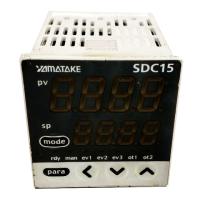
Display during execution of AT
The decimal point at the 1st digit of the display No. 1 (right end digit) flashes twice
repeatedly while the AT function is running. When the AT function is completed
and the PID constants are changed, this LED goes off.
rdy
man
ev1 ev2 ev3 ot1 ot2
para
mode
pv
sp
LED
8 - 1 AT (auto tuning) Function