7. Cold mirror assembly
7.3 Replace the Cold Mirror
Necessary tools
• 7mm nut driver.
• 7mm open-end wrench.
• 3mm Allen wre nch.
• Latex or cotton gloves.
• Slide caliper.
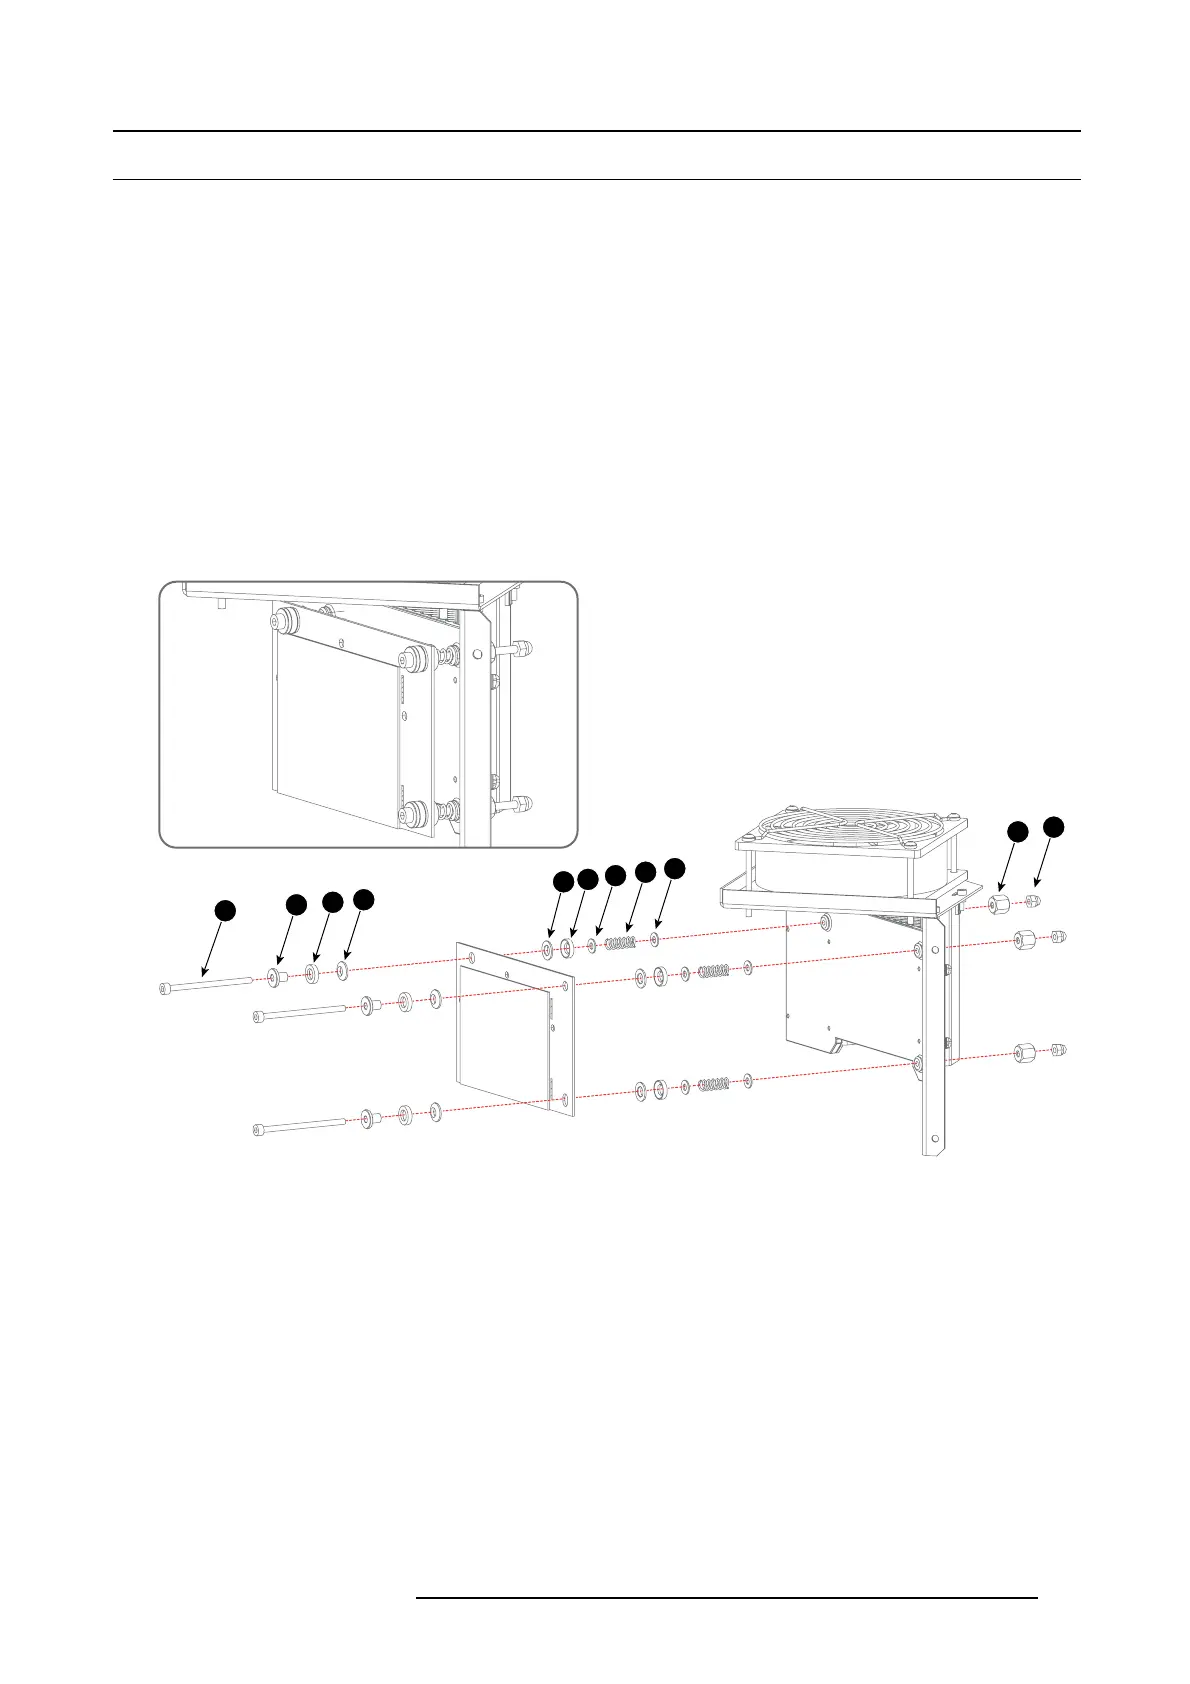
How to replace the Cold Mirror?
1. Loosen the three nuts ( reference 11) at the rear side of the Cold Mirror. Use a 7mm open-end wrench.
2. Loosen the three lock nuts (reference 10) at the rear side of the Cold Mirror. Use a 7m m open-end wrench.
3. Loosen the three long sc rews (reference 1) at the front side of the Cold Mirror. Use a 3 m m Allen wrench.
4. Remove the small c ompone nts (reference 5, 6, 7, 8 & 9) from the long sc rews (r eference 1) and take of the C old Mirror.
5. Install the new Cold Mirror. E nsure that all mounting parts (reference 1 to 9) upon the three long screws ar e placed in that order
as illustrated.
Caution: Do not touch the surface of the Cold Mirror. Use cotton gloves t o handle the Cold Mirror.
11
10
9
8
7
6
5
4
3
2
1
Image 7-5
6. Tighten the three long screws until the distance b
etween the Cold M irror and frame is 17.4mm. Tighten the lower lock nut until
the distance between the C old Mirror and the frame is 17.4mm.
R5905043 DP2K-12C/11CX 19/02/2018
127

 Loading...


