15. Power input
15.4 Replacement of the mains input filter
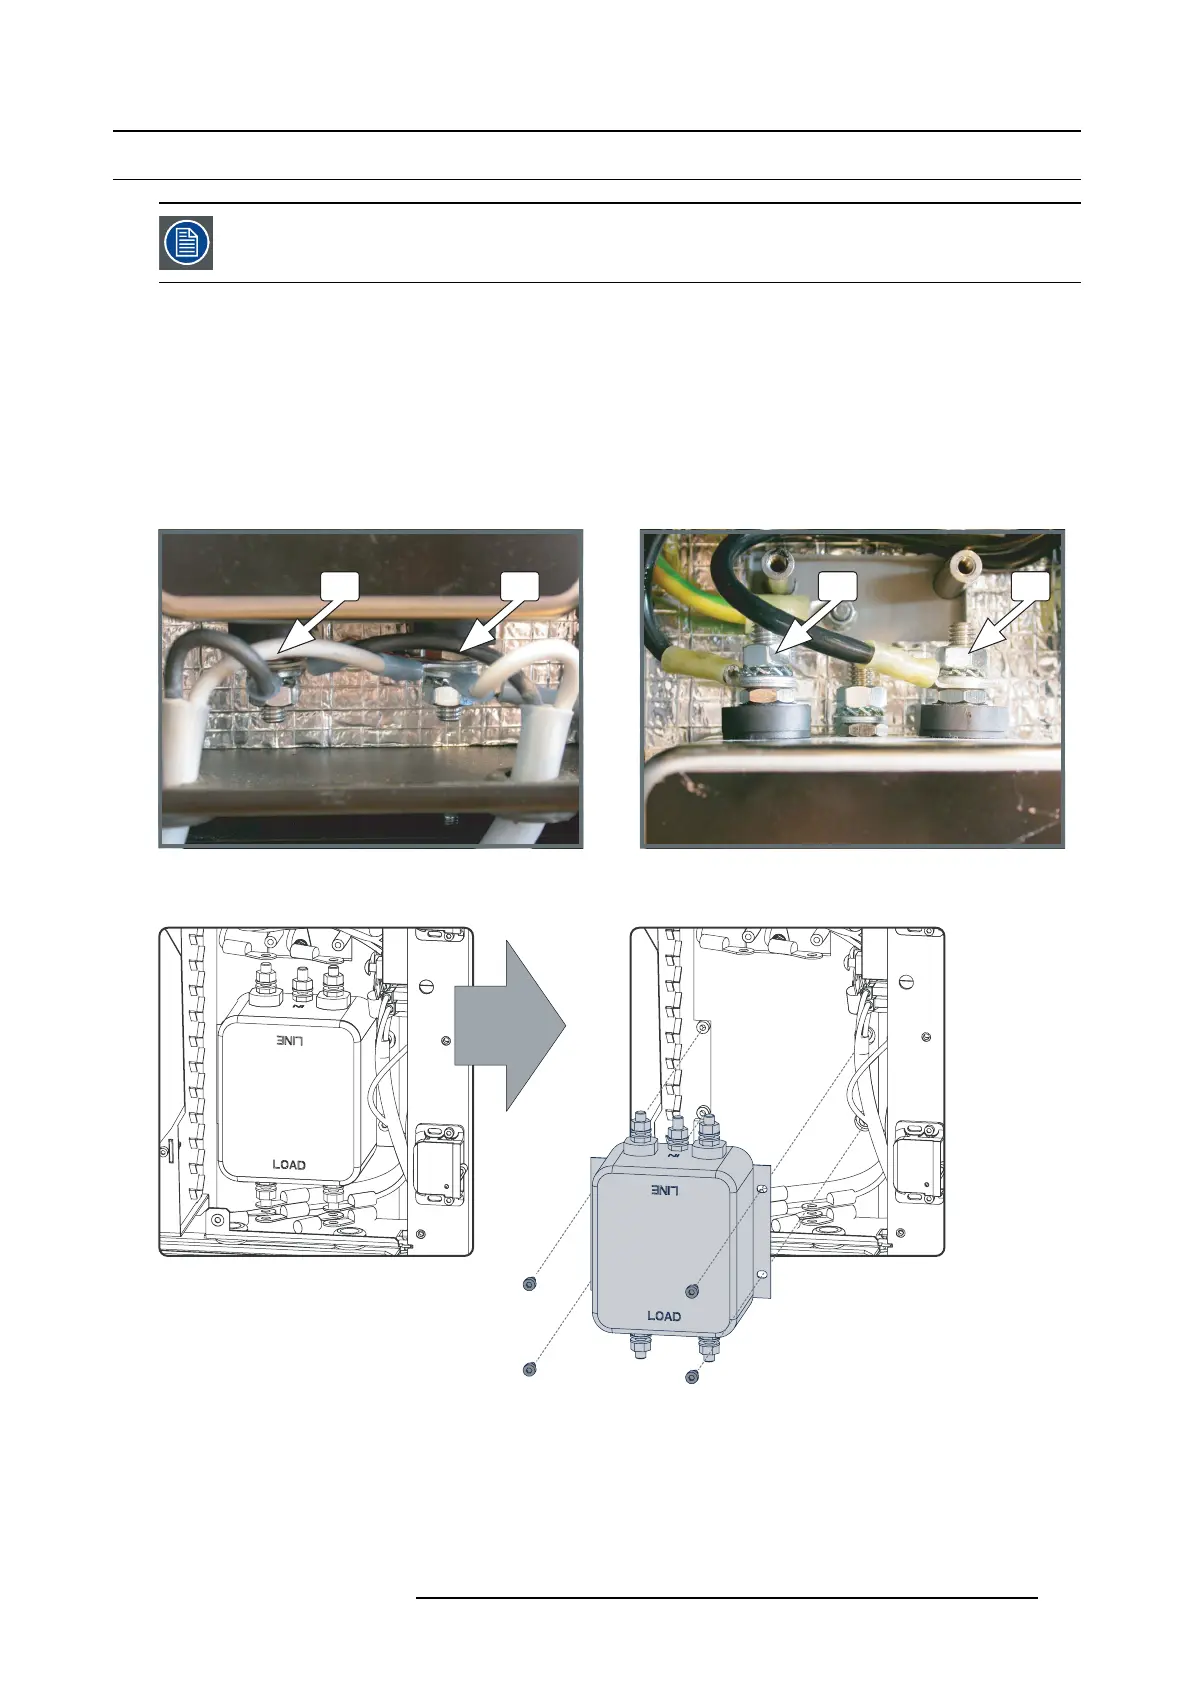
This procedure assumes that the M ains Inpu t comp onents a re accessible.
Necessary tools
• 3 mm Allen w rench.
• 10 mm open-end wrench.
How to replace the mains input filter
1. Remove both nuts on the “LOA D” side (reference A and B of image 15-8) of the m ains input filter and slide off all eye connections.
Do not drop the lock washers in the projector. Use a 10 mm open-end wrench.
2. Remove both nuts on the “LINE” side (reference C a nd D of image 15-8) of the mains input filter and slide off all eye connections.
Do not drop the lock washers in the projector. Use a 10 mm open-end wrench.
A B C D
Image 15-8
LOAD connections
3. Remove the mains input filter by releasing the four hexagon socket head cap screws as illustrated. Use a 3 mm Allen wr ench.
Image 15-9
Mains input filter removal
4. Place a new mains input filter on its position and fasten with four hexagon socket head cap sc rews. Mak e sure that the “LO AD ”
side is facing downwards. Use a 3 mm Allen wrench.
5. Connect the wires with the sam e colors of the LPS cables and the w ire from t he mains output with the “LOAD ” side of the mains
input filter (reference A and B of image 15-8). First slide the eye connections of the wires over the pin (same colors together),
then s lide a wa sher followed by a lock w asher over the pin and secure with a nut. Use a 10 mm open-end w rench.
R5905043 DP2K-12C/11CX 19/02/2018
273

 Loading...


