7. Cold mirror assembly
7.5 Adjusting t he cold mirror
The position of the xenon bulb in its reflector effects the position of the cold mirror with respect to the entrance
of the integration rod. Hence the adjustment of the cold mirror requires simultaneous adjustment of the xenon
bulb in its reflector for maximum light output. Once the cold mirror and xenon bulb are optimally adjusted,
the cold mirror should never be adjusted again. A xen on bulb rep lacement o nly requires realignment of the
lamp in its reflect or. O n ly when a cold m irror is replaced, should it be read justed.
Necessary tools
• 10 mm open-end wrench.
• 7 mm nut driver.
• Light meter.
• Slide caliper.
How to setup the projector for adjusting the cold mirror?
1. Remove the left cover and lam p cover of the projector.
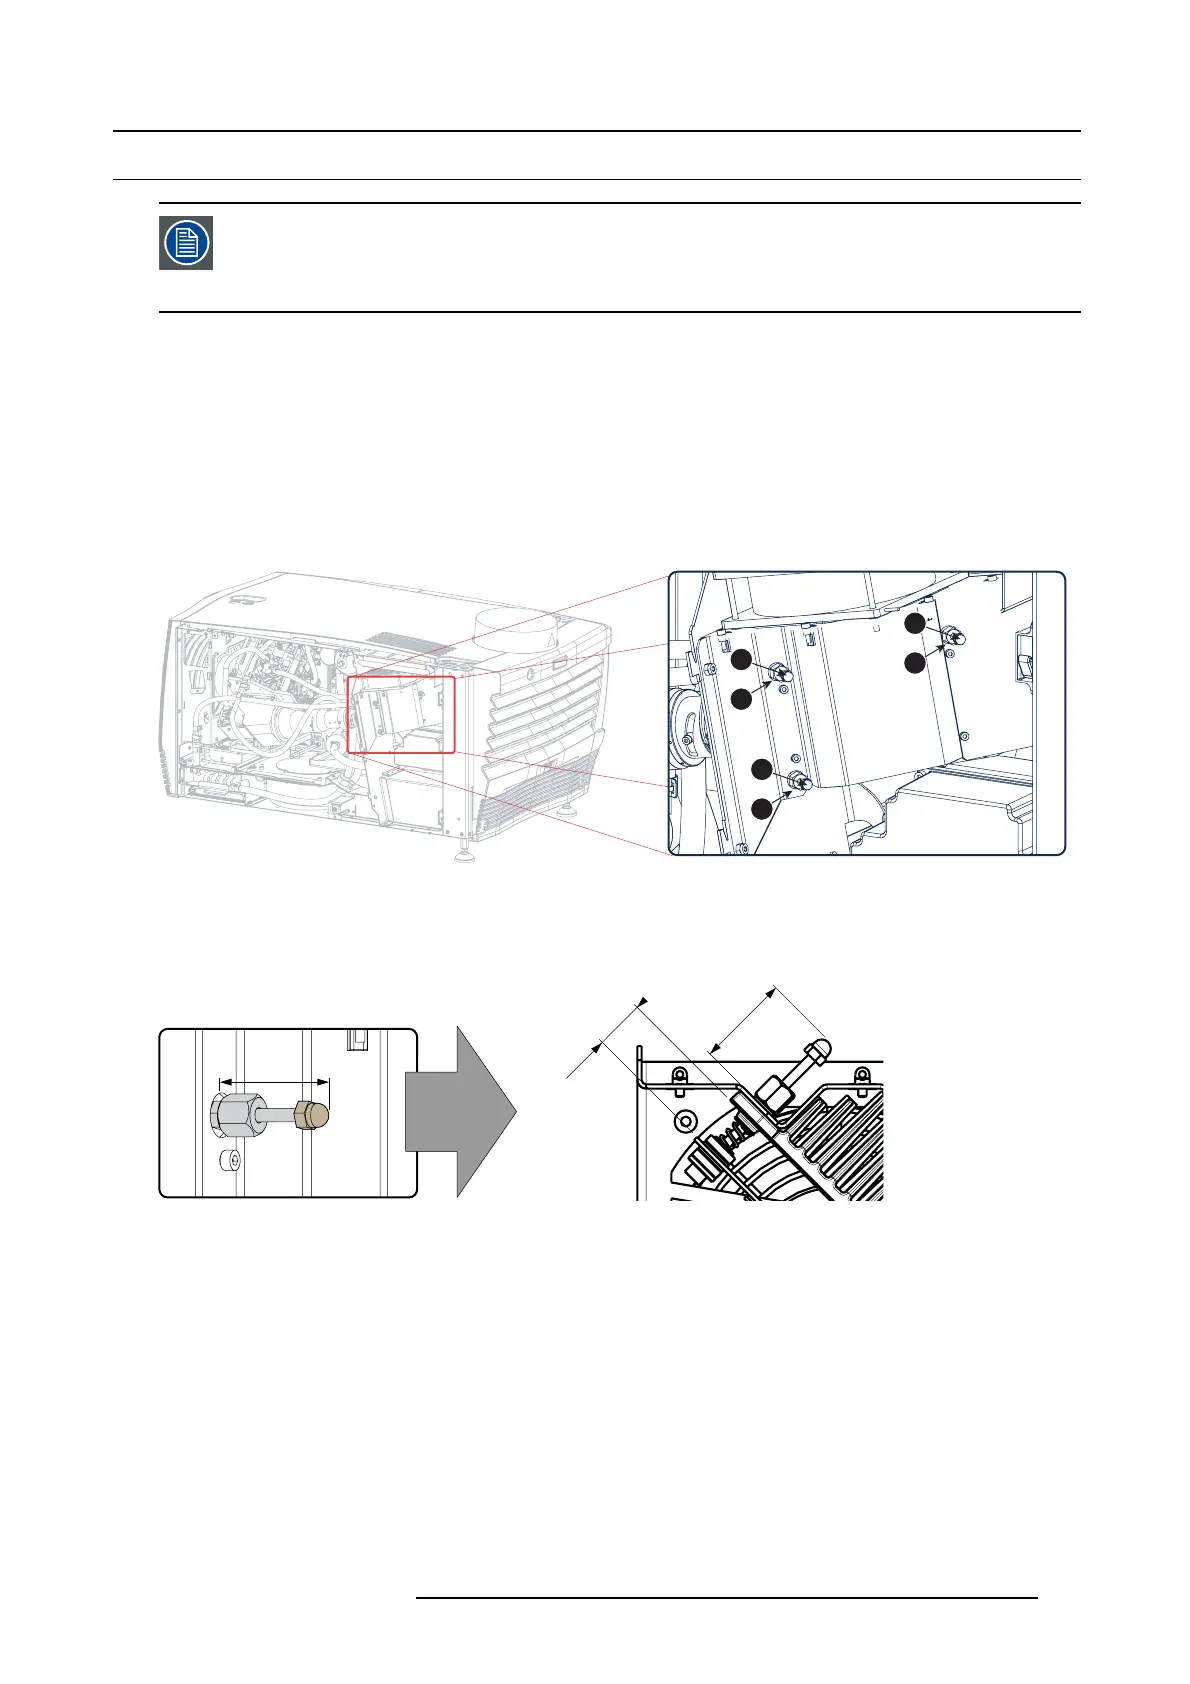
2. Loosen the three lock nuts (reference 4 image 7-10) of the cold mirror adjustment screws. Us e for that a 10 mm open-end wrench.
3
4
1
4
2
4
Image 7-10
3. Check the nom inal position of the cold mirror an d if required adjust. The distance between the head of the each adjustment screw
(reference 1, 2 & 3 im age 7-1 0) and the assembly plate should be 32,5 mm for nominal position. This distance corresponds with
17,4 mm between the cold m irror and its mounting surface. This nominal position is the best pos ition to s tart the adjustment
procedure. Normally the c old mirror s pare part is d elivered with the cold m irror in its nom inal position.
17,4
32,5
32,5
Image 7-11
4. Project a white test pattern.
5. Place the light meter in the center of the projec ted image.
How to adjust the cold mirror?
1. Tu rn the adjustment screw 2 (reference 2 image 7 -12) in or out until the maxim um light output is me asured. Use for that a 7 mm
nut driver.
R5905043 DP2K-12C/11CX 19/02/2018
131

 Loading...


