3. ICMP installation
3. ICMP INSTALLATION
About this chapter
This chapter describes how to upgrade the Barco projector with the ICMP or to replace an installed ICMP
in the field.
After the ins tallation, it is strongly re commended to backup the settings in a file so that
they are available for later use in case the ICMP has to be swapped.
Overview
• Process overview of ICMP installation
• Preparing the projector for ICMP upgrade
• Installing the ICMP
• Installing a HDD into the ICMP
• Obtaining the Barco ICMP certificate
• Removing a HDD from the ICMP
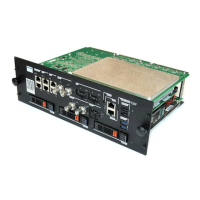
3.1 Process overview o f ICMP ins tallation
Process overview
1. Mechanical upgrade:
a) Prepare the projector for ICMP installation: First create a full backup clone package! Then, make
free the ICP and IMB slot and remove the partition plate between these two slots. See procedure
"Preparing the projector for ICMP upgrade", page 30.
b) Install the ICMP into the Card Cage of the projector. See procedure "Installing the ICMP", page 32.
c) In case the HDDs of the ICMP are delivered separated from the projector remove the protection
tape from the HDD input slots and install all three HDDs as described in the procedure "Installing
a HDD into the ICMP", page 33. Make sure that all HDDs in the ICMP HDD set have the same
storage capacity. See label on top of the HDD to know the storage capacity.
R5905722 ICMP 09/11/2016
29
 Loading...