4. Lamp & Lamp House
5
Image 4-33
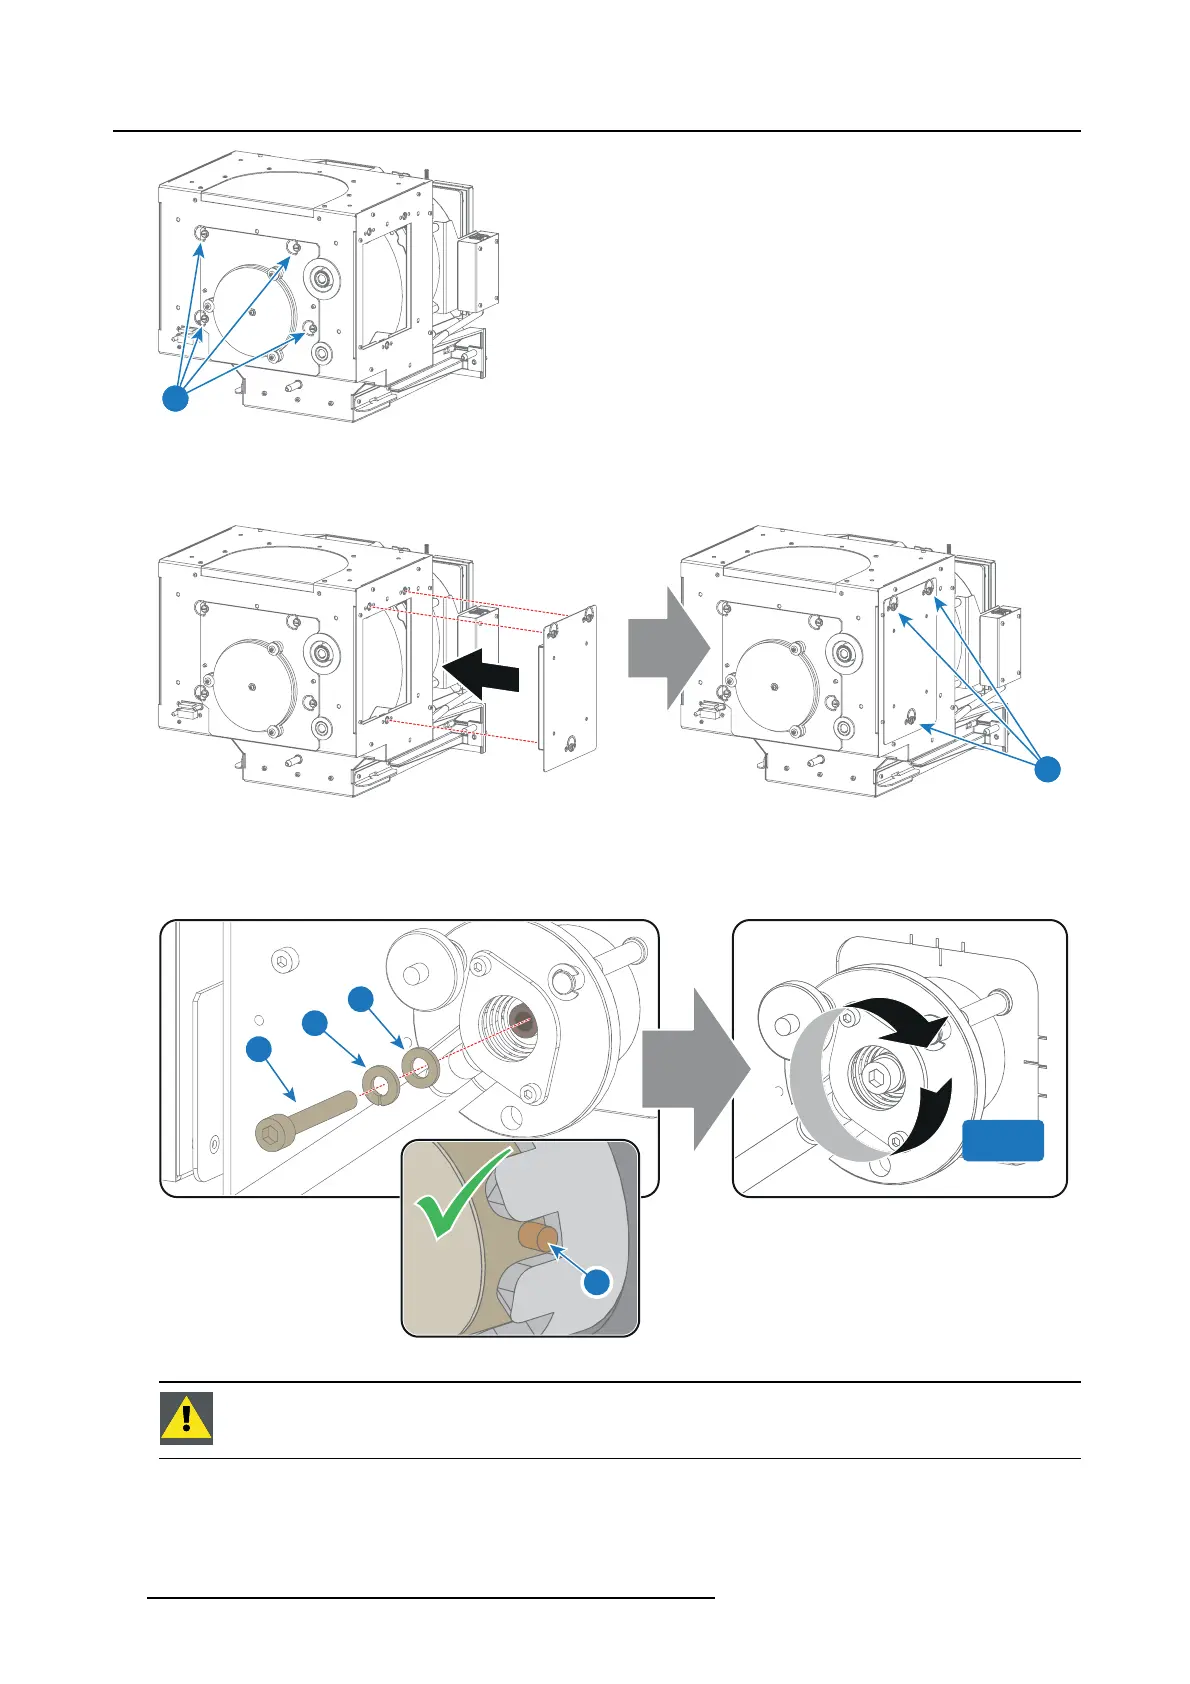
8. Install the side cover of the Lamp Hous e and fasten the three quarter turn sc rews (reference 4 image 4-34) of the cover.
Note: Please e nsure that the quarter turn screws turning wires are flush with the cover or interferenc
e will o cc ur while inserting
the Lamp H ouse into the projector.
4
Image 4-34
9. Secure the xenon lamp cathode with the hexagon sock et head cap screw (reference 1 image 4-35), spring washer (reference 2
image 4-35) a nd pla in wa sher (reference 3 image 4- 35). Fasten the screw with a torque of 5Nm(3,7 lbf*ft). Use a torque wrench
with a 5 mm Allen socket.
Caution: Make sure that both pins (reference 11 image 4-35) of the cathode adapter remain engaged in the foreseen slots.
5 Nm
3
2
1
11
Image 4-35
CAUTION: The “LA M P INFO” parameters which are stored on a ch ip inside the Lam p House MUS T be updated
after e ach installatio n o f an xen on lamp inside the Lam p H ouse. Neglecting this update will resu lt in poor
perform ance and short li f e time of the xen on lamp.
56 R5905963 PROMETHEUS SERIES 09/03/2015