9424200996 2-3
BE1-11m Quick Start
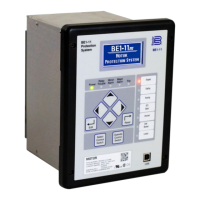
Figure 2-1. Front Panel Label Example
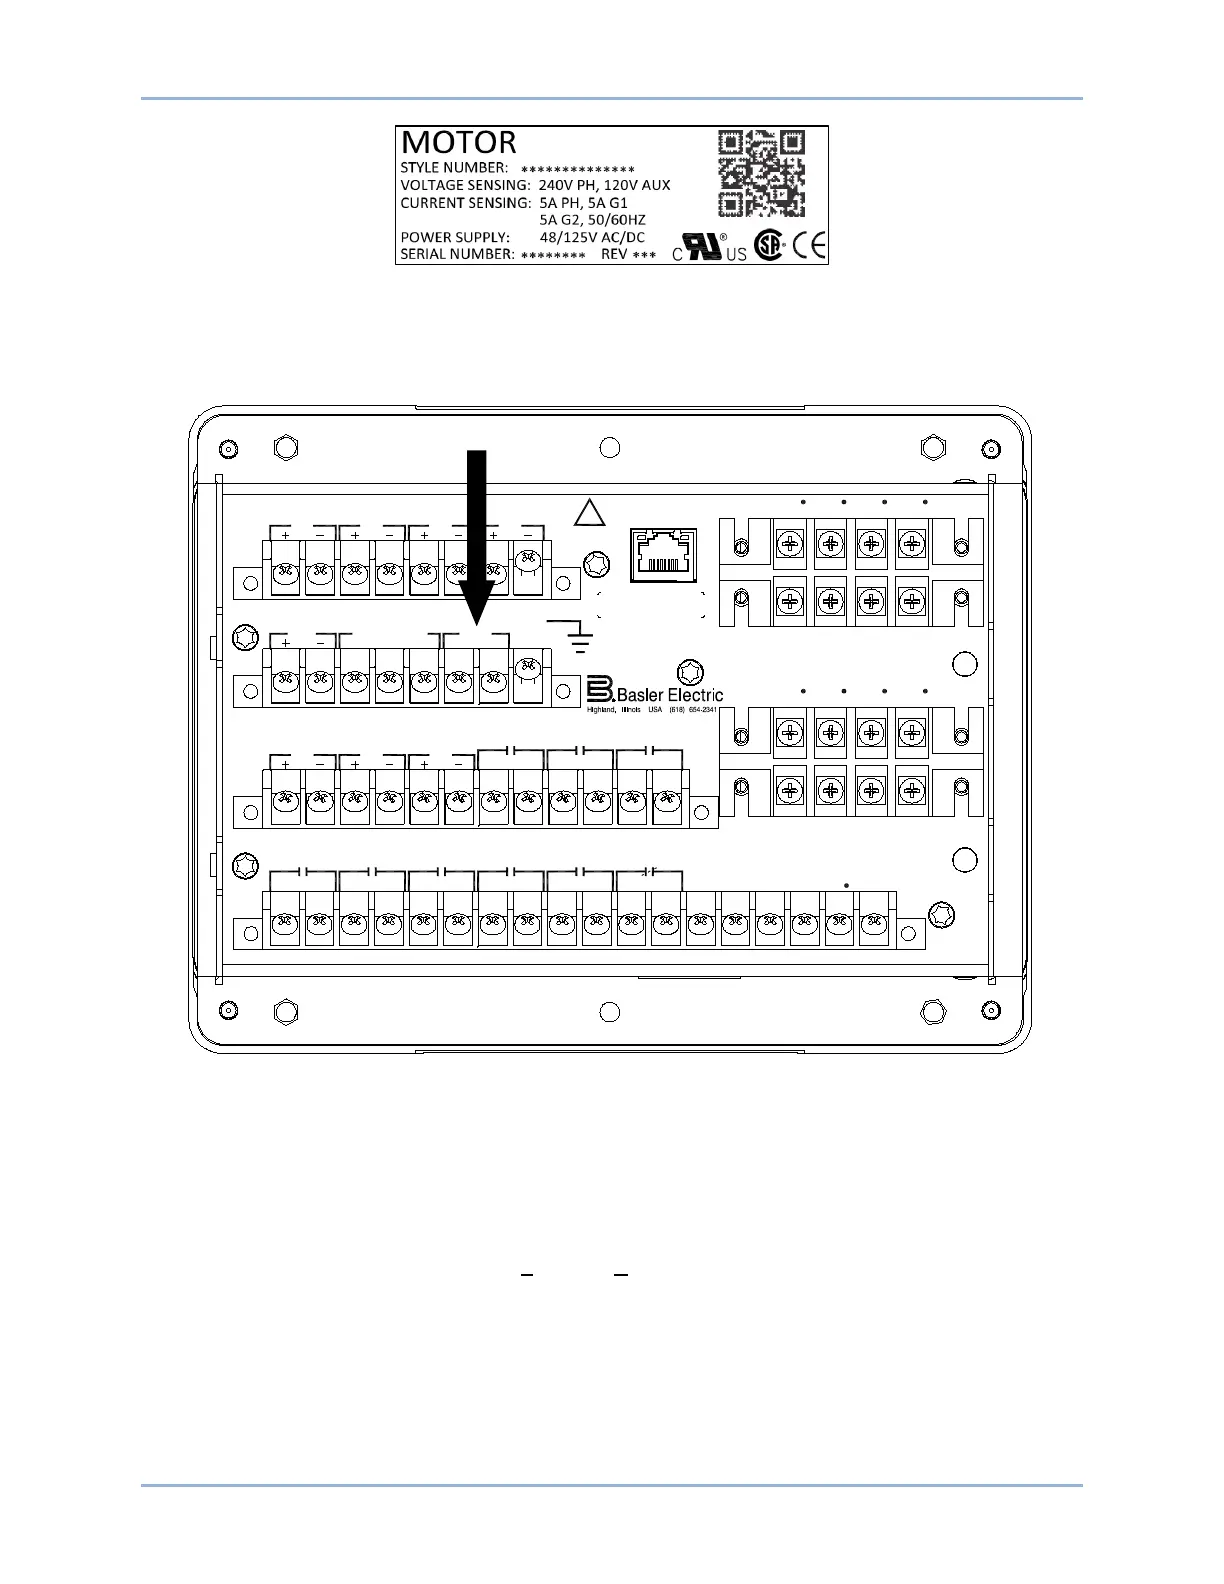
Connect rear terminals A6, A7, and A8 (ground) to a power supply. Figure 2-2 shows the rear terminals of
the BE1-11m with standard I/O option. Apply operating power consistent with the nominal power supply
values listed on the front-panel label. Wait until the boot sequence is complete.
Figure 2-2. PWR Rear Terminals
Start BESTCOMSPlus® and Activate BE1-11 Plugin
To start BESTCOMSPlus, click the Start button, point to Programs, Basler Electric, and then click the
BESTCOMSPlus icon. During initial startup, the BESTCOMSPlus Select Language screen is displayed
(Figure 2-3). You can choose to have this screen displayed each time BESTCOMSPlus is started, or you
can select a preferred language and this screen will be bypassed in the future. Click OK to continue. This
screen can be accessed later by selecting Tools and Select Language from the menu bar.
ETHERNET
!
WARNING
BE1-11
C12C11
C10C9C8C7C6C5C4
C3C2C1
C13 C14 C15 C16 C17 C18
V
A
OUT 2 OUT 3
OUT 4
OUT 5OUT 1 ALARM V
B
V
C
V
X
V
X
N
E12E11
E10E9E8E7E6E5E4E3E2E1
OUT 8 OUT 7
IN5 IN6
IN7
OUT 6
A8A7A6
A5A4A3
A2
A1
IRIG PWR
CA B
COM2 RS-485
GND
B8B7B6B5B4B3B2B1
IN1
IN2
IN3
IN4
D1 D3 D5 D7
I
A1
I
B1
I
C1
I
G1
I
A1
D2 D4 D6
D8
I
B1
I
C1
I
G1
I
A2
F2
F4 F6 F8
I
B2
I
C2
I
G2
F1 F3 F5
F7
I
A2
I
B1
I
C2
I
G2
P0061-43