Setup Program
61
> Press the switch again to activate the securing stitches at the start.
– If the embroidery motif has programmed securing stitches, they will be embroidered.
– If the embroidery motif doesn't have any programmed securing stitches, the securing stitches are
added and will be embroidered.
> Press the switch in the lower right section to deactivate the securing stitches at the end.
– If the embroidery motif has programmed securing stitches, they will be embroidered.
– If the embroidery motif doesn't have any programmed securing stitches, none are embroidered.
> Press the switch again to activate the securing stitches at the end.
– If the embroidery motif has programmed securing stitches, they will be embroidered.
– If the embroidery motif doesn't have any programmed securing stitches, the securing stitches are
added and will be embroidered.
Adjusting the thread cut
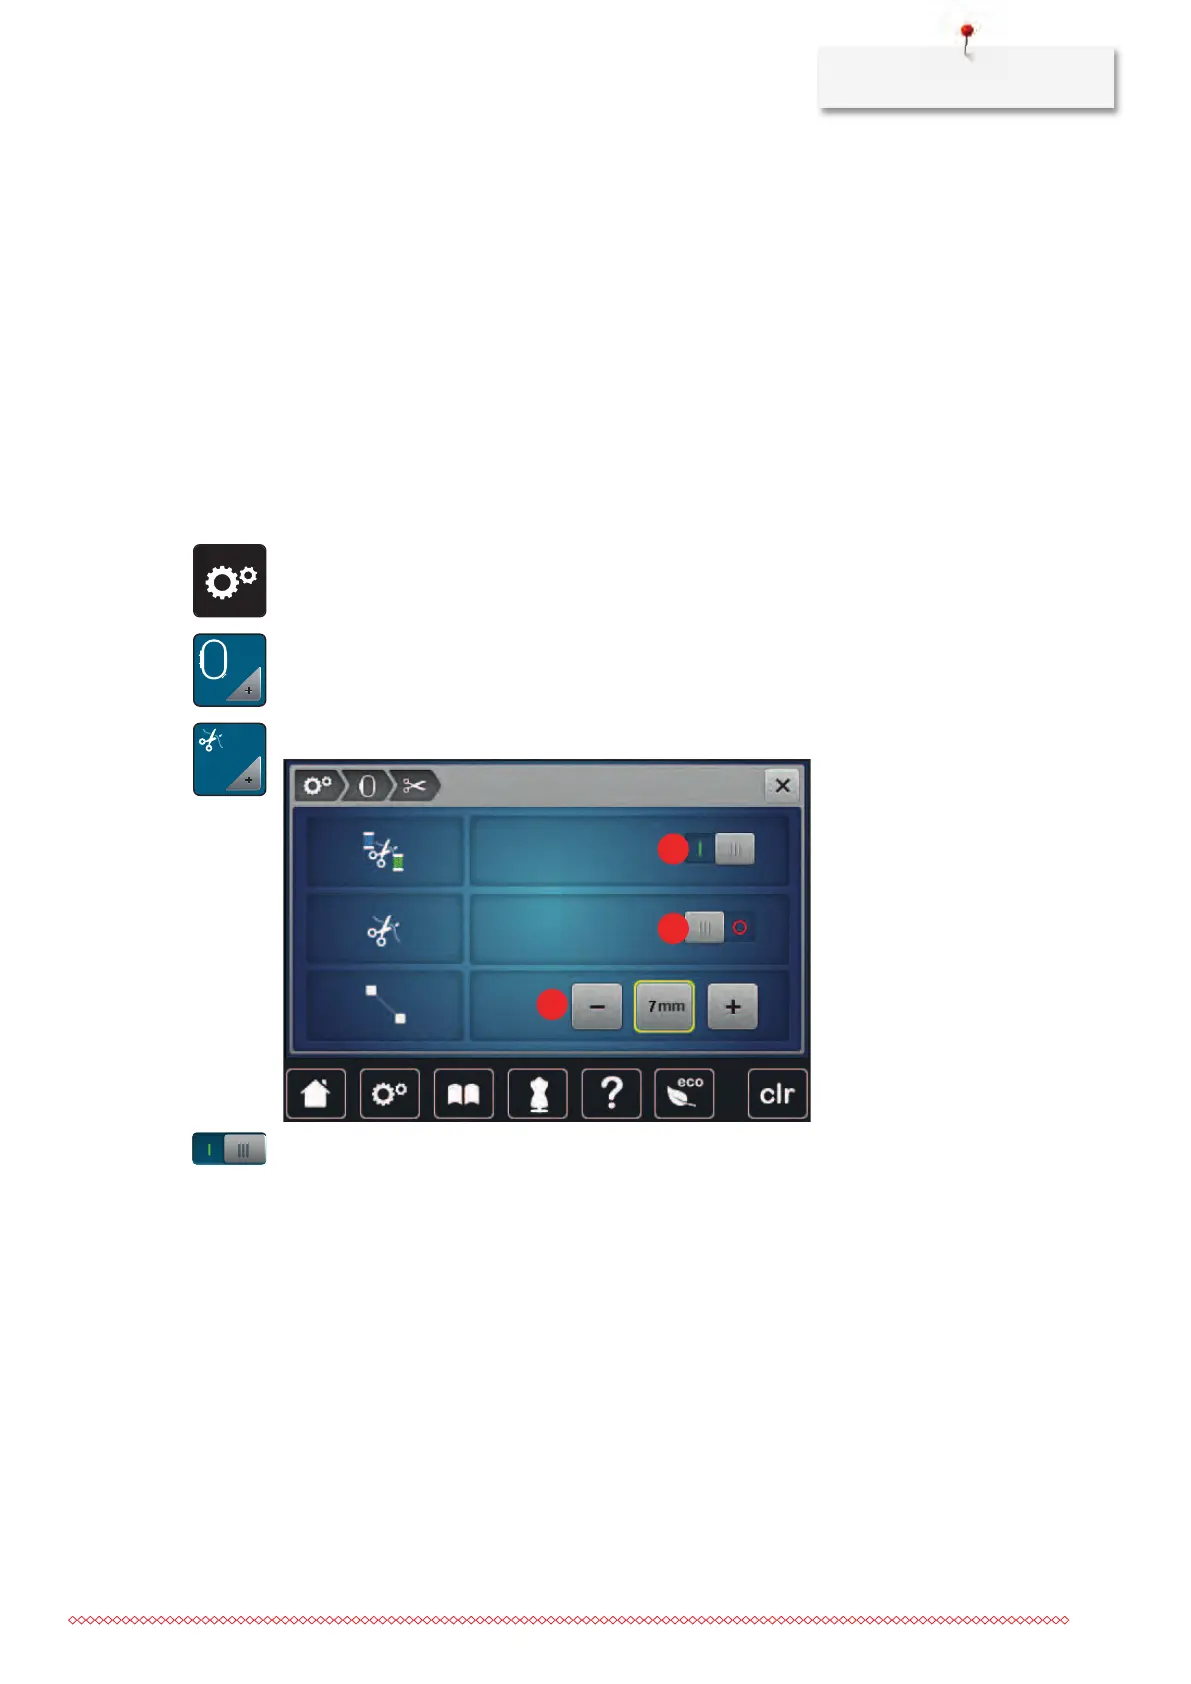
> Touch the icon «Setup Program».
> Touch the icon «Embroidery settings».
> Touch the icon «Thread cut settings».
> Touch the switch in the upper portion of the display (1) to deactivate the automatic thread cut before the
thread is changed.
> Touch the switch in the upper portion of the display (1) again to activate the automatic thread cut before
the thread is changed.
> Touch the switch in the middle section of the display (2) to stop machine after about 7 stitches and the
remaining thread can be cut manually.
> Touch the switch in the middle section of the display (2) again and the machine won't stop for a manual
thread cut.
> Touch the icons «-» or «+» (3) to adjust the length from where the connecting stitches are cut.
> Touch the yellow-framed icon on the left side to reset the alteration to default setting.


 To Next Page