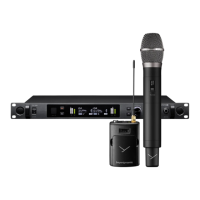
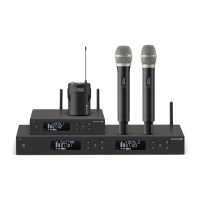
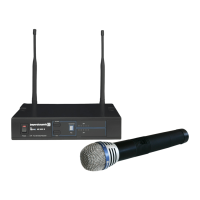
TG 1000 – Digital Diversity Receiver
17
• Adjust the settings for the network on the receiver as described
in the following.
• Press the function button . “Network” is displayed . Press
the rotary switch to enter the “IP” sub-menu.
IP
• In the “IP” sub-menu you can display the IP address assigned to
the receiver and change it if necessary. The IP address consists of
4 bytes. Each byte consists of three numbers (from 0 to 255).
If you want to assign the IP address manually, select the
“Manual” function in the “Mode” sub-menu (refer also to the
“Mode” paragraph). Afterwards select the “IP” sub-menu by
turning the rotary switch to the left and press the rotary switch
to access the sub-menu.
Turn the rotary switch to the right or left to select a value
between 0 and 255. Press the rotary switch to confirm the first
byte and to go to the next byte. Repeat the last two steps to enter
all four bytes. When you have set the IP address, press the rotary
switch to confirm.
• Network
▼ Display Brightness
• IP: 0. 0. 0. 0.
▼ Mask: 0. 0. 0. 0.
f
f
Select the “Network” main menu
Select the “IP” submenu
Select the “Mask” submenu
▲ IP: 0. 0. 0. 0.
• Mask: 0. 0. 0. 0.
▼ Mode: DHCP
f
Mask
• In the “Mask” sub-menu you can display or change the net mask
assigned to the receiver. The net mask consists of 4 bytes. Each
byte consists of max. three numbers (from 0 to 255). In
conjunction with the IP address of the receiver the net mask
determines which IP addresses the device its searching in its own
net and which it could reach via a router in other networks. It
separates the IP address into a net prefix and component. The net
prefix must be the same with all devices within the net, the
component of each device within the network must be different.
In order to manually assign a net mask, select “Manual” function
in the “Mode” sub-menu (refer also to the “Mode” paragraph).
Turn the rotary switch to the left and select the “IP” sub-menu
and press the rotary switch to enter the sub-menu.
Turn the rotary switch to the right or left to select a value
between 0 and 255. Press the rotary switch to confirm the first
byte and go to the next byte. Repeat the last two steps to enter
all four bytes. When you have set the net mask, press the rotary
switch to confirm.