BL-E30-0515 - 03-01-2018 9-5
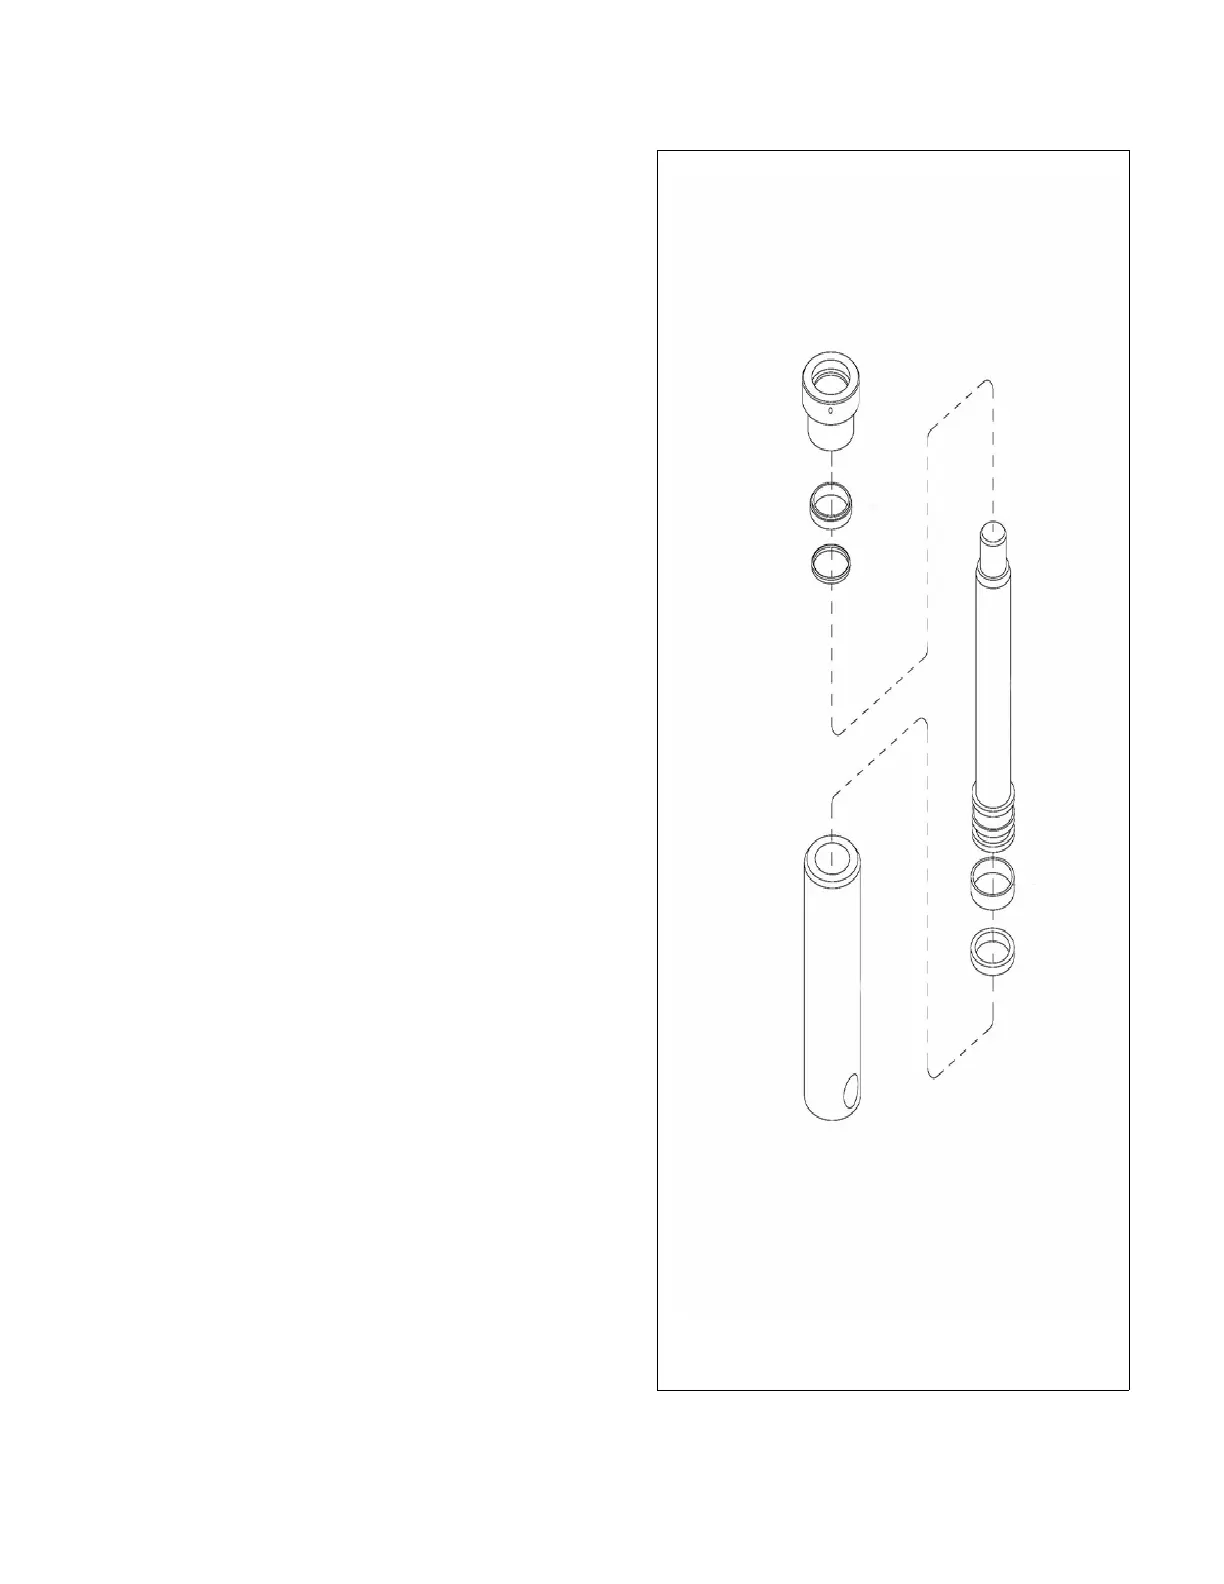
9-3.4. Lift Cylinder
9-3.4.1.Removal
1. Lower forks fully.
2. Turn on the key switch (20, Figure 12-18) and
emergency disconnect (17).
3. Remove the upper compartment covers as
described in paragraph 5-2.
4. Ensure that hydraulic pressure has been relieved
from the lift circuit. Disconnect the hydraulic line
from the lift cylinder.
5. Remove screw (6, Figure 9-2) and washers (5)
and disconnect hose (8) from cylinder (2).
6. Remove screw (12, Figure 12-10) securing the
cylinder to frame.
WARNING: Frame is heavy. Use care while securing
and lifting in order to prevent injury.
7. With suitable hoist, carefully raise frame slightly
so the cylinder can be removed.
9-3.4.2.Repair
1. Secure the lift cylinder in a vise, clamping lightly
at the base of the cylinder.
2. Unscrew gland nut from body.
3. Remove wiper and O-ring from gland nut.
4. Withdraw the cylinder rod from body.
5. Remove guide ring and seal ring from rod.
NOTE: If the cylinder body or piston rod are dam-
aged, the entire lift cylinder must be replaced.
6. Replace guide ring, seal ring, wiper ring and O-
ring.
7. Coat all parts with hydraulic oil (Table 3-2).
8. Install new guide ring and seal ring on rod.
9. Insert piston rod into body.
10. Install wiper and O-ring in gland nut.
11. Install gland nut in body.
Figure 9-4 Lift Cylinder