26
Hydraulic Cylinder Repair
CAUTION
Hydraulic cylinder removal requires extensive
disassembly of the ESP 19 lift vehicle. Contact
Bil-Jax for assistance before removing the
hydraulic cylinder.
Hydraulic Cylinder Removal
It is recommended that Bil-Jax be contacted for
assistance before removing the hydraulic cylinder.
Make sure hydraulic cylinder is completely
retracted and pressure is released from the
system. Place a pan underneath the cylinder to
catch the hydraulic oil.
Disconnect the hydraulic hose from the flow
restrictor valve and drain the hydraulic oil from
the cylinder. Remove the two bolts, washers,
and nuts securing the hydraulic cylinder to the
base.
Remove the plexiglass cover from the base.
Remove the mounting bolt, washer, and nut
securing hydraulic cylinder to the lower mast.
Disconnect the two lift chains from the base
mast.
Using a crane with at least one ton of lifting
capacity, lift the lower mast section high enough
to remove the clamp securing the cylinder to the
base. Remove the clamp and cylinder from the
unit.
After hydraulic cylinder maintenance is
completed, reinstall the cylinder in the reverse
order of removal.
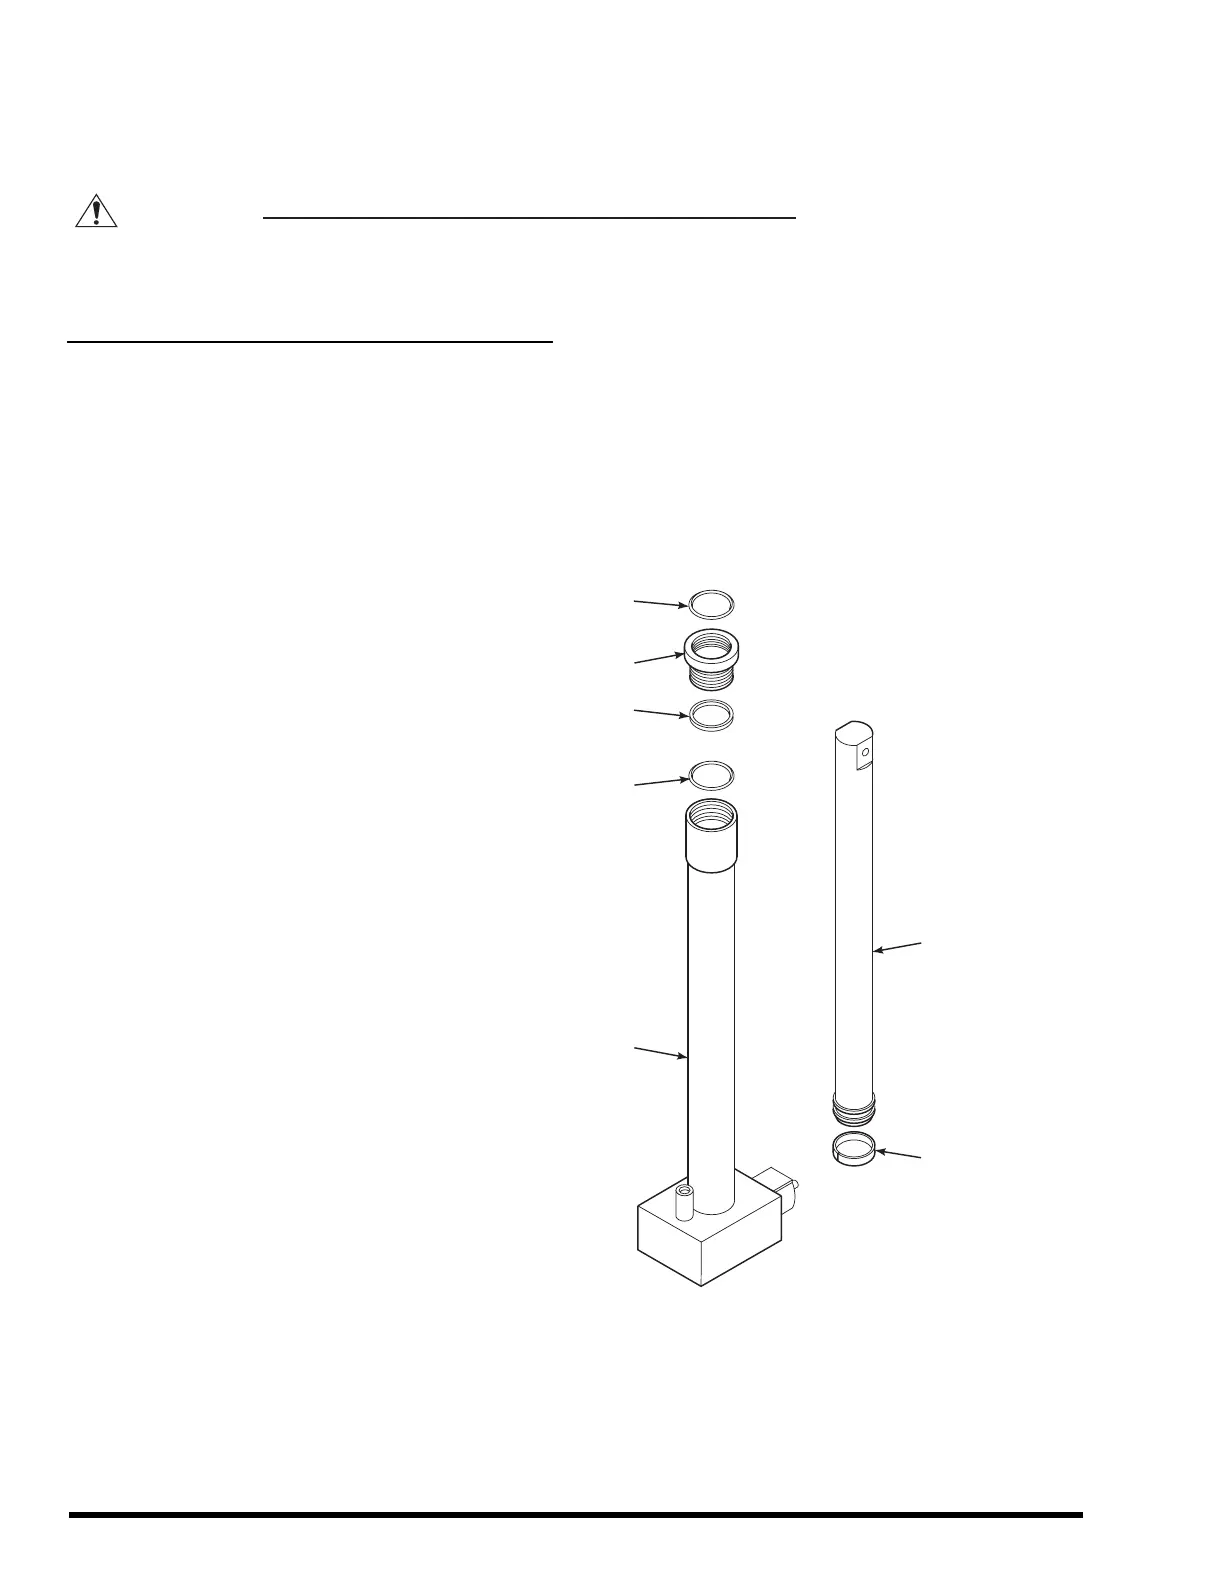
Hydraulic Cylinder Repair Procedure
Perform the following procedure to repair the
hydraulic lift cylinder. Refer to Figure 4-9.
Remove gland nut (1) from cylinder jacket (2). If
worn, replace gland nut (1),
o-ring (3), packing ring (4), and rod wiper (5)
with a new gland nut assembly.
Remove piston rod (6) and wear ring (7).
Inspect piston rod (6) and wear ring (7) for
gouges, scratches, and wear. Replace worn or
damaged components.
Thoroughly clean the inside surface of cylinder
jacket (2).
Lubricate wear ring (7) with clean hydraulic oil or
petrolatum. Slide piston rod (6) with wear ring
(7) into cylinder jacket (2).
Lubricate o-ring (3), packing ring (4), and rod
wiper (5) with clean hydraulic oil or petrolatum.
Slide gland nut (1) onto piston rod (6). Fully
thread the gland nut into cylinder jacket (2).
Reinstall the hydraulic cylinder in the lift vehicle
and reconnect the hydraulic hose.
Refill the hydraulic reservoir.
Stroke the cylinder to seat and align packing ring
(4) and wear ring (7).
Bleed all trapped air from the hydraulic system.
2
3
4
1
5
7
6
Figure 4-9. Hydraulic Cylinder Disassembly
1. Gland Nut
2. Cylinder Jacket
3. O-ring
4. Packing Ring
5. Rod Wiper
6. Piston Rod
7. Wear Ring