77
TEST PROCEDURES
3.1 Double click on the ATS.exe icon located on the Desktop (may be in the taskbar on some
PCs). This will launch the Audio Precision ATS-2 program window.
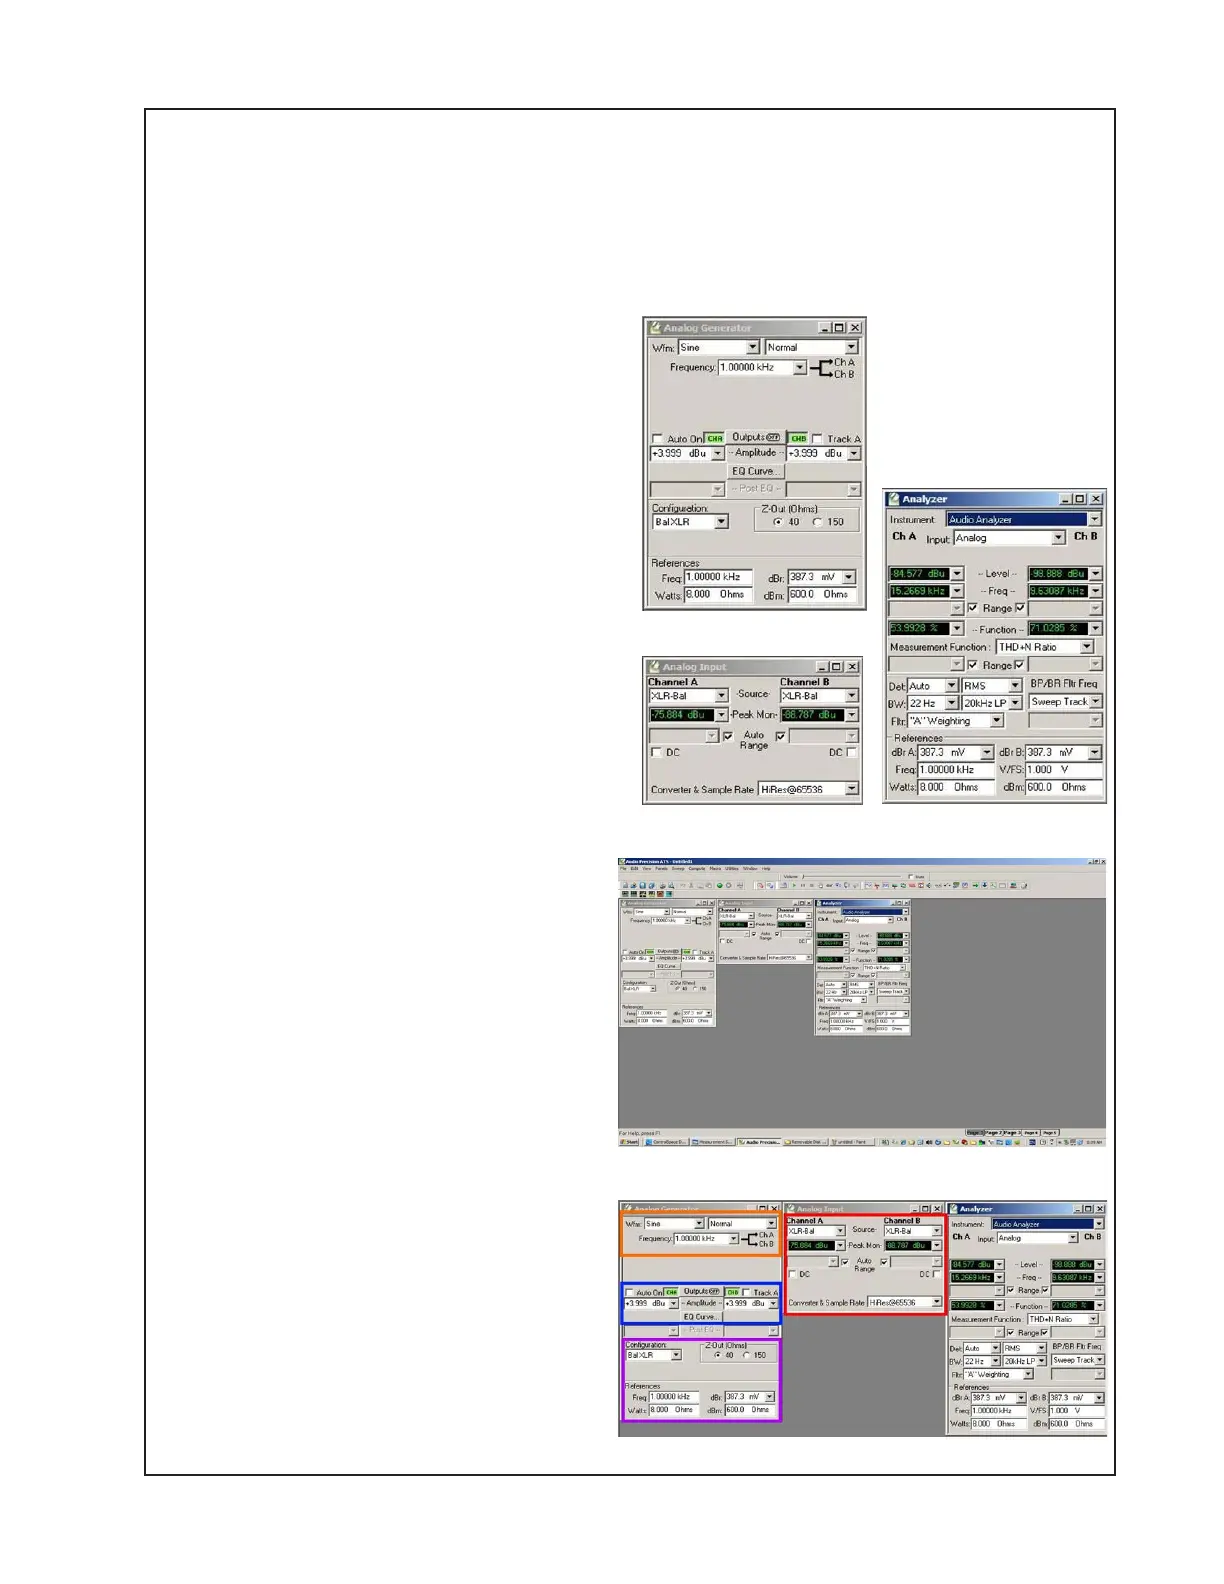
3.2 Select Panels -> Analog Generator. This
will display the Audio Generator panel and all
of the associated functions. See Figure H.
3.3 Select Panels -> Analog Input. This will
display the Analog input tools. See Figure I.
3.4 Select Panels -> Analyzer. This will dis-
play the Audio Analyzer panel. See Figure J.
3.5 The ATS-2 program window should look
like Figure K at right. Note: The following
settings are 'preliminary' and will be
changed throughout the course of testing.
3.6 Note the Orange rectangle in Figure L.
Set the Waveform (Wfm) Fields on the Analog
Generator panel to 'Sine' wave and 'Normal'.
Set the Frequency to '1.000 kHz' (Kilohertz).
Use the dropdown menu to select the types.
The Frequency field values may be input
directly.
3.7 Note the Blue rectangle in Figure L.
'Auto On' should be unchecked. 'CHA'
should be depressed (do not worry about
CHB at this time). 'Track A' should be
unchecked. Amplitude should be in dBu
units. Use the dropdown menu to select.
3.8 Note the Violet rectangle in Figure L.
Verify that the settings are as shown in the
Figure. 'Configuration' should be 'Bal XLR'.
'Z-out' should be '40' ohms. Frequency
Reference = 1.00000kHz. 'dBr' = '387.3'
mV. 'Watts' = '8.000' ohms. 'dBm' =
'600.0' ohms.
3.9 Note the Red rectangle in Figure L.
Verify that the settings for Channel A and
Channel B are as shown. 'Source' should
be 'XLR-Bal'. 'Peak Mon' should be dBu
units. Use the dropdown menu to select
the correct values for these fields.
Figure J
Figure H
Figure I
Figure K
Figure L