33
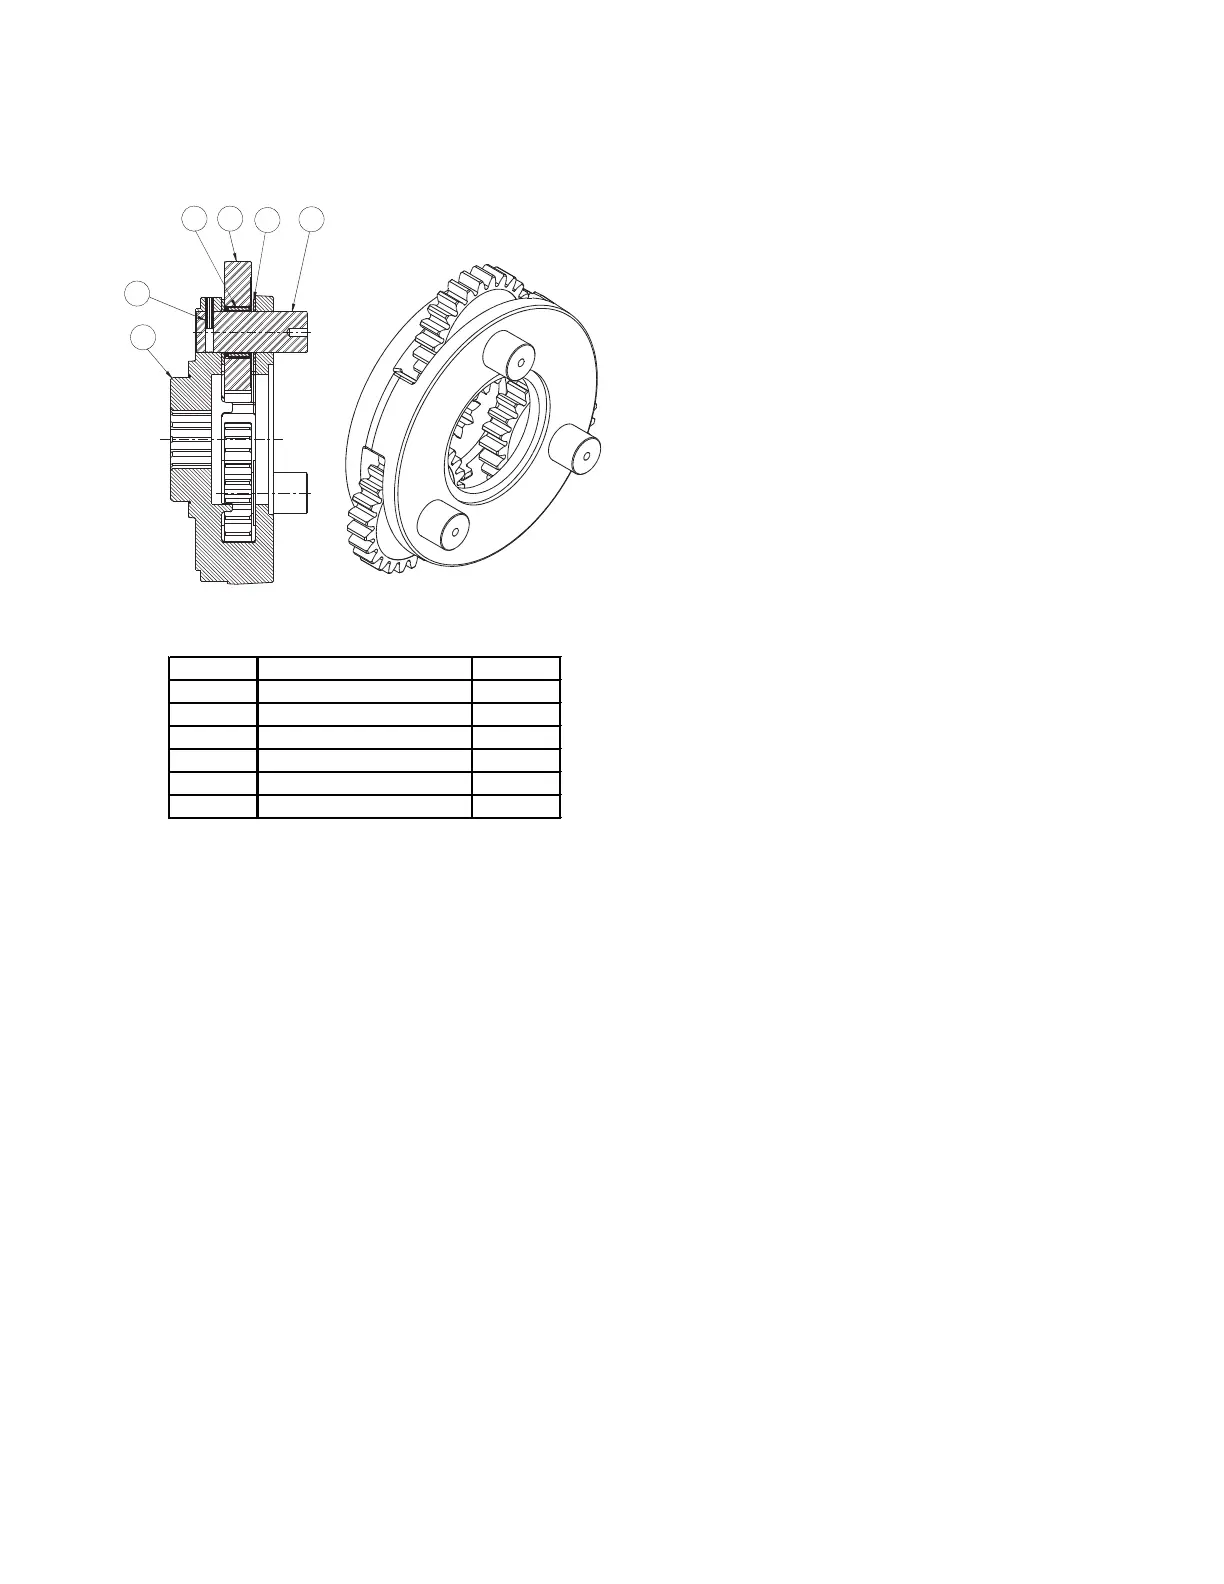
PRIMARY PLANET CARRIER
DISASSEMBLY
Note: Units without an extension shaft will use shorter
planet gear shafts (item 12).
1. Remove the planet gears by fi rst driving the spirol pins
(item 15) into the center of the planet gear shafts (item
12).
2. Use a punch to drive the roll pins from the planet gear
shafts. DO NOT reuse the roll pins.
3. Remove the planet shafts, roller bearings, thrust wash-
ers and gears. Thoroughly clean all parts and inspect
for damage and wear. The bearing rollers should not
exhibit any irregularities. If the rollers show any sign
of spalling, corrosion, discoloration, material displace-
ment or abnormal wear, the bearing should be re-
placed. Likewise, the roller bearing cage should be
inspected for unusual wear or deformation, particularly
the cage bars. If there is any damage that will impair
the cage’s ability to separate, retain and guide the
rollers properly, the bearing should be replaced. The
thrust washer contact areas should be free from any
surface irregularities that may cause abrasions or fric-
tion. The gears and shafts should be inspected for ab-
normal wear or pitting. Replace if necessary.
ASSEMBLY
1. Install a bearing (item 13) into a planet gear (11) and
place a thrust washer (14) on each side of the gear.
Position this assembly into an opening in the planet
carrier (10). Slide a planet gear shaft (12) through the
carrier, thrust washer, bearing and remaining thrust
washer.
2. Carefully align the pin hole in the carrier with the hole
in the shaft and drive a new spirol pin into place. AL-
WAYS use NEW spirol pins. When properly positioned,
50% of the spirol pin will engage the planet gear shaft
and 50% will remain in the carrier.
3. Note that the spirol pin is slightly recessed into the
carrier when properly installed. With a center punch,
stake the carrier next to the pin hole as shown. This
will distort the hole and prevent the pin from backing
out in operation. Repeat these steps for each of the
three planet gears.
11
14
1213
15
10