37
BRAKE CLUTCH SERVICE
DISASSEMBLY
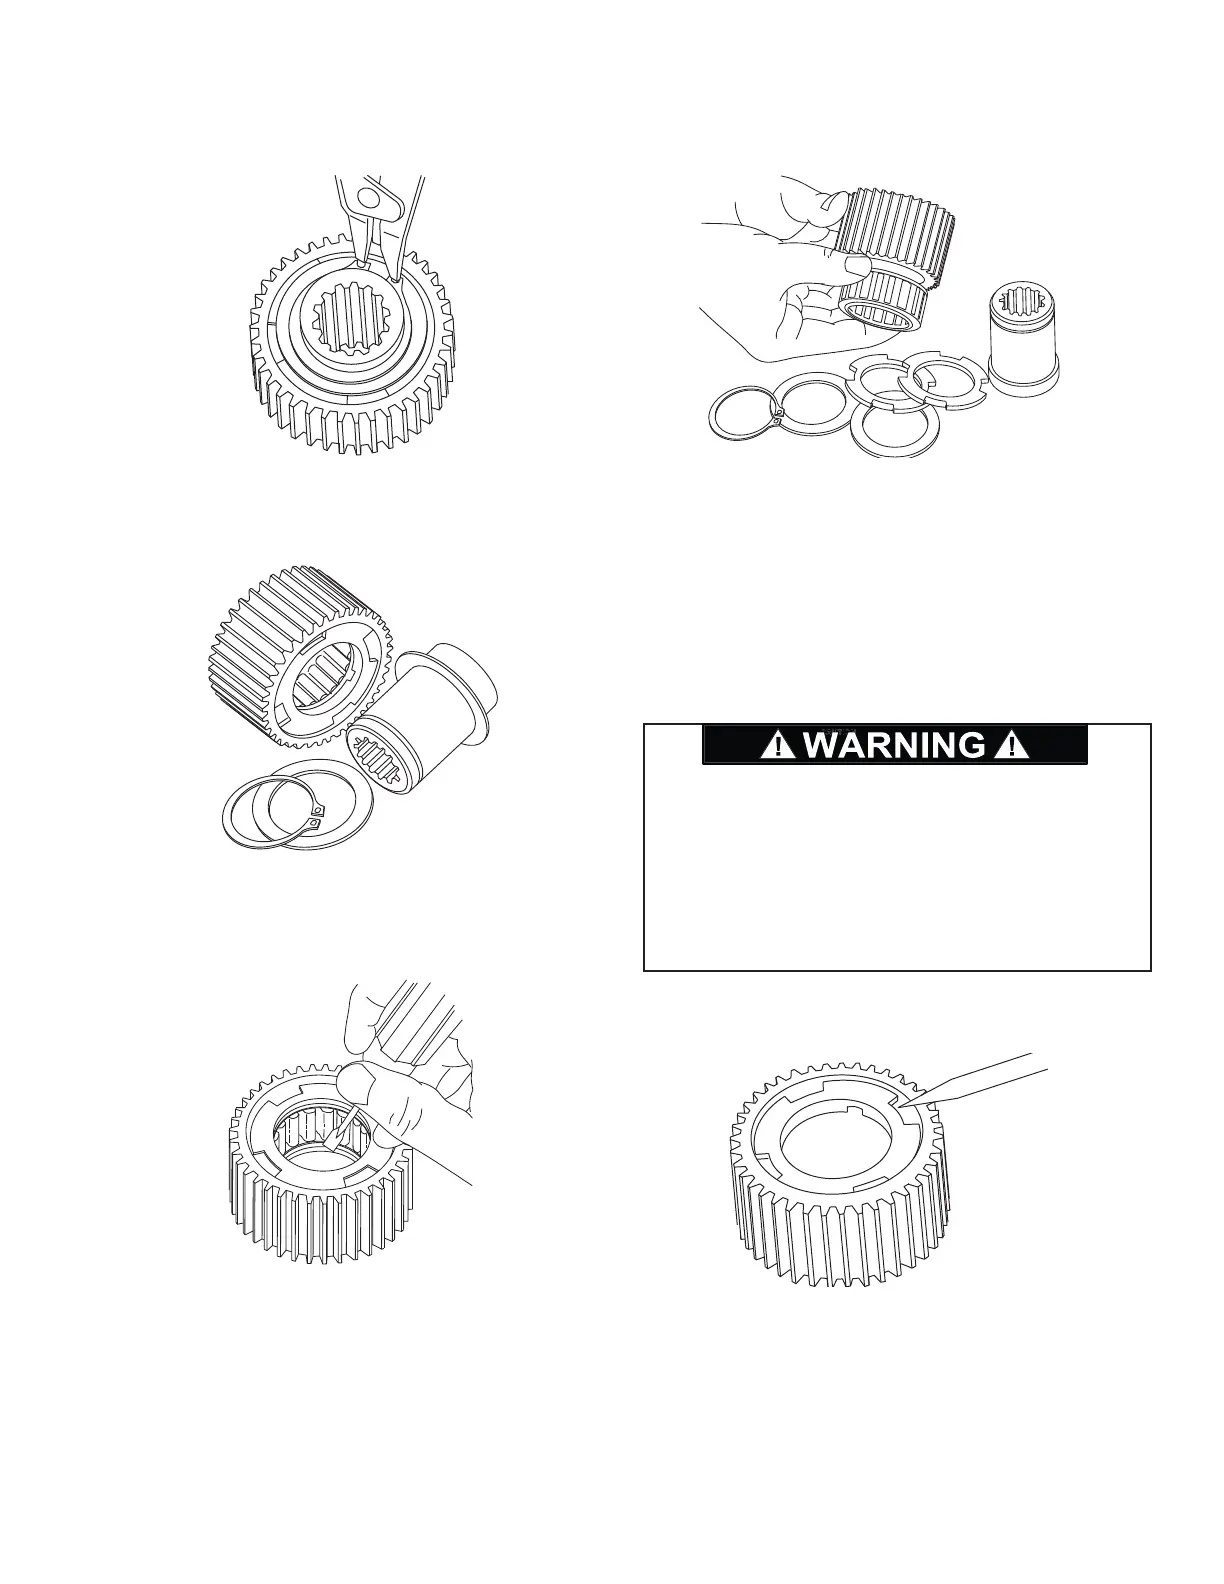
1. Remove the snap ring and sprag bushing retainer from
one end only.
2. Pull the inner race out. Examine the race for scoring,
wear or indentations caused by the sprag cams.
3. Use a screwdriver and mallet to remove the sprag
bushing from one end of the outer race. There are four
special cut-outs in the bushing for this purpose. Be
careful not to damage the bushing inside surface. If
a bushing’s inside surface is damaged or shows wear,
replace it.
4. Next, slide the sprag clutch out, inspect the sprag
clutch closely for abnormal wear, cracks, pitting or cor-
rosion. Check small clips for breakage or bright spots;
the signs of excessive wear. Unless the outer race or
remaining sprag bushing is damaged or shows exces-
sive wear, there is no need for further disassembly.
If disassembly is necessary, remove the bushing ac-
cording to the procedure covered in Step No. three (3).
All brake clutch assembly parts should be thoroughly
cleaned and inspected before assembly.
ASSEMBLY
1. Press a sprag bushing into the outer race, using
a mechanical or hydraulic press. A fl at plate of ap-
proximately the same diameter as the bushing fl ange
outside diameter should be placed between the press
and bushing during assembly to protect the bushing.
Be certain the bushing fl ange is against the shoulder
in the outer race.
The polished surfaces of the races and sprag cams
must be perfectly smooth to insure positive engage-
ment of the clutch. The slightest defect may reduce
brake clutch effectiveness, which may lead to loss of
load control and result in property damage, personal in-
jury or death. It is generally recommended to replace
the entire brake clutch assembly if any component is
defective.