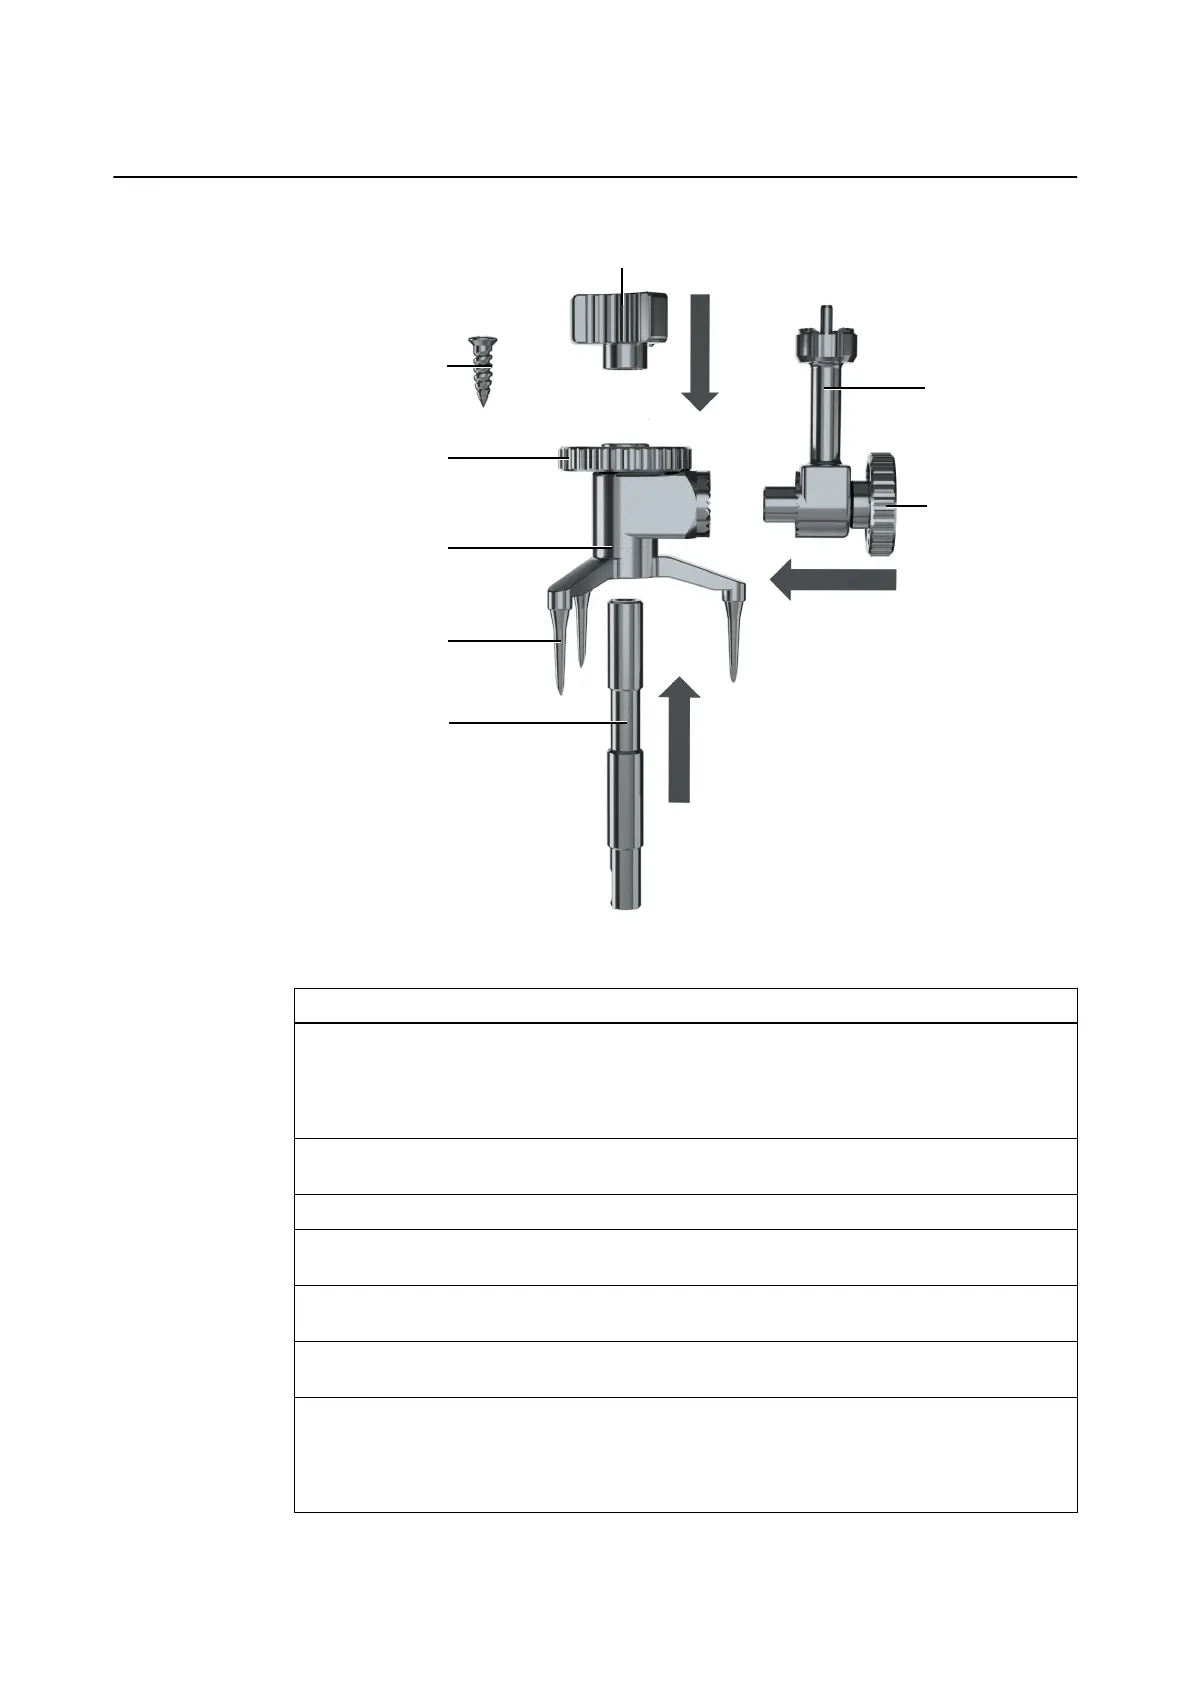
How to Assemble and Attach the Skull Reference Base
Figure 30
Step
1. Disinfect the area on the patient where the Skull Reference Base will be attached.
NOTE: Position the device so that it does not hinder the surgeon and provides the cam-
era an unobstructed view of the array at all times. Additionally, ensure that there is suffi-
cient bone density for placement.
2. Attach the array connector interface ⑦ to the base ③ (in the direction of the arrow), using
the adjustment nut ⑧ to securely fasten it.
3. Make an incision in the patient through which the tube ① will be inserted.
4. Insert the tube into the base through the bottom (in the direction of the arrow), and care-
fully fasten the tube cap nut ⑥ on top.
5. Place the assembled Skull Reference Base onto the patient’s skull and insert the tube
into the incision.
6. Insert a Disposable KLS Martin Bone Fixation Screw 1.5 mm x 6 mm ⑤ through the
tube.
7. Use the screwdriver to completely screw the screw into the bone until it is secure. Do not
apply excessive downward pressure, otherwise injury or hardware damage may occur.
NOTE: If the tube you are using has a window, loosen the screw about half a turn coun-
terclockwise. This facilitates easier removal of the device at the end of the procedure.
Assembly and Attachment
70 Instrument User Guide Rev. 2.6 Cranial/ENT Optical Tracking