2003 Buell P3: Chassis 2-29
HOME
INSTALLATION
1. Fit front brake caliper on rotor.
a. Slide carrier on caliper.
b. Slide caliper over front brake rotor without brake
pads installed.
2. See Figure 2-41. Apply LOCTITE 272 (red) to both cali-
per mounting screws (6). Install wireform to upper screw
and tighten both screws to 18-22 ft-lbs (24-30 Nm).
3. See Figure 2-42. Install brake pads.
a. Install pad spring (2) with opening at top as shown.
b. Insert inboard brake pad from rear of caliper.
c. Insert outboard pad.
d. See Figure 2-42. Install pad hanger pin (1) (metric).
Tighten to 132-180 in-lbs (15-20 Nm).
e. See Figure 2-41. Install pin plug (5). Tighten to 18-
25 in-lbs (2-3 Nm).
Use only new black banjo washers (See Parts Catalog for
Part No.) with D.O.T. 4 brake fluid. Earlier silver banjo
washers are not compatible with D.O.T. 4 fluid and will
not seal properly over time. Failure to comply may
adversely affect braking ability and lead to brake failure
which could result in death or serious injury.
To avoid leakage, verify that banjo washers, banjo bolt,
hydraulic brake line and caliper bore are completely
clean.
4. See Figure 2-41. Connect brake line (1) to caliper using
two new banjo washers (4) and banjo bolt (3) (metric).
Tighten to 16-20 ft-lbs (22-27 Nm).
5. Route brake line through wireform.
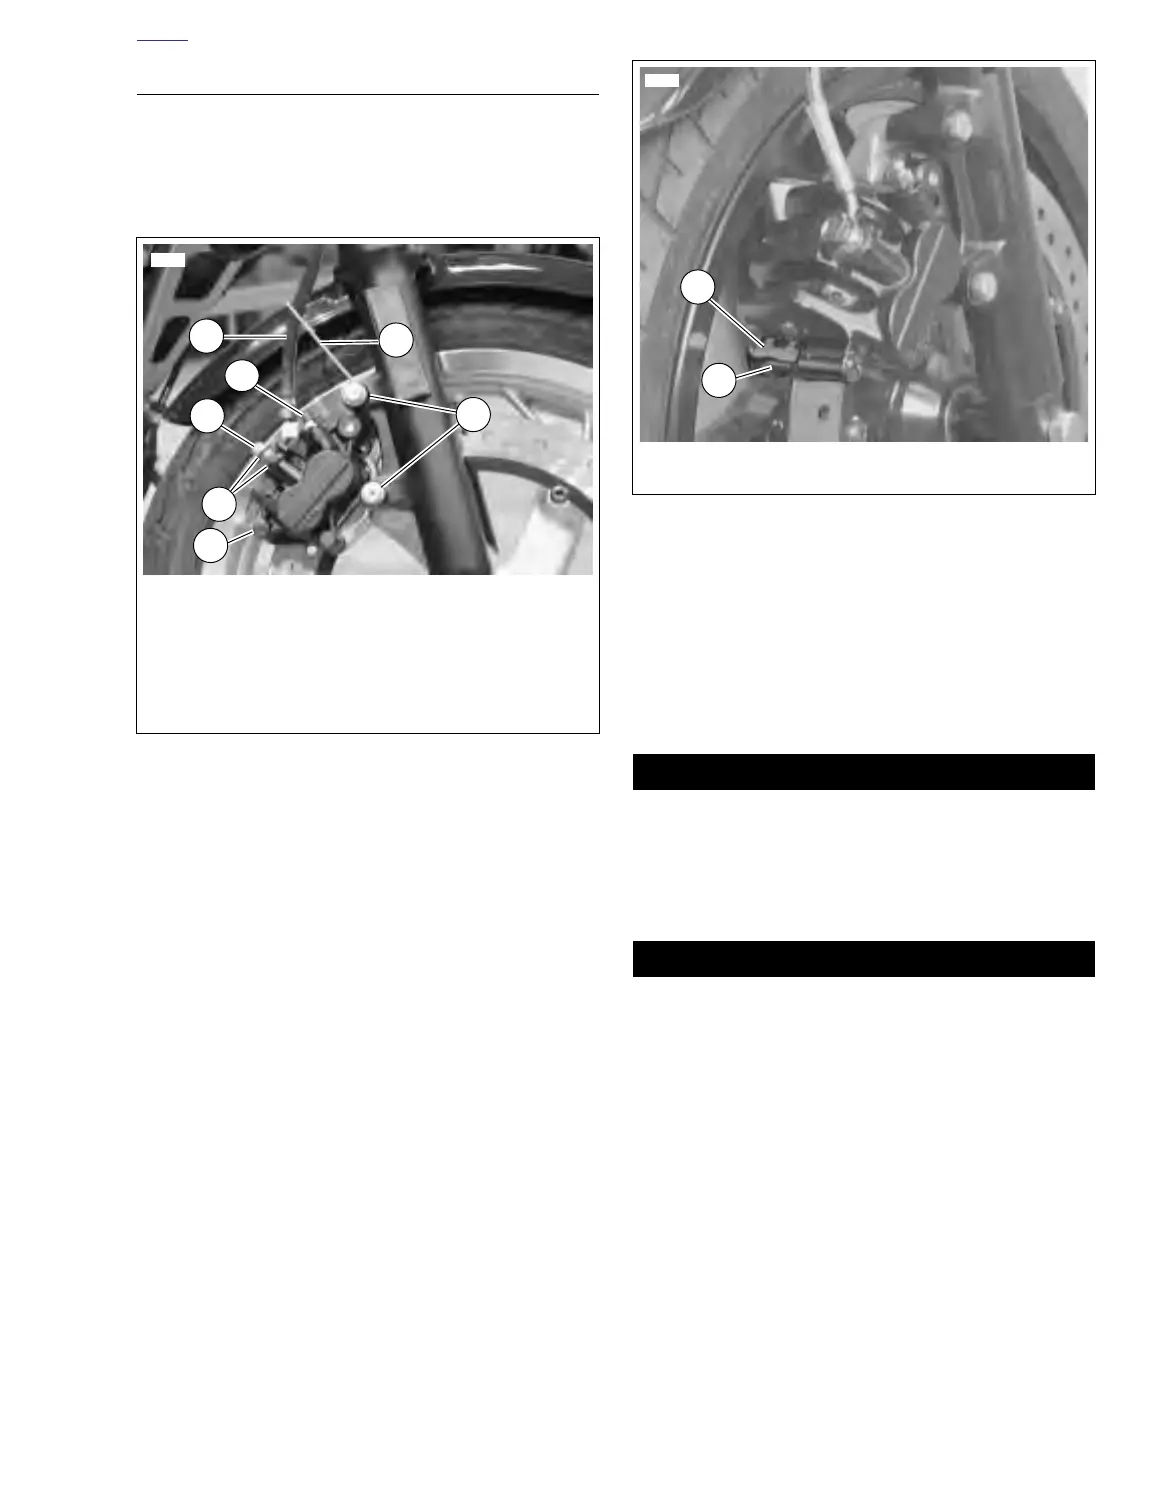
Figure 2-41. Front Brake Caliper
6
3
1
4
5
1. Brake line
2. Bleeder valve
3. Banjo bolt (metric)
4. Banjo washers (2)
5. Pin plug
6. Mounting screws (2)
7. Wireform
8273
2
7
Figure 2-42. Pad Spring
7702
1
2
1. Pad hanger pin (metric)
2. Pad spring