1-30 2003 Buell P3: Maintenance
HOME
ADJUSTMENT
1. Detach clutch cable at handlebar.
2. Remove seat and fuel tank. See 4.2 FUEL TANK
COVER/FUEL TANK.
3. Attach lifting straps to frame backbone behind steering
neck. Raise front wheel off floor using a floor hoist and
lifting straps.
4. Turn front wheel to full right lock.
5. See Figure 1-33. Attach a spring scale into the hole in
the front axle. Pull front wheel to center position. It
should take 6.5-7 lbs (2.9-3.2 kg) to pull front wheel to
center.
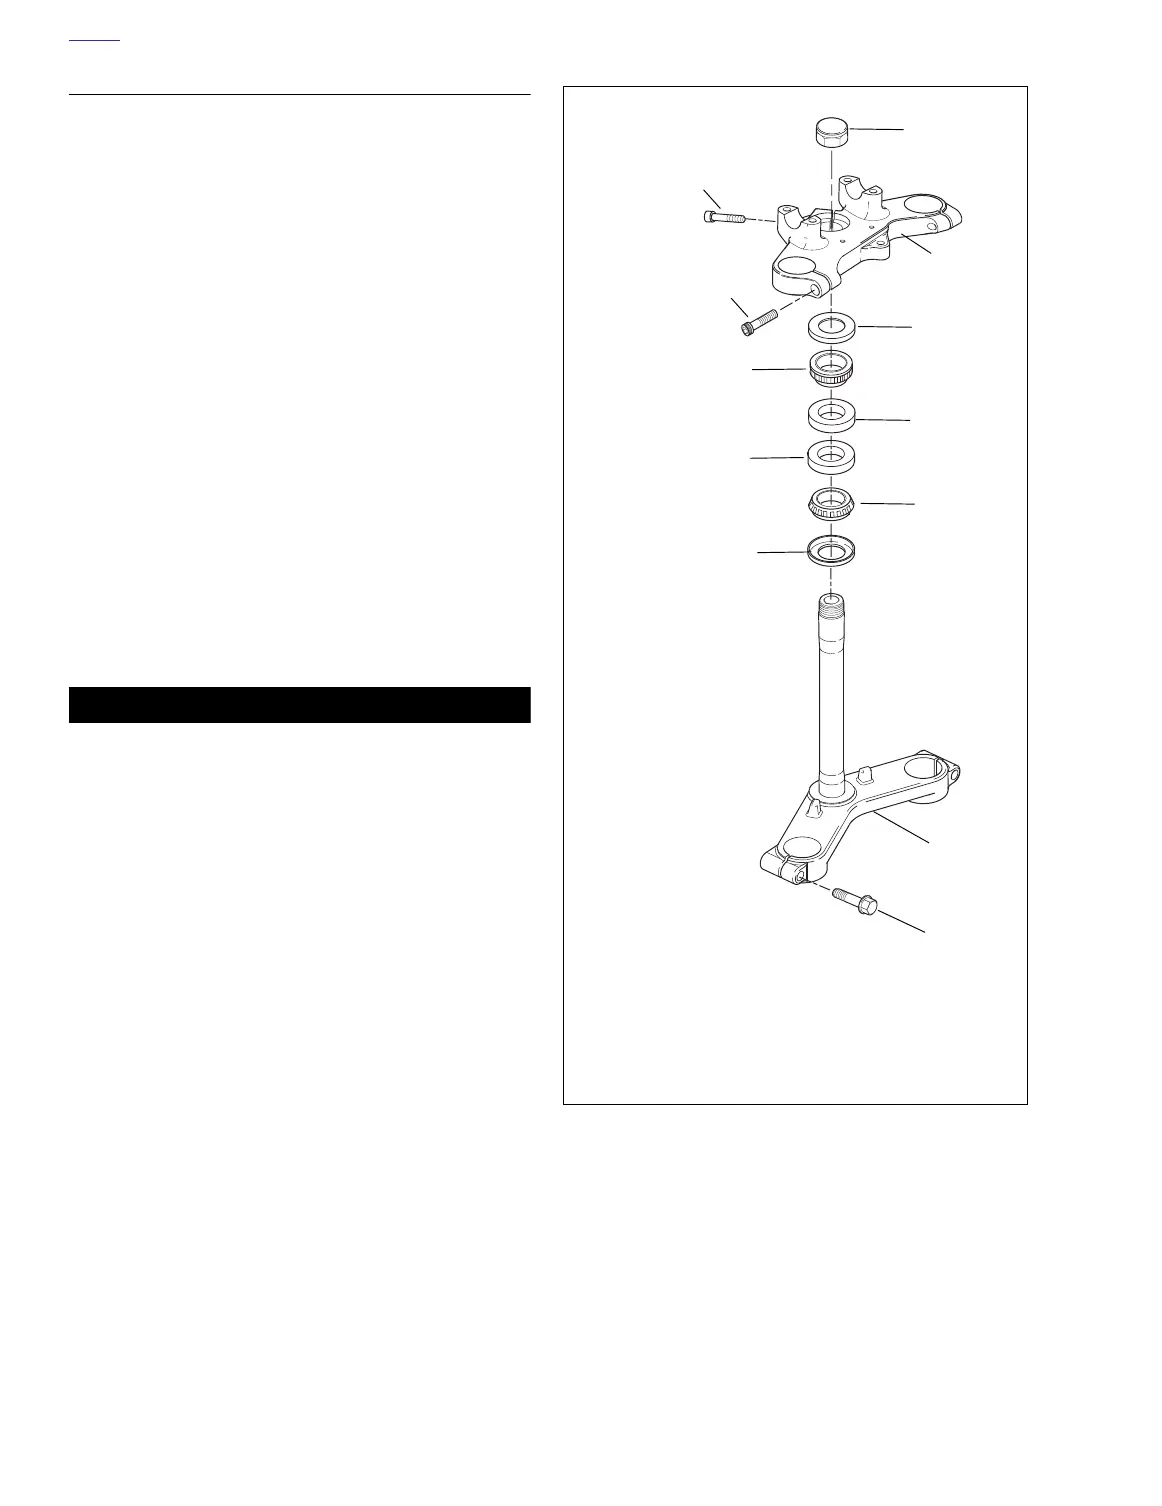
6. See Figure 1-34. To adjust:
a. Loosen both pinch screws (9) on lower triple clamp.
b. Loosen center cap nut pinch screw (2) on upper tri-
ple clamp.
c. Loosen cap nut (1), then tighten to 48-52 ft-lbs (65-
71 Nm) to seat bearing. Loosen cap nut, apply LOC-
TITE 243 (Blue) to threads of fork stem and
retighten cap nut to 28-32 ft-lbs (38-43 Nm).
7. Recheck tension using spring scale. See Step 5.
8. Tighten both lower triple clamp pinch screws (9) to 22-29
ft-lbs (30-39 Nm).
9. Tighten center cap pinch screw to 84-120 in-lbs (10-14
Nm).
11WARNING1WARNING
After installing seat, pull upward on front of seat to be
sure it is locked in position. If seat is loose, it could shift
during vehicle operation, causing loss of control of vehi-
cle and death or serious injury.
10. Install seat and fuel tank. See 4.2 FUEL TANK COVER/
FUEL TANK.
Lubrication
At 20,000 miles (32,000 km) and every 20,000 miles
(32,000 km) thereafter, lubricate the steering head bearings
with WHEEL BEARING GREASE (Part No. 99855-89).
Figure 1-34. Fork Stem and Bracket Assembly
6
6
5
7
7
5
1
4
2
3
9
8
a0137x2x
1. Capnut
2. Center cap pinch screw
3. Upper triple clamp
4. Pinch screws (2)
5. Dust shield (2)
6. Bearing (2)
7. Bearing cup (2)
8. Lower triple clamp
9. Pinch screws (2)