Do you have a question about the Canon VM-E70 and is the answer not in the manual?
Stores VM-E70 and accessories like battery pack, cables, and adapters.
Tips for recording clear audio in various conditions, using optional microphones.
Use a UV filter to protect the lens from dust and fingerprints.
Protect equipment from vibrations, shocks, and falls; clean before storing.
Use AC power indoors for uninterrupted shooting without battery concerns.
Handle video lights carefully due to intense heat; avoid pointing directly at camera.
Prioritize safety to avoid serious injuries; avoid dangerous locations and take precautions.
Maintain a stable body position, use surroundings for support, use tripod for telephoto/macro.
Pan and tilt slowly for smooth transitions; use wide angle for less noticeable motion.
Ensure equipment is ready, batteries charged, and accessories inspected.
Test recording before important events to check results and familiarize with equipment.
Utilize autofocus for automatic focusing, allowing more creative control.
Explains colour temperature (Kelvin) and its effect on video recording.
Necessary for natural colours under different lighting; ensures white objects appear white.
Tiny water droplets forming on metal objects when moving between temperature zones.
Occurs when moving from cold to warm, in humid rooms, or rapid heating.
Operate/caution indicator blinks; remove cassette, turn off unit; wait before reuse.
Find the desired point on the tape to begin editing.
Use the still button on VM-E70 to initiate editing.
Press the record button on the secondary VTR to begin recording the edit.
Press stop buttons on both units to conclude the editing process.
Connect VM-E70 to a VTR for recording edited footage.
Prepare video cassette, TV, and recording VTR before starting the editing process.
Connect the optional CG-E1 to the accessory shoe and EVF terminal.
Record titles, date, time, etc., with video; follow manual for specific procedures.
Slide finder release switch, remove finder, connect LF-E7, set image invert switch.
Record objects at low angles; open eyecup for easier viewing.
Record stereo music for background effect during regular recording.
Record distant or specific sounds effectively; recording level cannot be adjusted.
Raise microphone in quiet locations to avoid unwanted camera noise.
Match triangle marks, remove VM-E70 mic, slide external mic into accessory shoe, connect plug.
Place VM-E70 in pause mode, press timer button for interval (10/20/60 sec).
Press start button to begin recording at set intervals; tally lamp blinks slowly.
Press the start button again to cancel the interval timer function.
Place VM-E70 in pause mode, press timer button (SELF appears), press start button.
Timer counts down 10 seconds, numbers 9-1 appear, tally lamp blinks slowly before recording.
Press the start button before countdown reaches 1 to cancel the self timer.
Record fast action scenes at 1/1000 sec; press button to activate/resume.
Works best outdoors, may be rough playback, cancelled when unit is off or playback starts.
Place VM-E70 in pause mode, press and hold fade button to fade in.
During recording, press and hold fade button to fade out.
Press start to pause, then release fade button when scene has completely faded.
Choose manual focus (M. FOCUS), rotate zoom to wide end, press macro button.
Approach subject, fine-tune focus using lever; use tripod for stability.
Use W/T buttons to zoom out or in on subjects for dramatic effects.
Rotate the zooming ring using the zooming lever for manual zoom control.
Use different shots to add variety to recordings.
Use record review button to check recent recording through viewfinder.
Press start button to resume recording after a check.
Press stop/play, then still to begin; turn off VM-E70 when new recording begins.
Compose, press and hold button, press start to record; pause and release button.
Frame does not change; release button to cancel.
Adjusts white subjects to appear white for natural colour.
Locks white balance by pointing at a white object; clears automatically.
Recommended for precise colour balance or scenes with single colours.
Autofocus may fail with glossy, low-reflection, high-contrast, or obstructed subjects.
Do not cover window, use tripod, center subject; autofocus range up to 9m.
Covers autofocus and manual focusing methods for precise image control.
Select manual focus, set telephoto, focus with ring, frame with zoom.
Press and hold still button to stop playback image.
Hold rewind/review button for reverse playback at 7x normal speed.
Hold fast forward/search button for forward playback at 7x normal speed.
Notes on continuous still playback, noise, feedback, and starting playback.
Turn on TV and VM-E70, set TV to correct video channel.
Load video cassette and press stop to cancel record pause mode.
Connect VM-E70 using AV cable to TV's audio/video inputs.
Connect VM-E70 to TV without A/V inputs using RF unit and coaxial cable.
Set antenna selector to VTR for proper playback connection.
Attach power, load cassette, turn on, select tape speed.
Connect battery pack or AC adapter as power source.
Press eject, load cassette, close compartment.
Turn VM-E70 on, enter pause mode, select SP or LP tape speed.
Press eject button, then unload the video cassette.
Slide switch to prevent accidental erasure; black means recordable, red means protected.
Use P-5 type cassettes; press eject, load with label facing out, close compartment.
Notes on cassette condition, transfer holes, and handling.
Clip the lens cap onto the grip belt during recording.
Adjust the grip belt for a comfortable fit.
Attach SS-E2 shoulder strap or WS-20 wrist strap to attachment bars.
Slide charge coupler into battery compartment, connect adapter cable and power cord.
Disconnect power, slide eject switch, locate 'lip', pull coupler forward.
Notes on car battery adapter use and potential noise with CA-E7.
CR-E7 Charge Coupler charges two packs in approx. 80 mins using adapters.
'BATT' blinks when charge is low; replace or recharge immediately.
Notes on charge time, overnight charging, and battery warmth.
Slide battery pack into compartment in record pause or stop mode.
Slide eject switch, locate 'lip', pull battery pack forward.
Notes on charging, warmth, cold temperatures, autofocus/zoom impact, and terminal cleaning.
Provides approx. 40 mins recording time; charges in approx. 80 minutes.
Uses AC power outlet (100-240V AC, 50/60Hz) for continuous operation.
Uses 12 or 24V DC negative-ground car battery for power.
Explains displays like M. FOCUS, WB LOCK, DEW, T. END, BATT, SELF, PAUSE, REC.
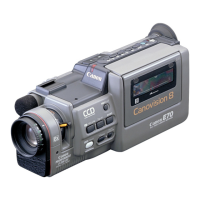
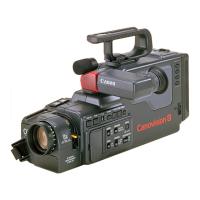
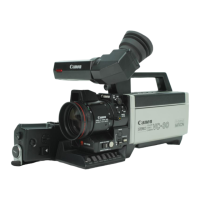
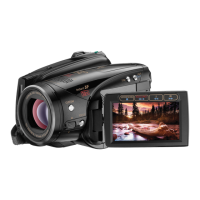
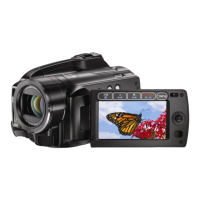
Diagram identifying various parts and controls of the VM-E70 camera.
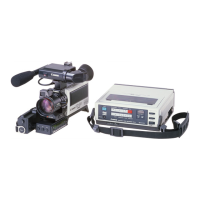
Lists items included in the VM-E70 package.
Lists optional accessories for the VM-E70 system.
Details power supply, consumption, television system, and video recording system.
Details image sensor, tape format, speed, lens, focusing, and illumination.
Details audio system, microphone, output level, and signal-to-noise ratio.
Lists symptoms, causes, and remedies for common VM-E70 problems.
Lightweight protection for VM-E70 and accessories.