Chapter 3 Creating Your Address Book
3-6 Corex Technologies
1
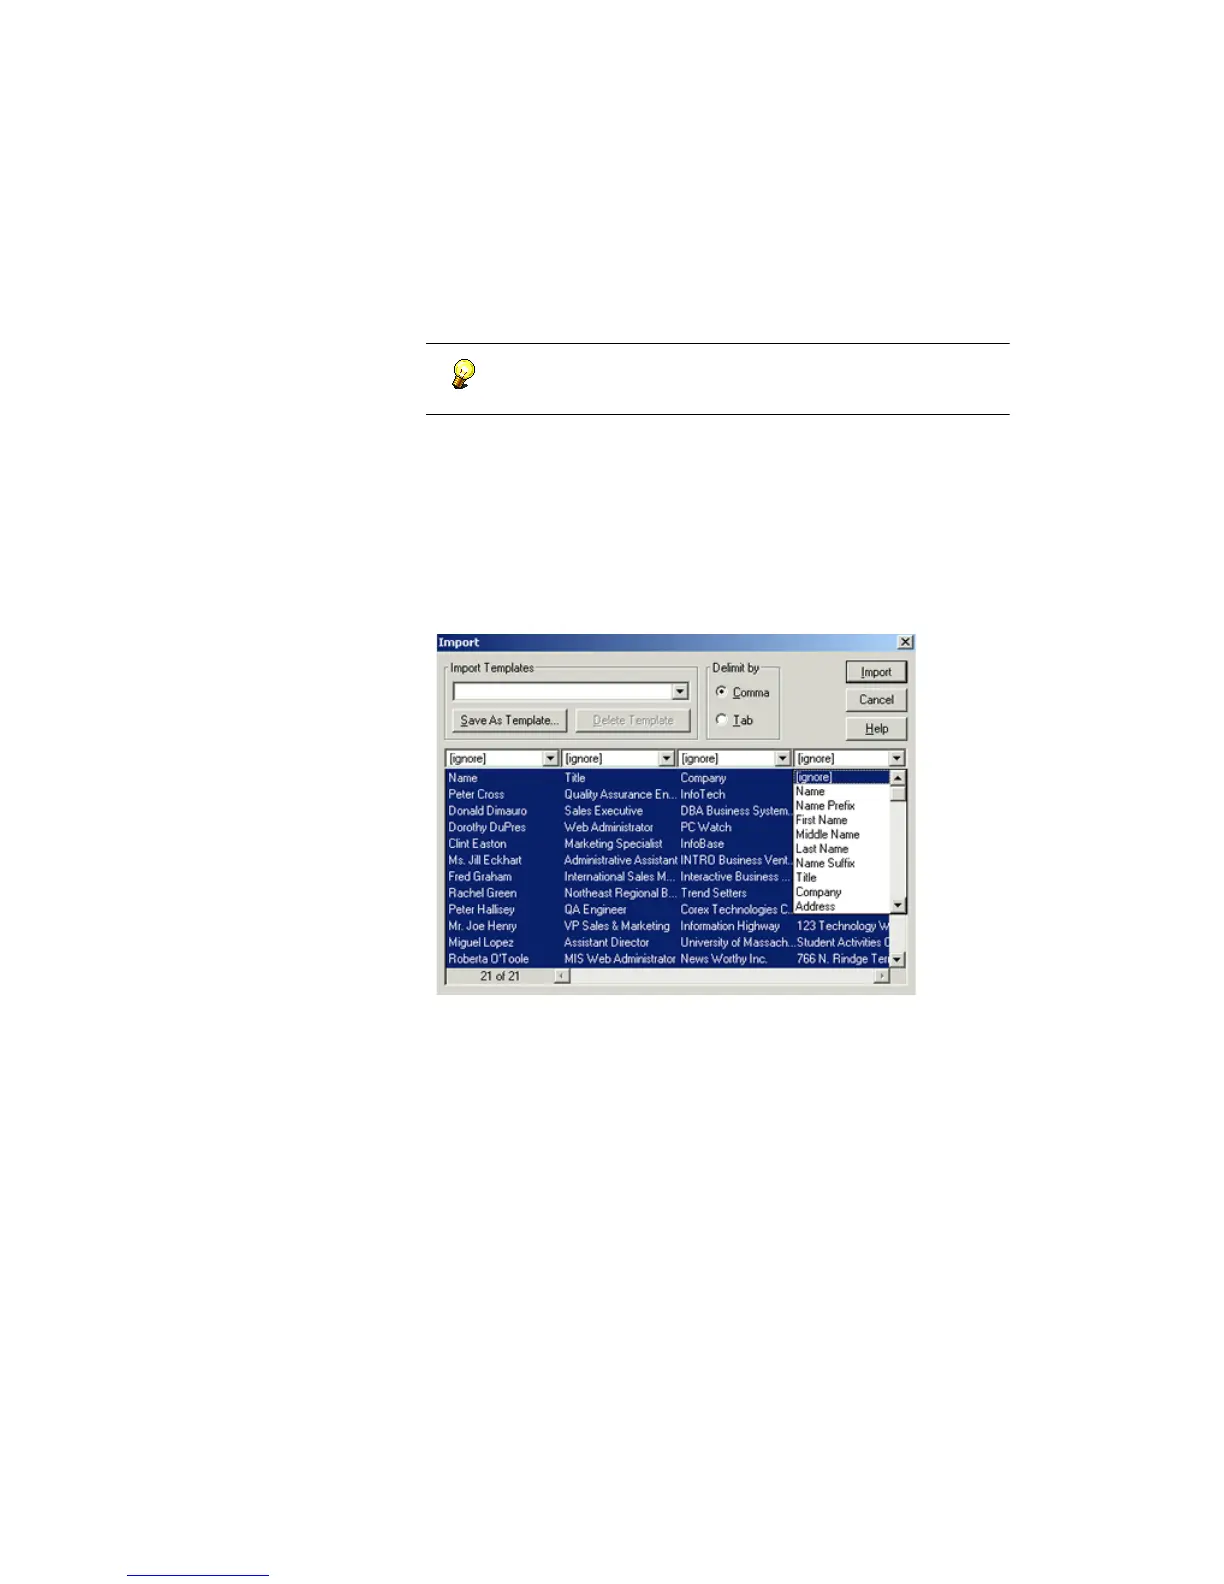
In the Import dialog, each row represents a contact in the text file, and
each column represents a field.
If the file contains more than four columns, use the scroll bar to
see the additional information.
Initially, all contacts are selected. To import only certain contacts, select
them. Use Shift+click or Ctrl+click to select multiple contacts.
6. If the columns don't look aligned, change the DELIMIT BY option to TAB.
7. To import using a predefined template, choose it from the I
MPORT
T
EMPLATES dropdown list and go to step 11.
To create your own import template, go to step 8.
8. For each column, use the dropdown list at the top of the column to
indicate the CardScan field into which to put the information.
9. To omit a column, choose [ignore]. To import a column that does not have
a corresponding CardScan field, choose Notes or Other (near the bottom
of the list).
10. Click Save As Template to save the import template you created or
modified.
11. Click Import to finish importing the text file. CardScan displays the
imported contacts in List View.