5
Table 2 – Navigator Mode and Menu Display Structure
RUN
ST ATUS
SERVICE
TEST
TEMPERATURES PRESSURE S
SET-
POINTS
INPUTS OUTPUTS CONFIG URATION TIME CLOCK
OPERATING
MODES
ALARMS
Auto View of
Run Status
(VIEW)
Service Test
Mode
(TEST)
Thermostat
Inputs
(STA T)
General
Outputs
(GEN)
General Unit
Config
(GEN)
Time of Day
(TIME)
Curr Active
Alarm
(CURR)
Cooling
Status
(COOL)
Test Independen t
Outputs
(INDP)
Switch
Inputs
(SW)
Cooling
Outputs
(COOL)
Indoor Fan
Config
(I.FAN)
Month, Date
Day and Year
(DATE)
History
(HIST)
Heating
Status
(HEAT)
Te s t Fa ns
(FANS)
Analog
Inputs
(AIS)
Heating
Outputs
(HEAT)
Economizer
Config
(ECON)
Daylight
Savings
Config
(DST)
Reset All
Current
Alarms
(R.CUR)
Ventilation
Status
(VENT)
Test Cooling
(COOL)
General
Inputs
(GEN)
Buildin g Net
Config
(NET)
Schedules
Adjust
(SCHD)
Alarm Res et
History
(R.HIS)
Assigned I/O
Channels
(A.IO)
Te s t H e a t i n g
(HEAT)
User Display
Config
(DISP)
Holiday
Adjustm ent
(HLDY)
Versions
(VERS)
Pressing the ESC and ENTER keys simultaneously will display an
expanded text description across the display indicating the full
meaning of each display point. Pressing the ESCAPE and ENTER
keys when the display is blank (MODE LED level) will return the
display to its default menu of rotating AUTO VIEW display items.
In addition, the password will need to be entered again before
changes can be made.
Changing item values or testing outputs is accomplished in the
same manner. Locate and display the desired item. If the display is
in rotating auto-view, press the ENTER key to stop the display at
the desired item. Press the ENTER key again so that the item value
flashes. Use the arrow keys to change the value of state of an item
and press the ENTER key to accept it. Press the ESCAPE key and
the item, value or units display will resume. Repeat the process as
required for other items.
There are some points that can be forced from the Navigator
display. If the user needs to force a variable, follow the same
process as when editing a configuration parameter. A forced
variable, regardless where the force has come from will be
displayed with a blinking “f” on a Navigator display following its
value. For example, if economizer commanded position (EC.CP) is
forced, the Navigatort display shows “80f”, where the “f” is
blinking to signify a force on the point. Remove the force by
selecting the point that is forced with the key ENTER and then
pressing the up and down arrow keys simultaneously.
Depending on the type of unit (48FC,GC or 50FC,GC),
factory-installed options and field-installed accessories, some of the
items in the various Mode categories may not apply.
See Table 2 and Appendix C for full Navigator display menu
layout.
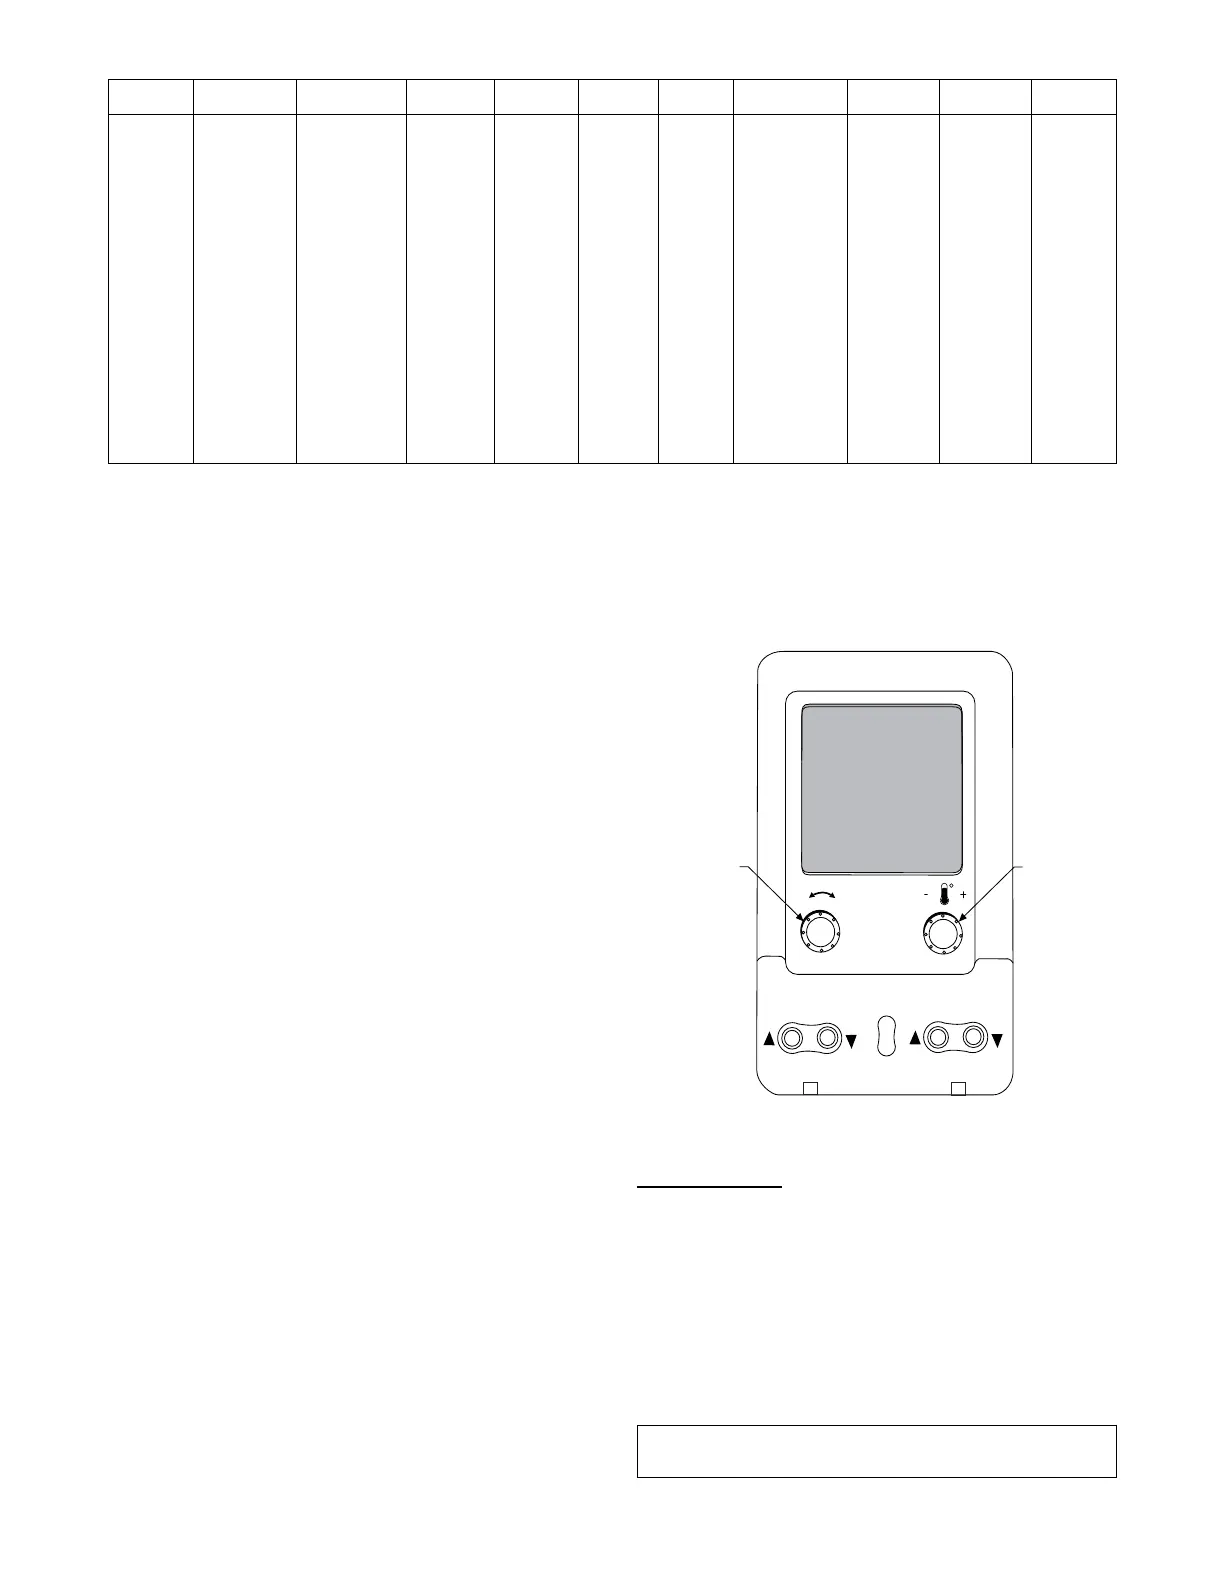
System Pilott and Touch Pilott Devices
The System Pilot device (33PILOT-01) and Touch Pilot device
(33CNTPILOT) can be used as CCN communication
user--interfaces. These devices can be put on the CCN bus and
addressed to communicate with any other device on the network.
Unlike the SystemVut display and Navigator display, these pilots
read the unit’s CCN tables and its CCN points can be monito red,
forced, or configured. The Pilot devices can be used to install and
commission a 3Vt zoning system, linkage compatible air source,
universal controller, and all other devices operating on the Carrier
communicating network.
Additionally, the System Pilot device can serve as a wall-mounted
temperature sensor for space temperature measurement. Occupants
can use the System Pilot device to change set points. See Fig. 4 for
System Pilot device details.
CCN Tables and Display
In addition to the unit--mounted SystemVut display, the user can
also access the same information through the CCN tables by using
the service tool or other CCN programs/devices. The variable
names used for the CCN tables and the SystemVu display menus
may be different and more items may be displayed in the CCN
tables. Details on the CCN tables are included in Appendix D.
SCROLL
+
-
NAVIGATE/
EXIT
MODIFY
SELECT
PAGE
C06322
Fig. 4 -- System Pilott User Interface
Force Hierarchy
There is a hierarchy in SystemVu controls with regards to forcing a
point. Programs and devices write a force at different priority
levels. A higher level (smaller number, 1 being the highest) will
override a lower level force. The SystemVu controller uses a
Control Force at level 7. The Navigatort device writes a Service
Force which is level 3. System Pilott and Touch Pilott devices
write Supervisor Forces at level 4. Network programs can be set to
write different level priority forces.
NOTE: In the case of a control power reset, any force in effect at
the time of power reset will be cleared.
IMPORTANT: All further discussions and examples in this
document will be based on the SystemVut controller.

 Loading...